Ascending Marble Toy
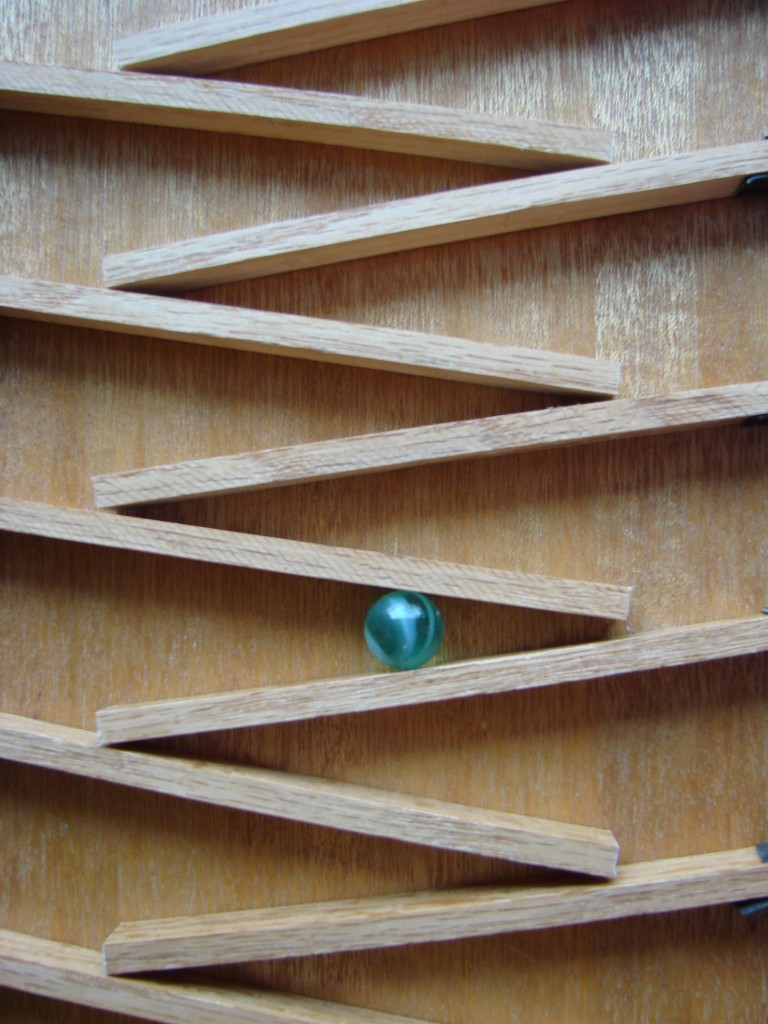
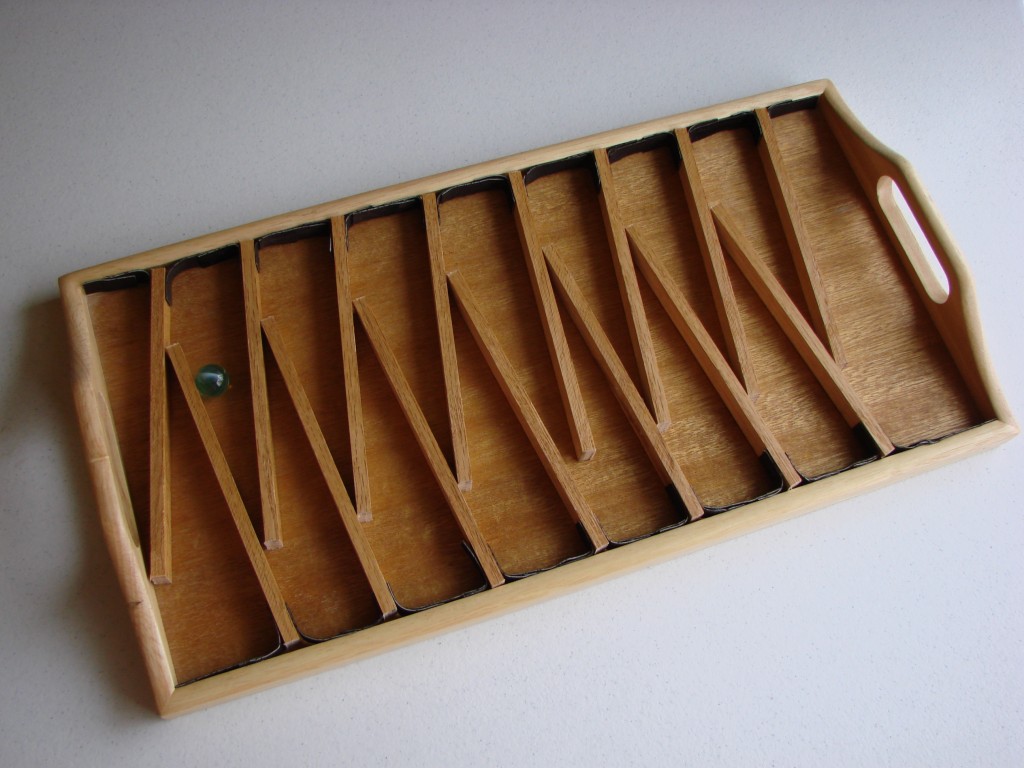
I designed this fun marble-rolling toy many years ago, inspired by a similar toy from the 1880’s. The object is to make a marble or small ball climb from the bottom of the box all the way to the top, as quickly as possible. Then you turn the box 180 degrees and make it climb the other direction, back to its original starting place.
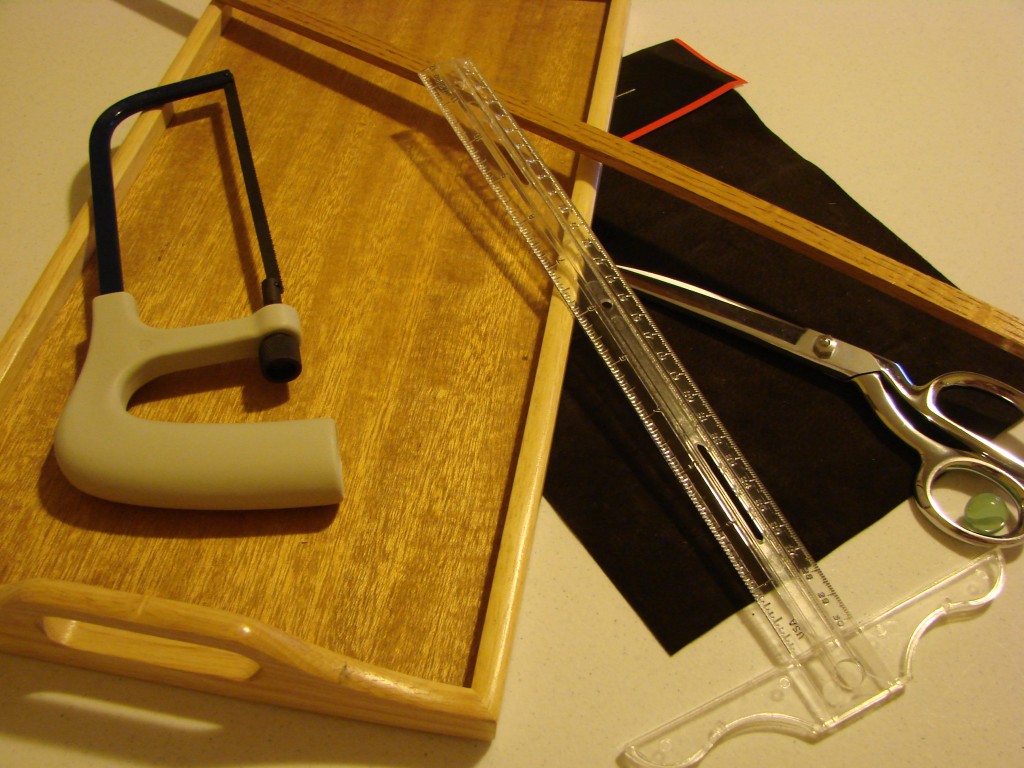
To make your own toy, you will need:
- A shallow, open rectangular box (can be as simple as a shoebox lid; I used a small tray I got at a garage sale)
- Marble or heavy ball (such as a metal ball bearing), preferably smaller than the height of the sides of the box
- Strips of wood or sturdy cardboard (I used flat floor molding, but you could also use tongue depressors, an old yardstick or sturdy cardboard such as chipboard)
- Something appropriate to cut your strips (saw if you are using wood; scissors or craft knife if you are using cardboard)
- Ruler
- Pencil and/or marker
- Flexible strips (I used strips of faux leather, but you could also use ribbon, or even strips of self-adhesive shelf paper or duct tape) slightly narrower than the depth of your box, and four times as long
- Glue: a strong one that is appropriate for your materials
Step 1: Decorate the box.
The first step is to make your box look pretty. My “box” was already finished and I was shooting for an appearance of a classic handcrafted wooden toy, so I skipped this step. But you could paint yours or cover it with shelf paper or something – use your imagination! Do keep all decorations on the inside of the box flat; if you want raised decorations, put those on the outside.
Step 2: Measure and mark the box.
Next, measure the width, length, and depth of your box, and the size of your ball. Here are the dimensions for my project:
Box width |
Box length |
Box depth |
Marble size |
7-7/8 inches |
15.75 inches |
1/2 inch |
5/8 inch |
You will need to cut a bunch of sturdy guide strips, one set for each side of the box. They need to be spaced evenly but offset, so that the strips on one side are halfway between the strips on the other side.
You need to space the guide strips evenly, and no closer together than twice the size of the roller ball. If your guide strips are thick like mine, you should space them even farther apart than that. Mine are spaced 1 and 7/8 inches apart. We’ll call that the “standard space”. If the length of your box is not evenly divisible by the standard space, that’s actually good. At the two ends of the box, you won’t use the standard space anyway – it’s best to have that space be about one-and-a-half times the standard space.
So for example, if your box is 12 inches long, 1.25 inches would be a perfect standard space. That would give you 8 strips (at 1.25”, 2.5”, 3.75”, 5”, 6.25”, 7.5”, 8.75”, and 10”), with 2 inches (which is 1.5 times the standard space) at the end.
But if your standard space does not come out perfect, that’s okay. You can adjust the end spaces to be a little shorter or longer.
Now you need to make marks on the inside of your box, showing where the strips will go. On one side, in the corner that you want to be the “starting place” for the ball, start making marks, using your standard spacing. When you get close to the other end of the box, the last space should ideally be about one-and-a-half times the standard space… (but don’t panic – remember it isn’t essential.)
Now, to mark the other side of the box, start back on the starting end of the box again. The marks on this side should all be located halfway between marks on the other side of the box. So your first one should be 1.5 times the standard space from the box end, and then should all be standard-spaced apart from each other until you get to the other end of the box. Ideally, you should have something like a standard space at the end — or somewhere close to it. This rule is important: Don’t ever put a strip closer to the end of the box than ¾ of the standard space measurement.
Step 3: Make the guide strips.
Are you ready? It’s time to cut your guide strips! But how big should they be?
Width: slightly less than the depth of your box
Length: the width of your box, minus one standard space
Since my box was ½ an inch deep, my ½ inch molding was already about the right width. My box width was 7 and 7/8 inches, and my standard space was 1 and 7/8 inches, so I cut my strips 6 inches long. I used a small hand saw to make the cuts. If your strips are cardboard, you could just use a craft knife to cut the strips.
When you have all your strips cut, finish them however you desire (sand, paint, seal, etc.) If I had wanted to reduce the difficulty of my toy, I could have sanded down one end of each guide strip to help the marble roll smoother… However, I liked the idea of increasing the challenge level instead.
Step 4: Assemble the game.
Now, lay all your strips out in the box, lined up with the marks you made earlier. At this point, you can make some adjustments to the distances at the ends of the box, if you want. Remember to keep standard spaces between all the guide strips, and never put a strip closer to the end of the box than ¾ of the standard space measurement.
Once you are satisfied with the arrangement, it’s time to put everything together. Cut flexible strips about two times longer than your standard space. Now place them in a U-shape between the guide strips, to attach the guide strips to the side wall of the box. Work your way from one end of the box to the other, alternating attaching one side and then the other. Be sure that the strips are correctly positioned between their correct “neighbors” as you go, because once they are attached, it may be very hard to re-position them.
Try to keep the “flex points” free of glue – the glue could dry stiff and prevent the guide strips from moving freely. Be sure the guide strips fit correctly against the bottom of the box, so that the marble cannot fall down around the wrong side of the guide strip. But also not so snug that they drag. The strips should glide easily when you tilt the box.
Step 5: Test and adjust.
Hold the toy semi-upright so that the ends of the strips rest on the strips just below them. Now turn the box 180 degrees so that the strips now fall the opposite direction. Put the marble in start position at the bottom of the box, and give it a test run! Make sure everything appears to be moving smoothly and working properly. If not, try to make corrections.
That’s all there is to it! You could put an acrylic or glass “lid” on the toy, sealing the marble inside if you want, but I like having it open so that there is a risk of the ball falling out. Again, this adds to the challenge for grown-up players.
Please be aware that this toy is not child-safe, since there are choking hazards (marbles, etc.) and a possibility of splinters if you use wooden parts. Use your own best judgment, as I’m sure you do whenever you make other handcrafted items. I made my version with adults and teens in mind, so I did not take special precautions.
Used properly, this is a fun toy. My son loves the sound the toy makes, as the marble repetitively clinks against the wooden risers. You could have a timed tournament, where each person must get the marble across the board a certain number of times… giving penalties if the marble falls out of the tray or goes off-course.
Have fun… and whatever you do, don’t lose your marbles!




Yes, hardwood would be fine and would probably better withstand the clatterings of the marbles or ball bearings. Be aware it is often harder to find, more difficult to work, with and more expensive. Choose the materials best suited for you. If you make the toy, please let me know and I’ll make arrangements to post a picture of your project!
When it comes to wooden toys, i always prefer to use wooden toys made from hardwood materials because they last longer.