Coiled zipper bracelet
")
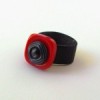
This wrist band reminds me of a coiled octopus tentacle. I made it from a vintage zipper from a craft stash I inherited from my mom.
")
My mom was a church craft bazaar organizer, a girl scout leader, and a home sewer. The woman had accumulated quite a craft stash! When I went through it, I found dozens of homemade cardboard patterns and handwritten instructions… Clipped magazine pictures… And a shoe box full of zippers, of all colors and lengths.
Since I am no dressmaker, I knew I’d have to find some other use for all those zippers. Having seen some zipper jewelry, I decided to create a zipper bracelet with a sinuous, coiled embellishment.
Making this wrist band is a quick and easy project — should just take you an hour or two at the most. Here’s what you’ll need:
- A 7-inch zipper
- Matching thread or embroidery floss
- A needle
- Scissors
- A sew-on snap
Step 1: Take the zipper apart.
First, you’ll need to de-construct the zipper. One half will become the wrist band; the other half will be the coiled “tentacle.” My zipper had a metal piece at one end — almost like a super-wide staple — that helped hold it tgether. I started by carefully sliding a scissor blade underneath the prongs to loosen it, and then gently removing it. (Be careful! Sharp pointy things can hurt you!)
")
")
")
")
")
")
Once the staple thingy is free, then zip the zipper-pull all the way down the zipper and off the end. (Save the zipper-pull — you can make fun jewelry out of it, as well.) Then pull the two halves of the zipper completely apart.
")
Step 2: Sew on the snap.
Fold the raw ends of the fabric under, and sew on the snaps. You can sew the snaps in different locations to adjust the size of your wristlet.
")
Make sure to sew the snaps on the correct sides of the fabric. Test it by putting it around your wrist every so often to make sure it’s working right.
")
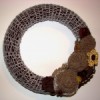
Step 3: Form the coil.
With the other half of the zipper, form a long, snaking, coil. Tack the fabric part together with your needle and thread as you go along, so that the coil holds its shape.
")
")
")
")
")
")
The stitching doesn’t have to be very neat, as it will eventually be hidden from view.
")
Step 4: Attach the coil to the wrist band.
Stitch the coil about in the center of the wristlet. Look at it from all angles and try to tuck away all the fabric edges and tack them so they stay hidden.
")
Step 5: Wear your bracelet!
Ta da! All done. I think my mom would be pleased that her old sewing stuff produced such a zippy new accessory.
")