Carpe diem!
Words are powerful things. They can inspire us, or touch our hearts.
For most of my adult life, I have collected quotations and posted them where I will see them daily, in an effort to absorb their messages. Typically, I jot them on wipe-off boards, or print them via my computer’s inkjet printer and then tape them up on walls.
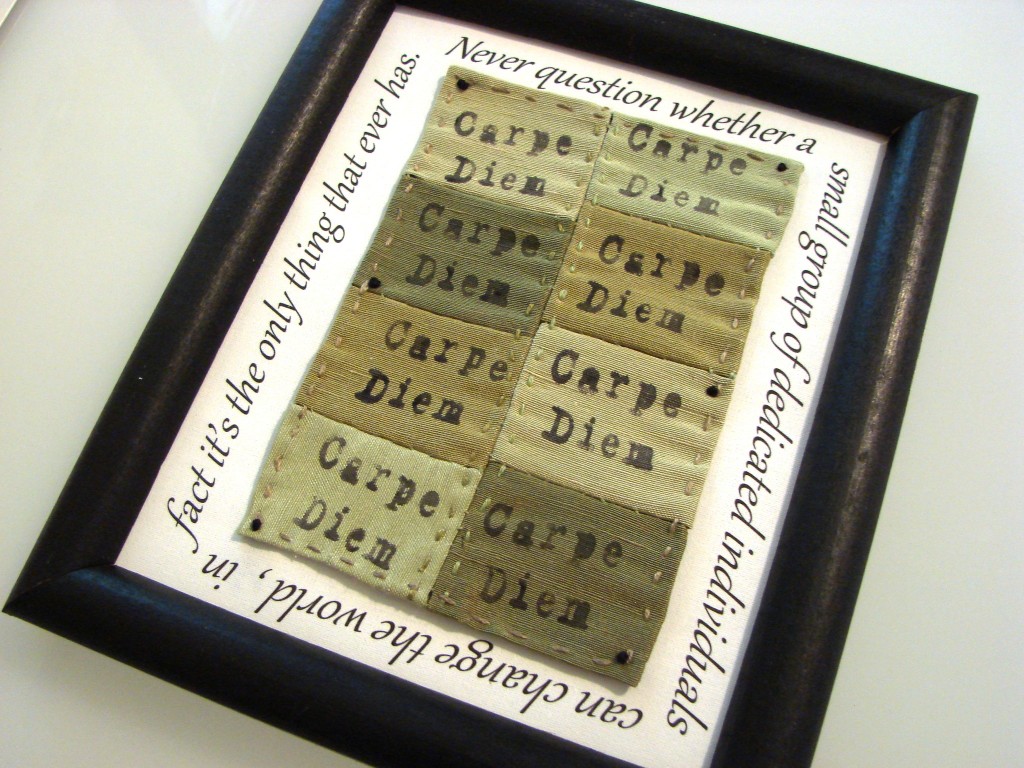
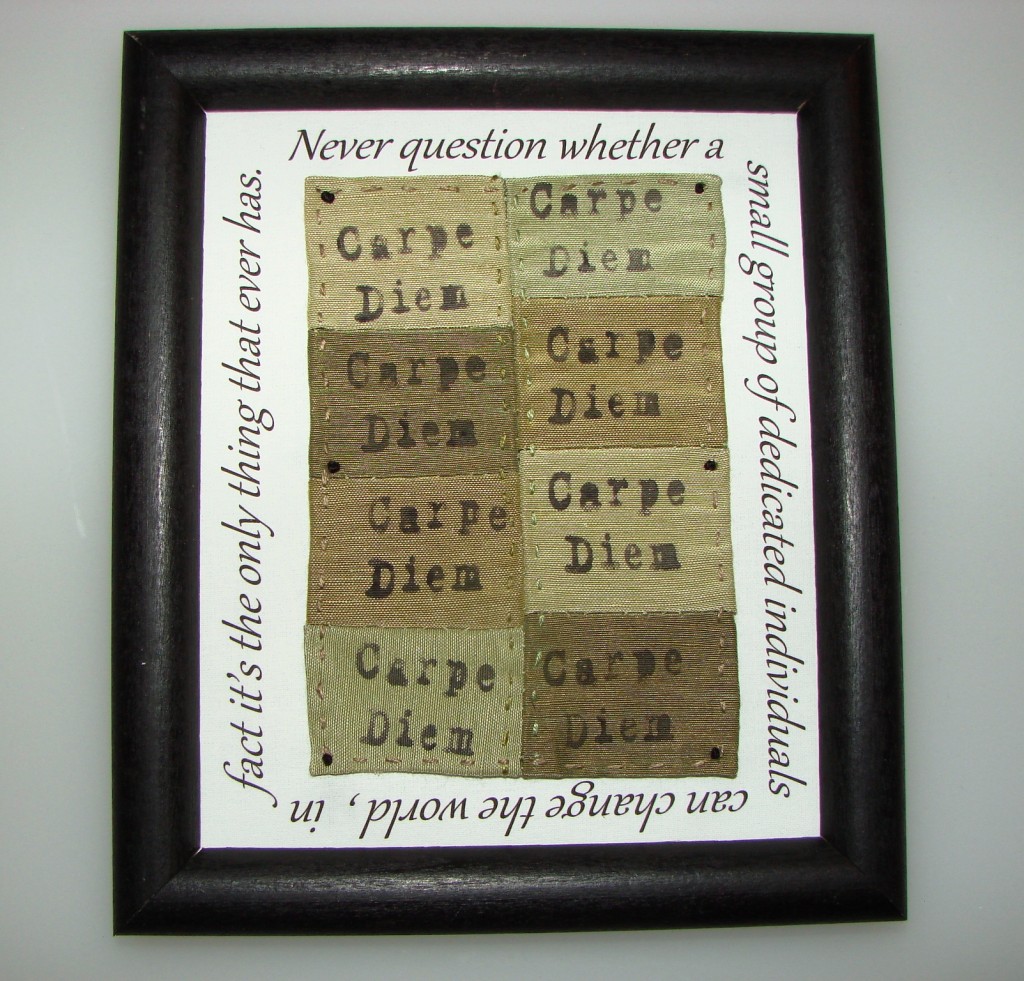
Here’s a more permanent way of displaying favorite quotes. These framed, stamped and stitched quotes make particularly nice gifts. They work for almost any occasion; just adjust the quotes accordingly.
Here’s what you need:
- A frame, 8 x 10″ or smaller.
- An injet printer and a sheet of inkjet fabric. Inkjet fabric is like a piece of canvas that you can run through your printer. I use it for a lot of projects. As far as I know, it only comes in white, but of course you could create a colorful design on your computer and print it onto the fabric.
- Alphabet stamps and a stamp pad: The letters should be large enough to be legible from a bit of distance. I think mine were about 1/4 inch tall.
- Snippets of fabric: This is a great use for small scraps. It is best if they are solid colors — prints make it harder to read the stamped words. I had a fabric sample book with several coordinating fabrics, which created a nice effect. A variety of colors would also look nice.
- Embroidery floss: This can be a coordinating or contrasting color, whichever you prefer.
- Two quotes: The visual impact is created by the repetition, so one of your quotes needs to be very short. Carpe diem (Seize the day!) worked well. The other one should be longer, to wrap all around the edge of the frame.
Step 1: Create the wraparound quote.
Start by measuring the inside opening of the frame.
Then count the number of characters (letters, spaces, and punctuation marks) in your longer quote. If your frame is square, you can just divide the total number of characters by four, to figure how many words should go one each side.
If your frame is rectangular, you’ll need to do a little math. (If they had told me in high school that math comes in very handy for many art and craft projects, I might have paid more attention to it!) For example, let’s say your frame is, 5″ x 7″ and your quote has 124 characters.
Find the total number of inches available by adding the two widths
and the two heights. 5 + 7 + 5 + 7 = 24
Divide the total number of characters by the total inches available,
to yield the number of characters per inch. 124/24 = 5.2
Multiply your width by the characters per inch. 5 x 5.2 = 26
Multiply your height by the characters per inch. 7 x 5.2 = 36.4
Now go back to your quote, and figure out the best way to “break it into four parts” that roughly correspond to the number of characters allotted for each side of the frame. Of course, you’ll need to break the quote cleanly (at the end of words), so the characters won’t come out exactly right, but as long as they are close it should be okay.
I used Microsoft Word to do the quote, but use whatever program you are comfortable with. I created four text boxes, one for each piece of the quote. I then used the rotation function to turn the words in the correct directions. And I dragged the textboxes around until they were in the right positions. Change the font size until the quote it is the perfect size to fit inside your frame. By the way, the whole thing should be centered on the page with white space all around it.
Once you are satisfied with the arrangement of the quote, test it by printing it on a plain sheet of paper and then putting the frame on top of the page to make sure everything lines up right. The fabric sheets are not cheap, so make sure all is well before printing the fabric version.
Step 2: Create the inner tiles.
Measure the open area inside the quote you’ve printed on the inkjet fabric. This will give you an idea how big your tiles should be. Remember that there needs to be some white space between the wraparound quote and the tiles.
Next, stamp your quotes on the different scraps of fabric, leaving at least 1/4 inch unstamped on all sides, for hems and seams. When you cut them, the widths should all be similar, but the heights should vary — the idea is for it to look asymmetrical and rough-hewn, in contrast to the orderliness of the computer-generated border.
I started by sewing each small piece to a vertical neighbor, until I had a group of four, all in a vertical line. Then I did the same thing again, so that I had two sets of four. Next, I sewed those two groups together up the center, and then hemmed all around all four edges. (All of the sewing is done with the inner tiles piece “loose” — not yet attached to the wraparound quote fabric.)
By hand, give the center seam and the four outer edges a decorative top stitch (an extra line of visible stitching, that follows the seam line.)
Step 3: Assemble it.
Use a few well-placed French knots to attach the tiles to the inkjet fabric. Then put the whole thing into the frame.
I wrapped the edges of the inkjet fabric around the cardboard insert from the frame, and duct-taped it in place. (Gotta love duct tape!)
Then I covered over that with a piece of plastic cut to exactly the right dimensions. (You could also use a piece of pretty scrapbook paper or cardstock.)
This was a fairly quick project for me — the hardest part was the math!
