Lighthouse Tea Towels
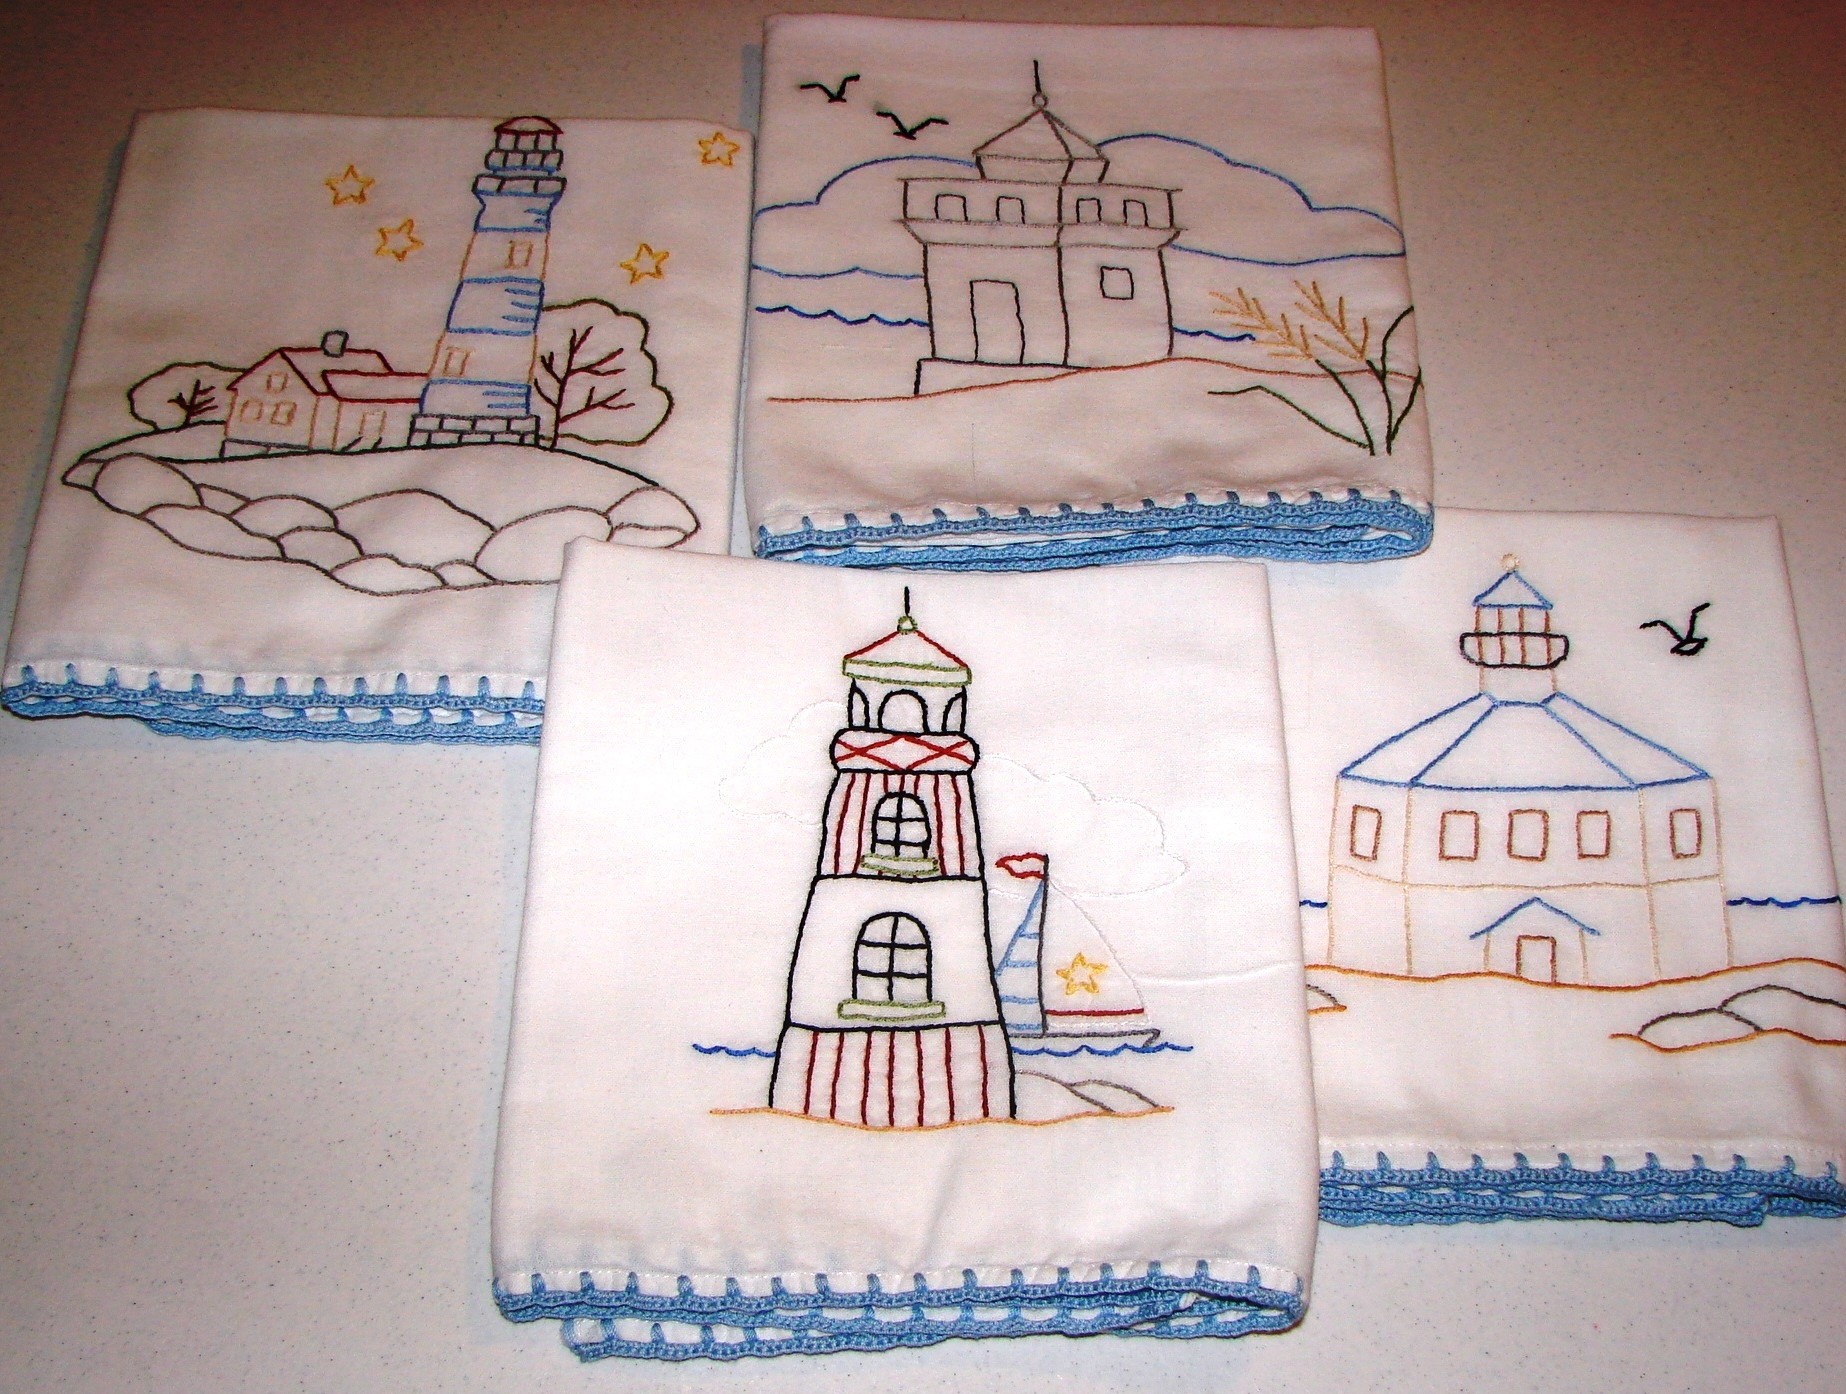
My sister, Cindy, has a vacation home in Maine, right on the Eggemoggin Reach. They spend summers and Christmases there, and also loan it out at other times of the year. When I was at a fabric store looking for embroidery transfers for another tea towel project, I saw a package of lighthouse designs, which immediately reminded me of Cindy’s place.
These don’t have the days of the week, but they are pretty. I already showed you how to do embroidered designs on tea towels. So this time, I thought I’d go into more detail on the edging.
By the way, be sure to finish the embroidered designs before you start the edging. Otherwise, it may be more difficult to use an embroidery hoop to keep your design work taut. (The edging may be too thick to accommodate the hoop.)
There are different thicknesses of crochet thread, which produce different results.
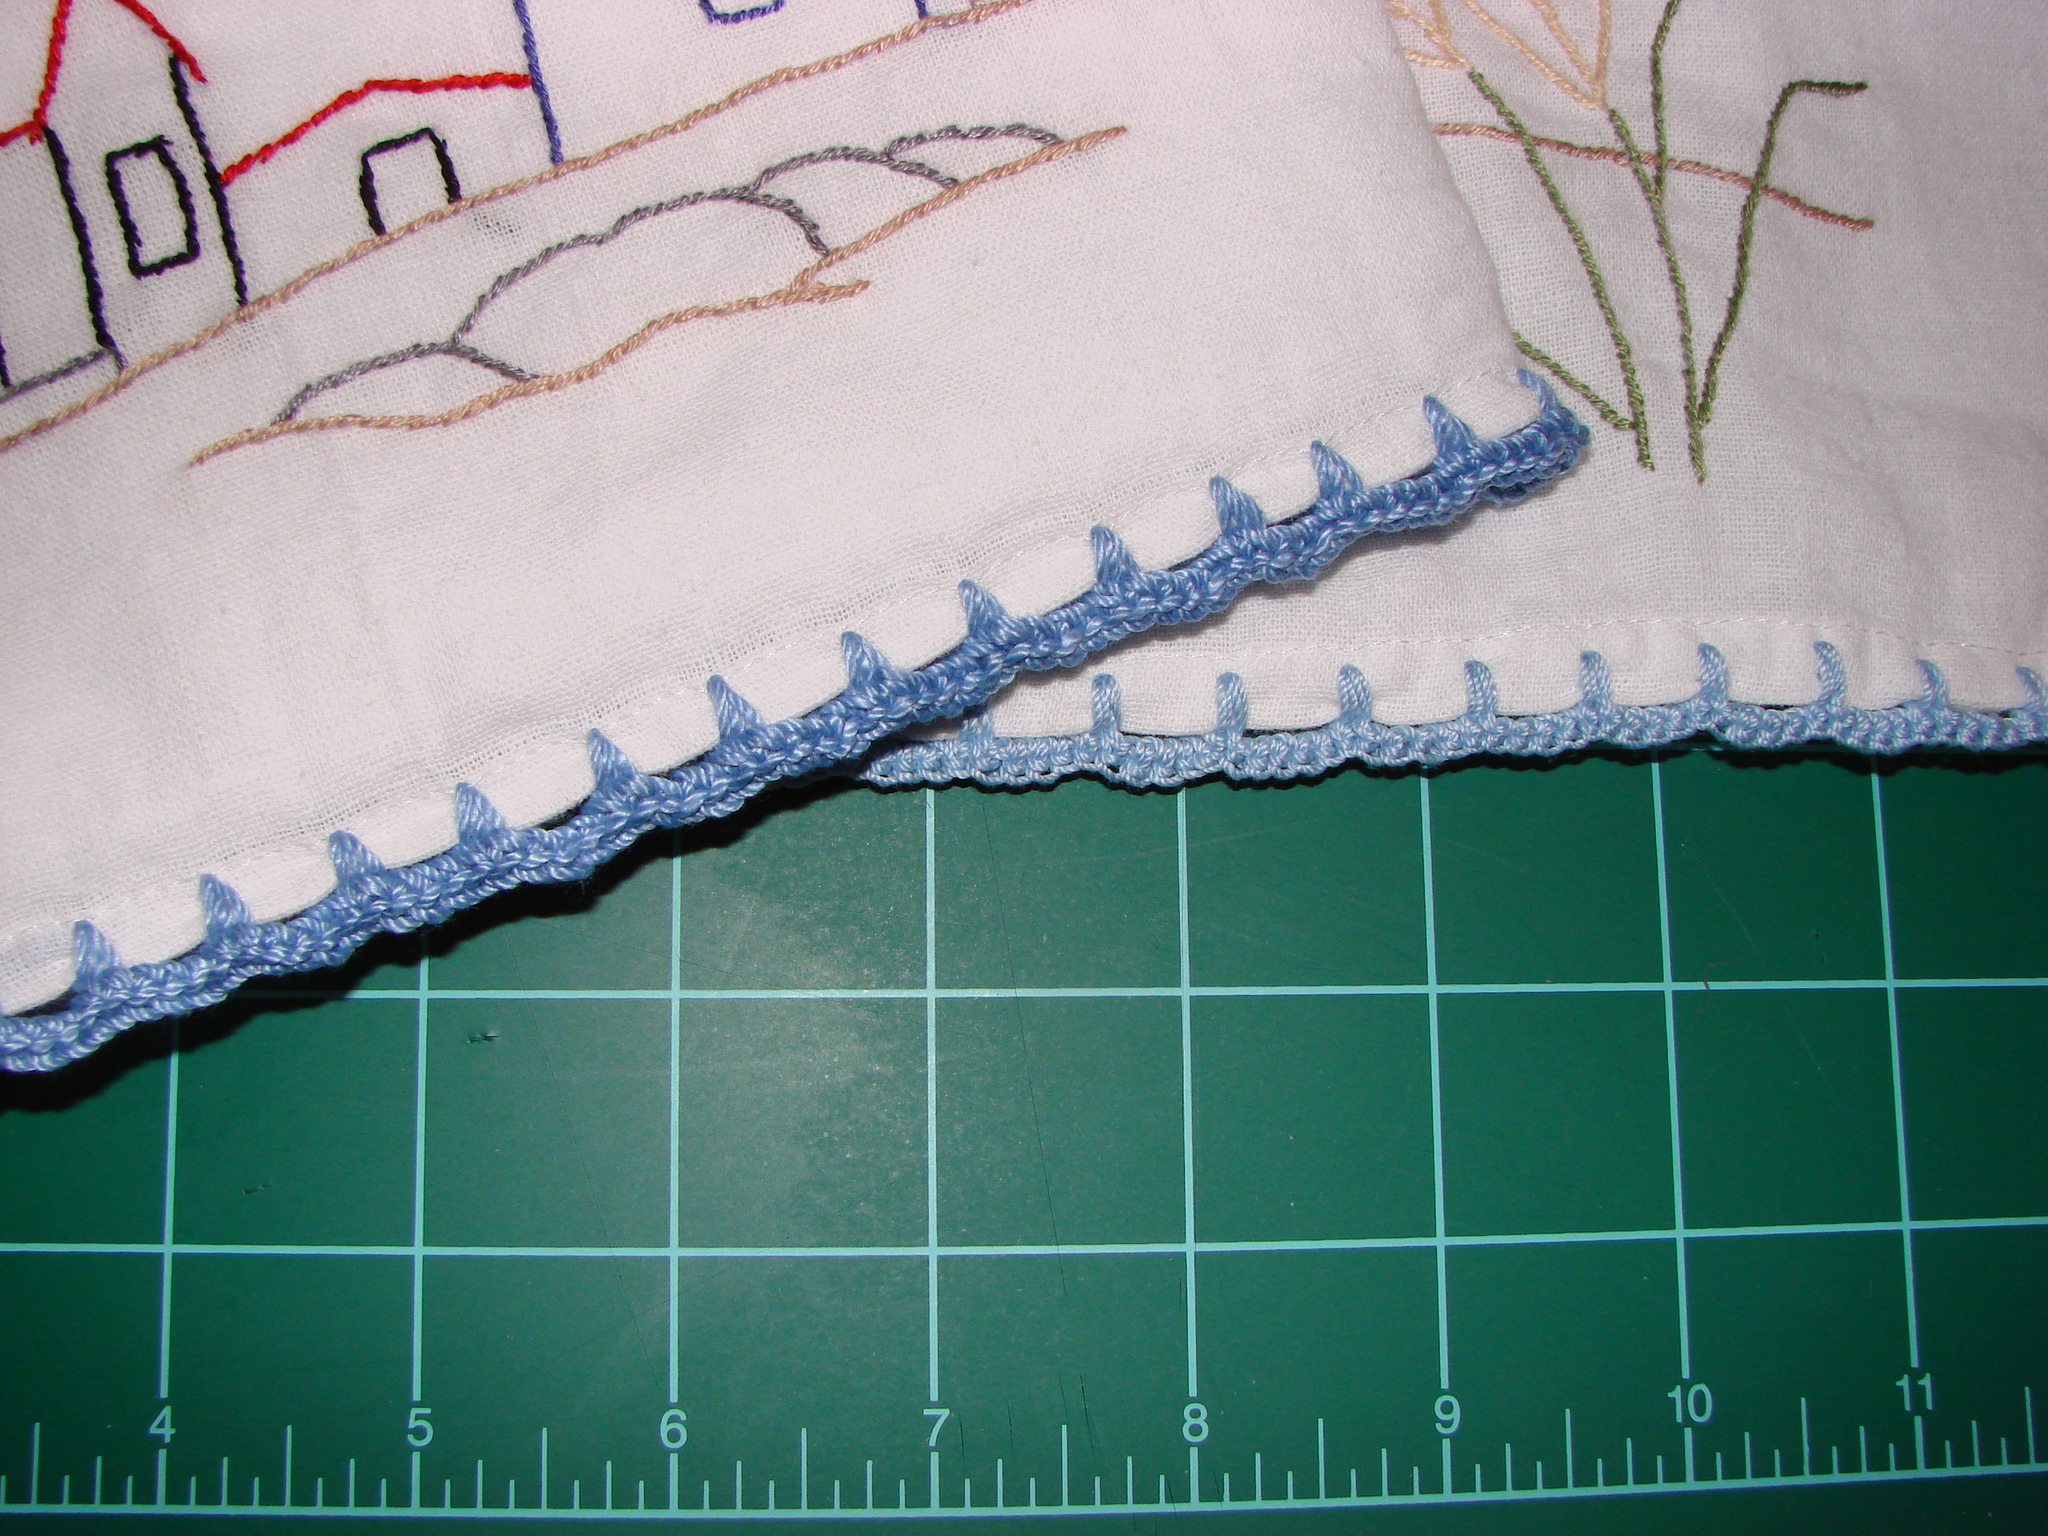
I like the daintier look of the thinner thread, but it’s just a matter of personal taste. I find the thinner thread slightly harder to work, however.
You start by measuring and marking the edge of your cloth.
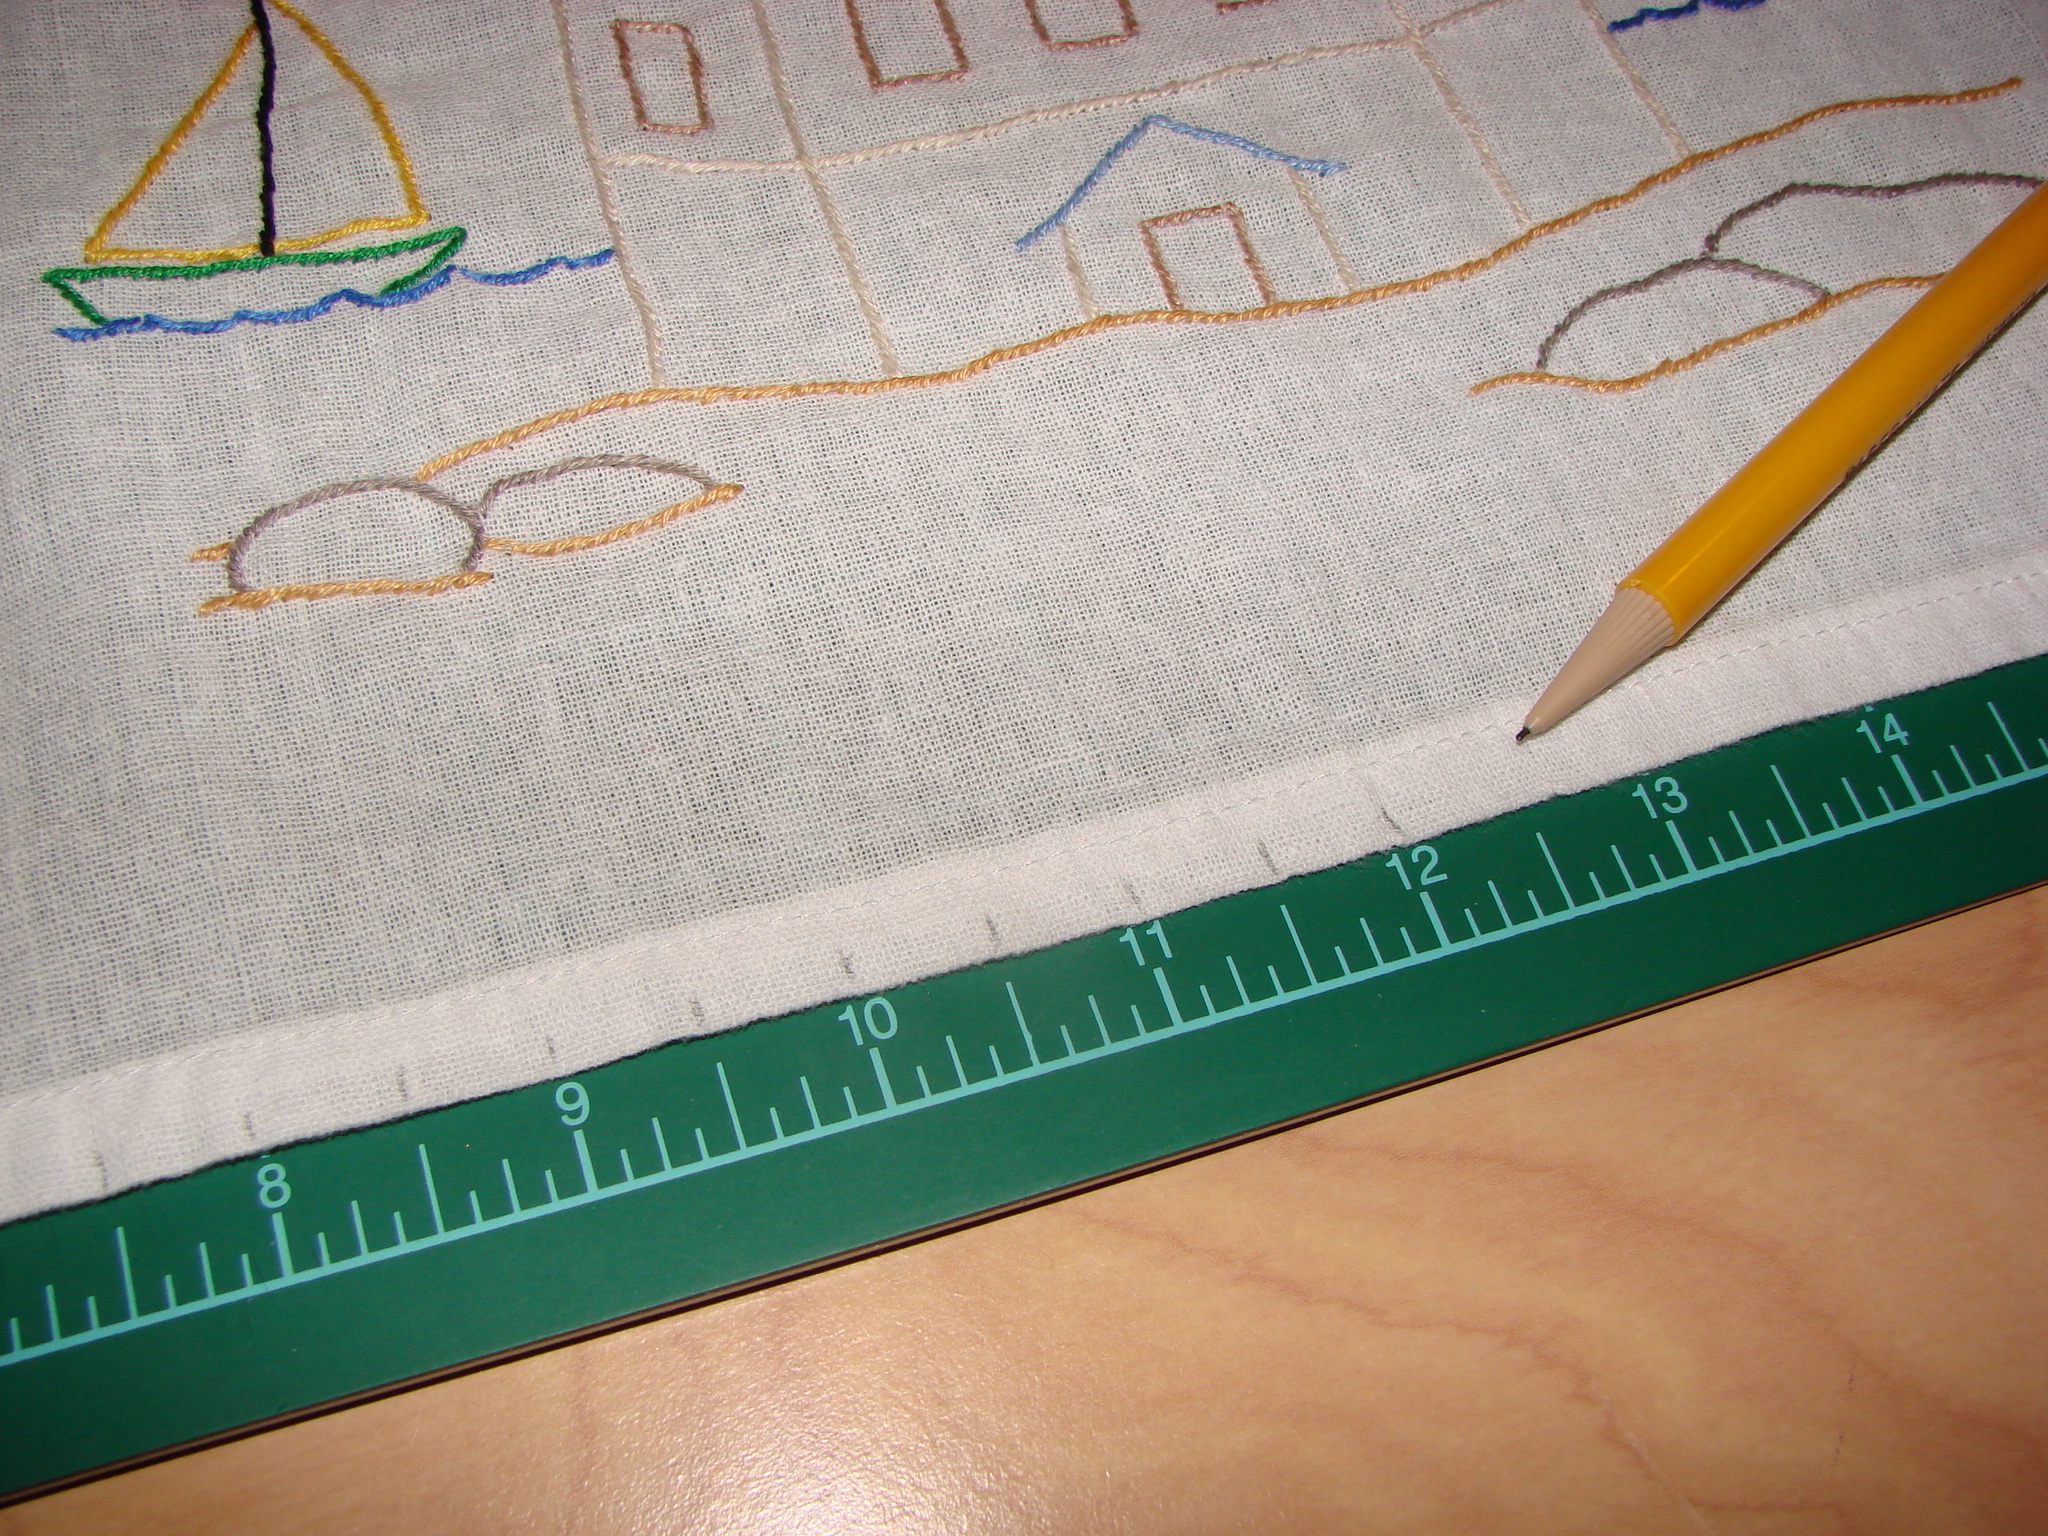
As you can see, I used half-inch increments. It’s probably best to use a washable fabric marker… but you can see I just grabbed a pencil, since the marks will be pretty well hidden beneath the stitching anyway, even if the marks don’t completely wash out.
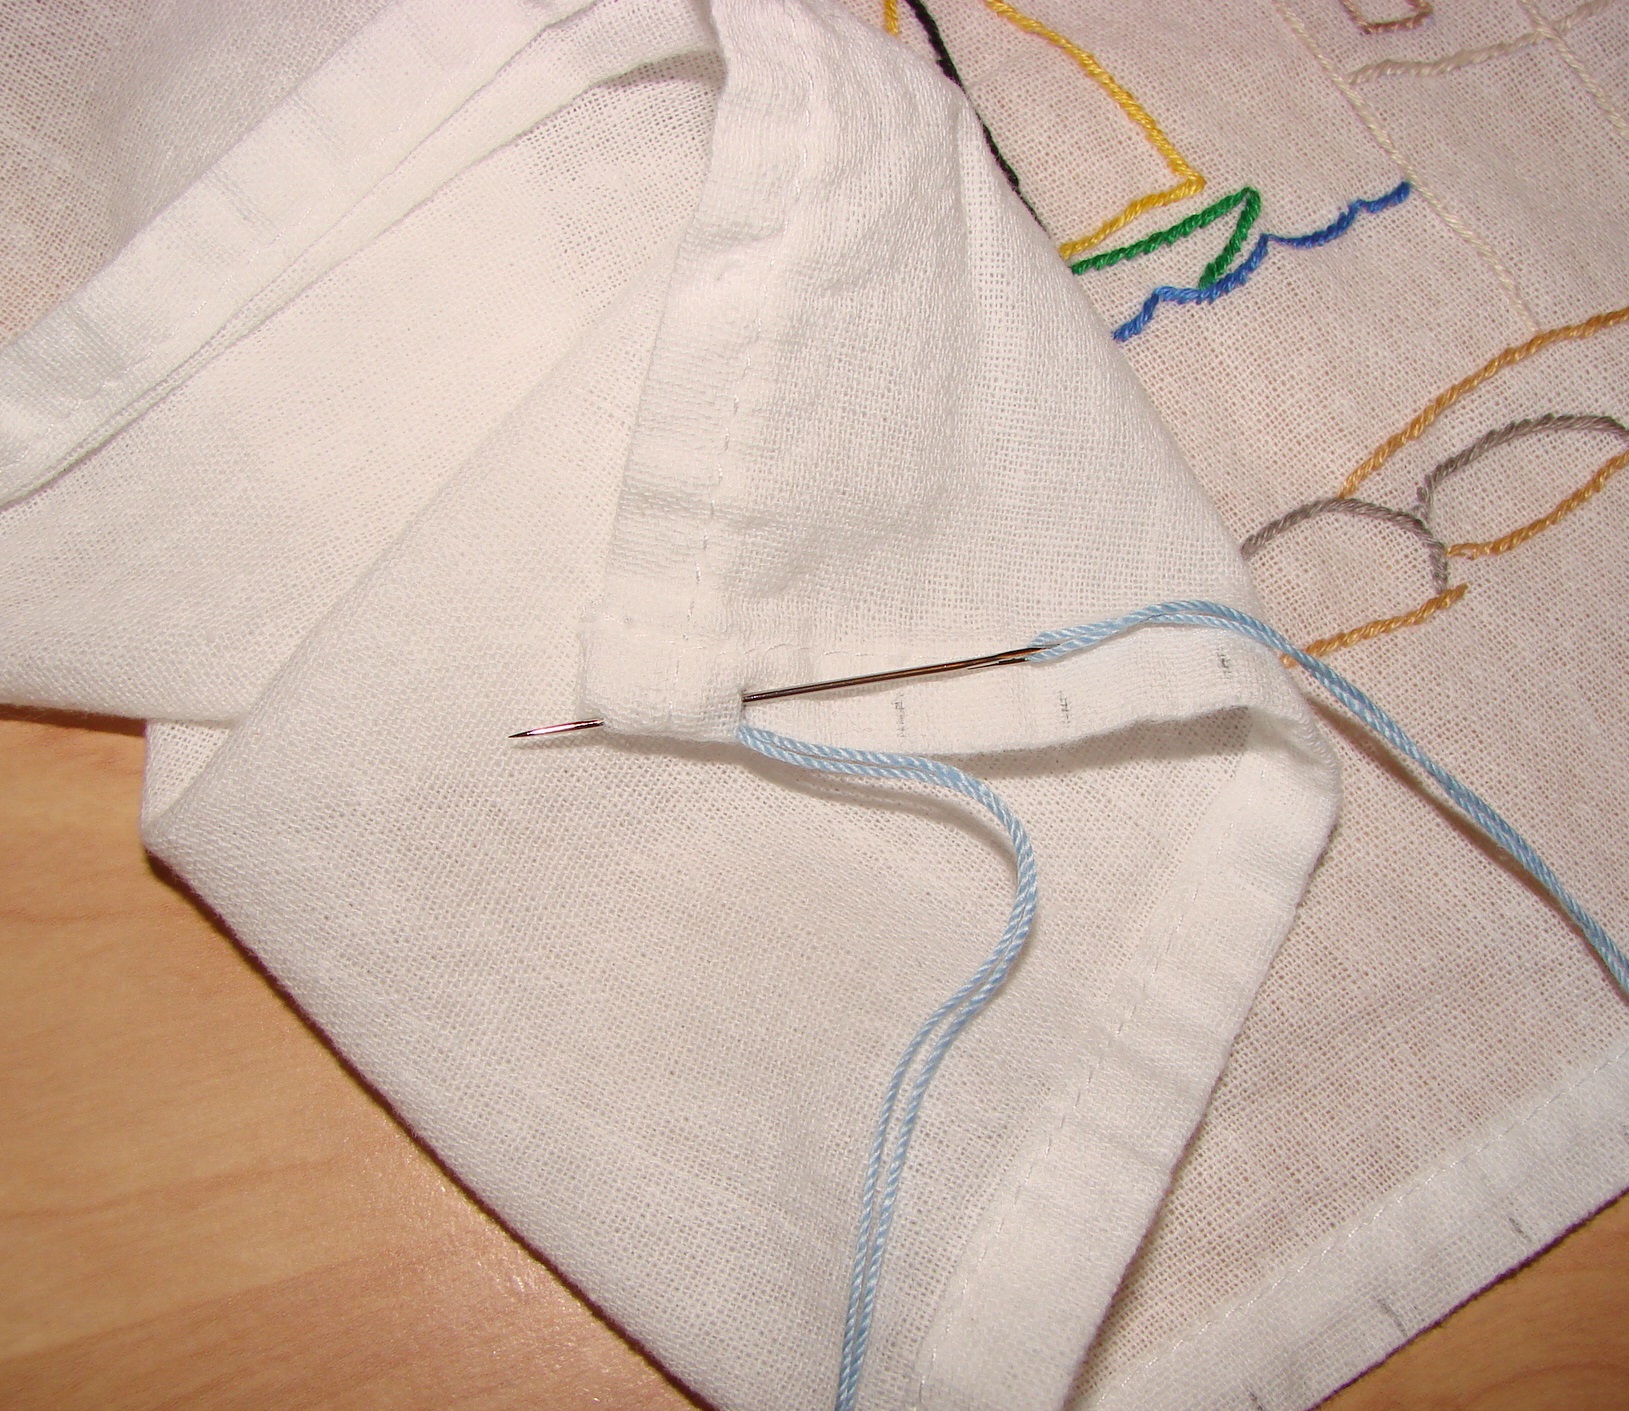
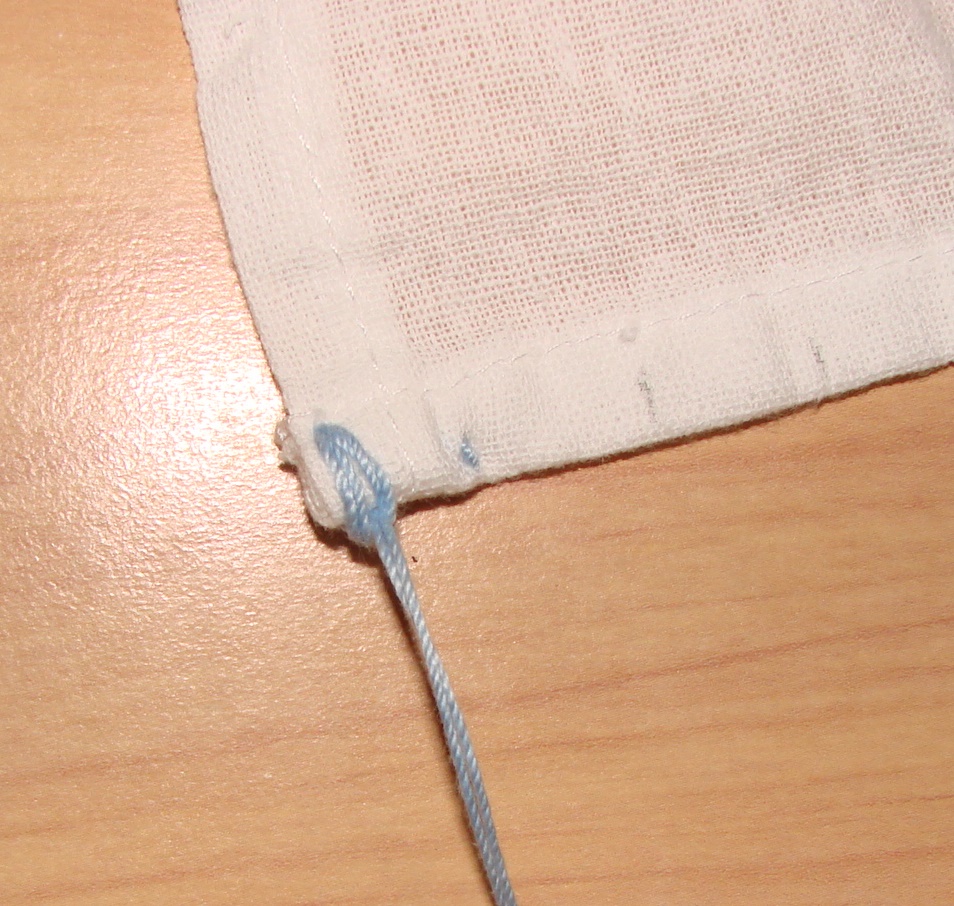
Now, thread your (somewhat large-eyed) needle with a double thickness of crochet thread, and tie a knot at the ends of the thread.
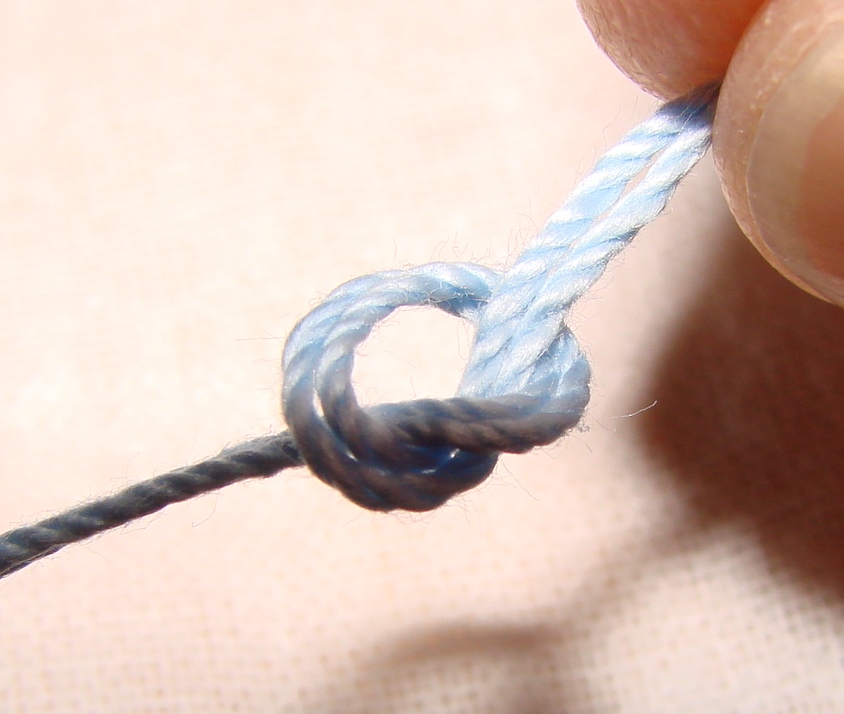
You will be working from left to right, on the right side of the fabric. First, you will hide the knot inside the hem. Squeeze one end of the hem. The opening should be big enough for the knot to pass through.
The tip of your needle should emerge at your first mark.
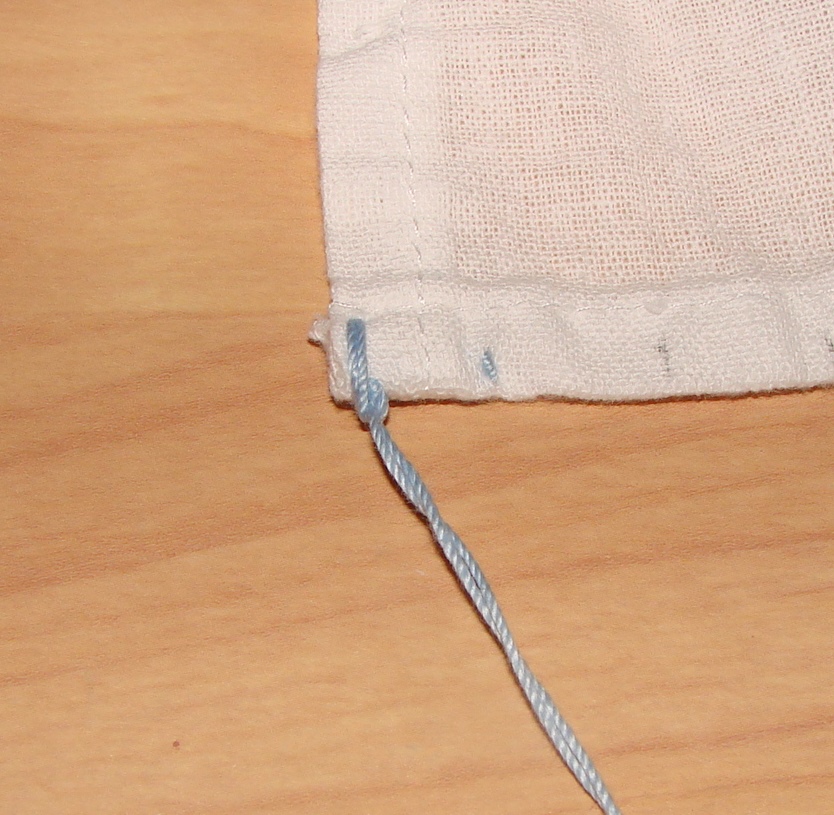
When you pull the needle all the way through and pull firmly on the thread, the knot will disappear into the fold of the hem, so tidy!
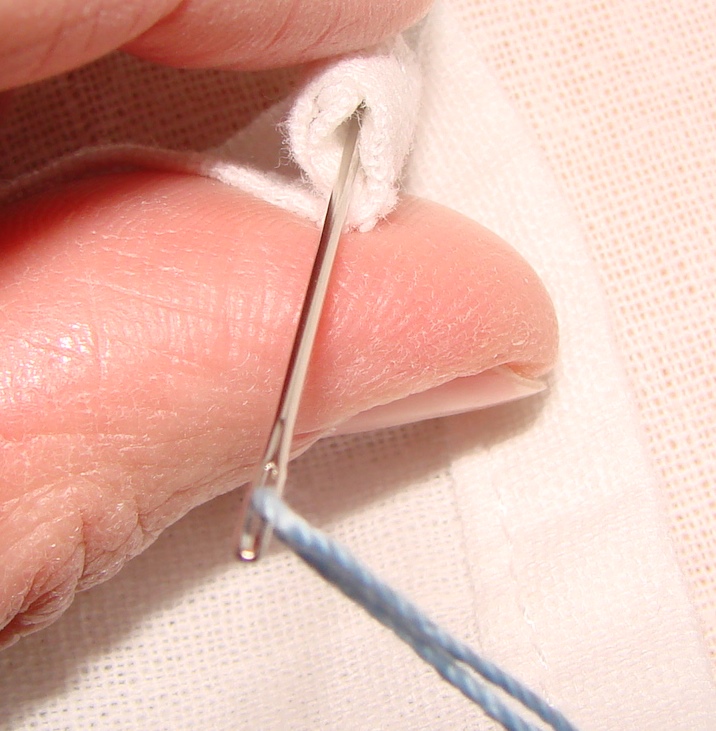
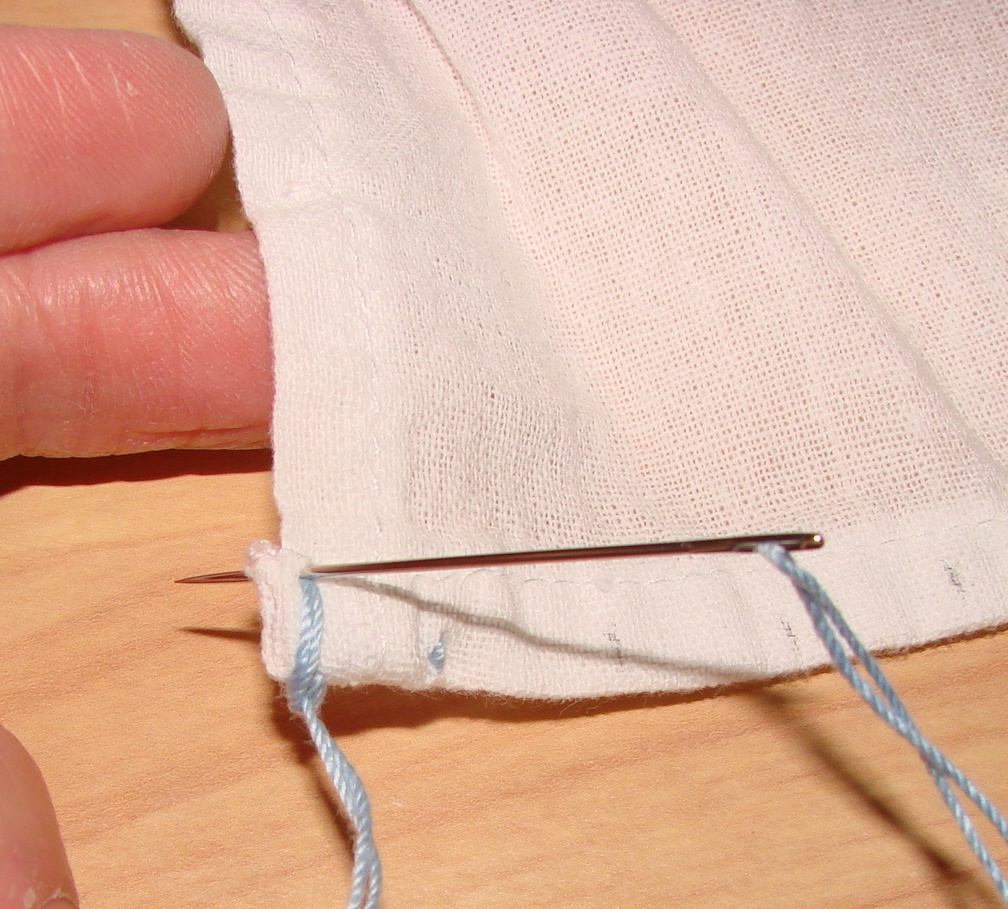
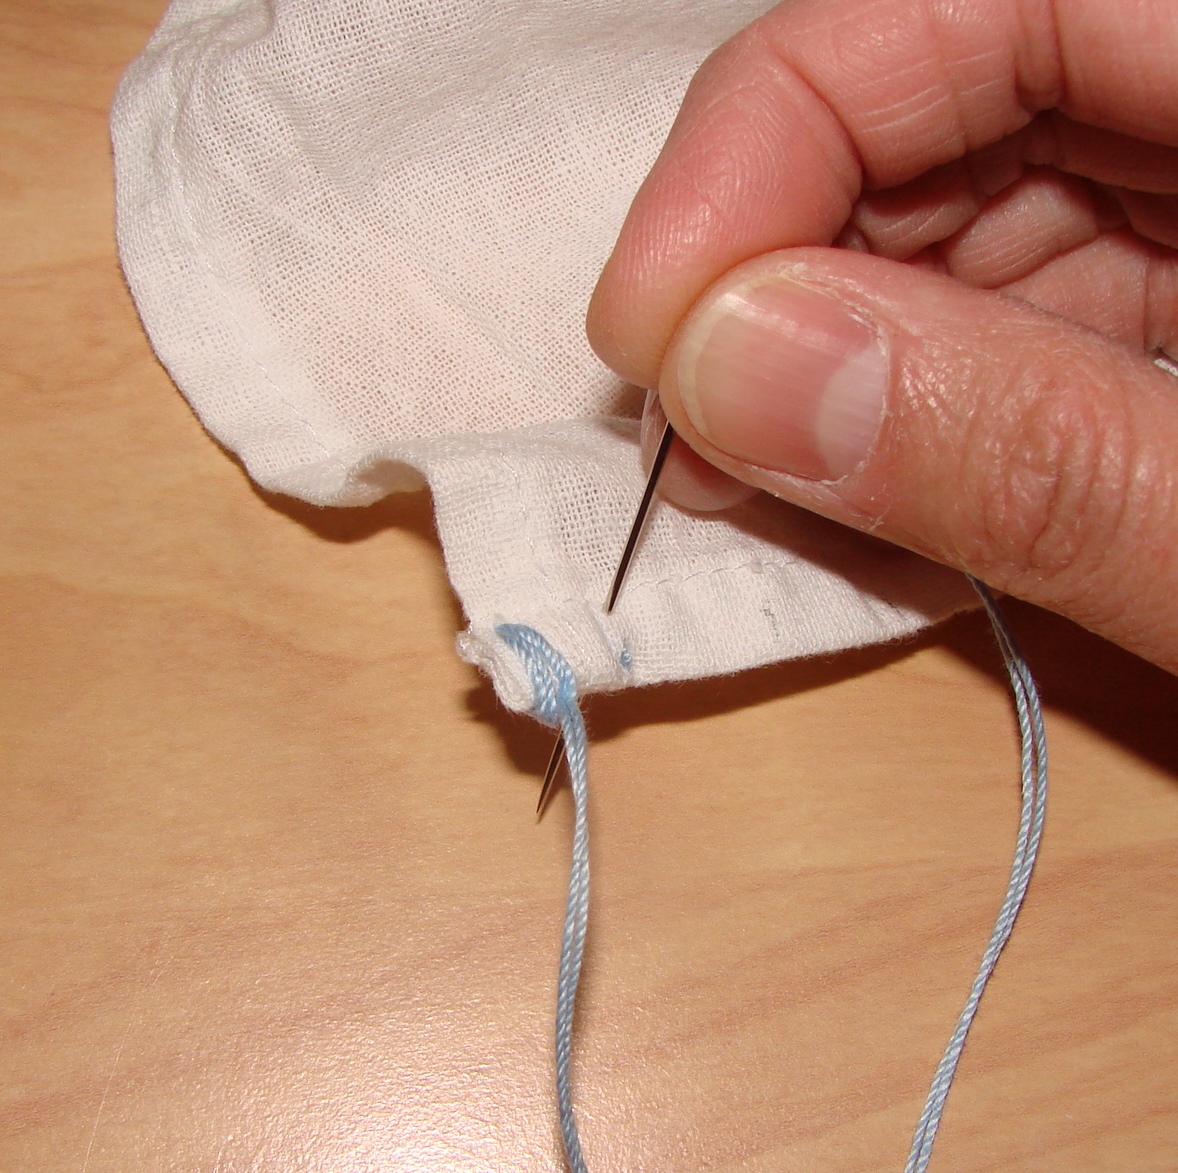
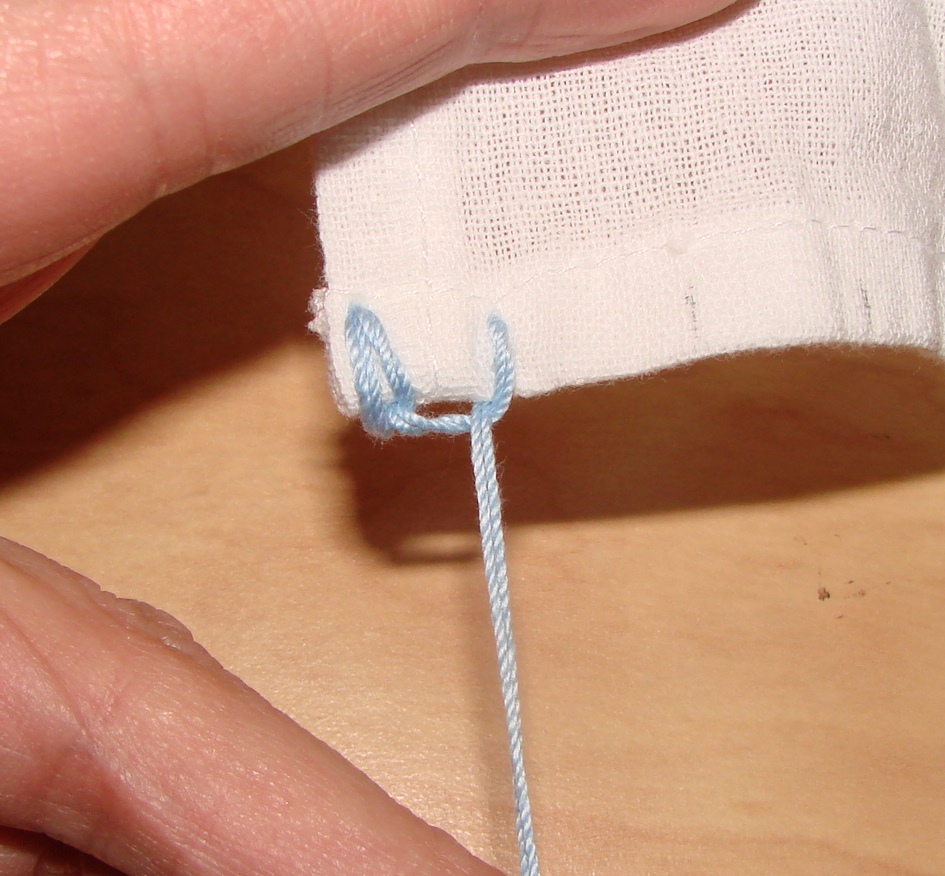
Now take your first stitch. The stitch should be small, close to where the needle came out (but make sure you catch more than just one or two threads of the cloth.) The needle should pierce the bottom edge of the cloth again, close to the side edge of the cloth, but not quite all the way to the edge.
Insert the needle at the top of the hem now, from front side of fabric through to the back, leaving about the same amount of cloth on the far edge, as you left before.
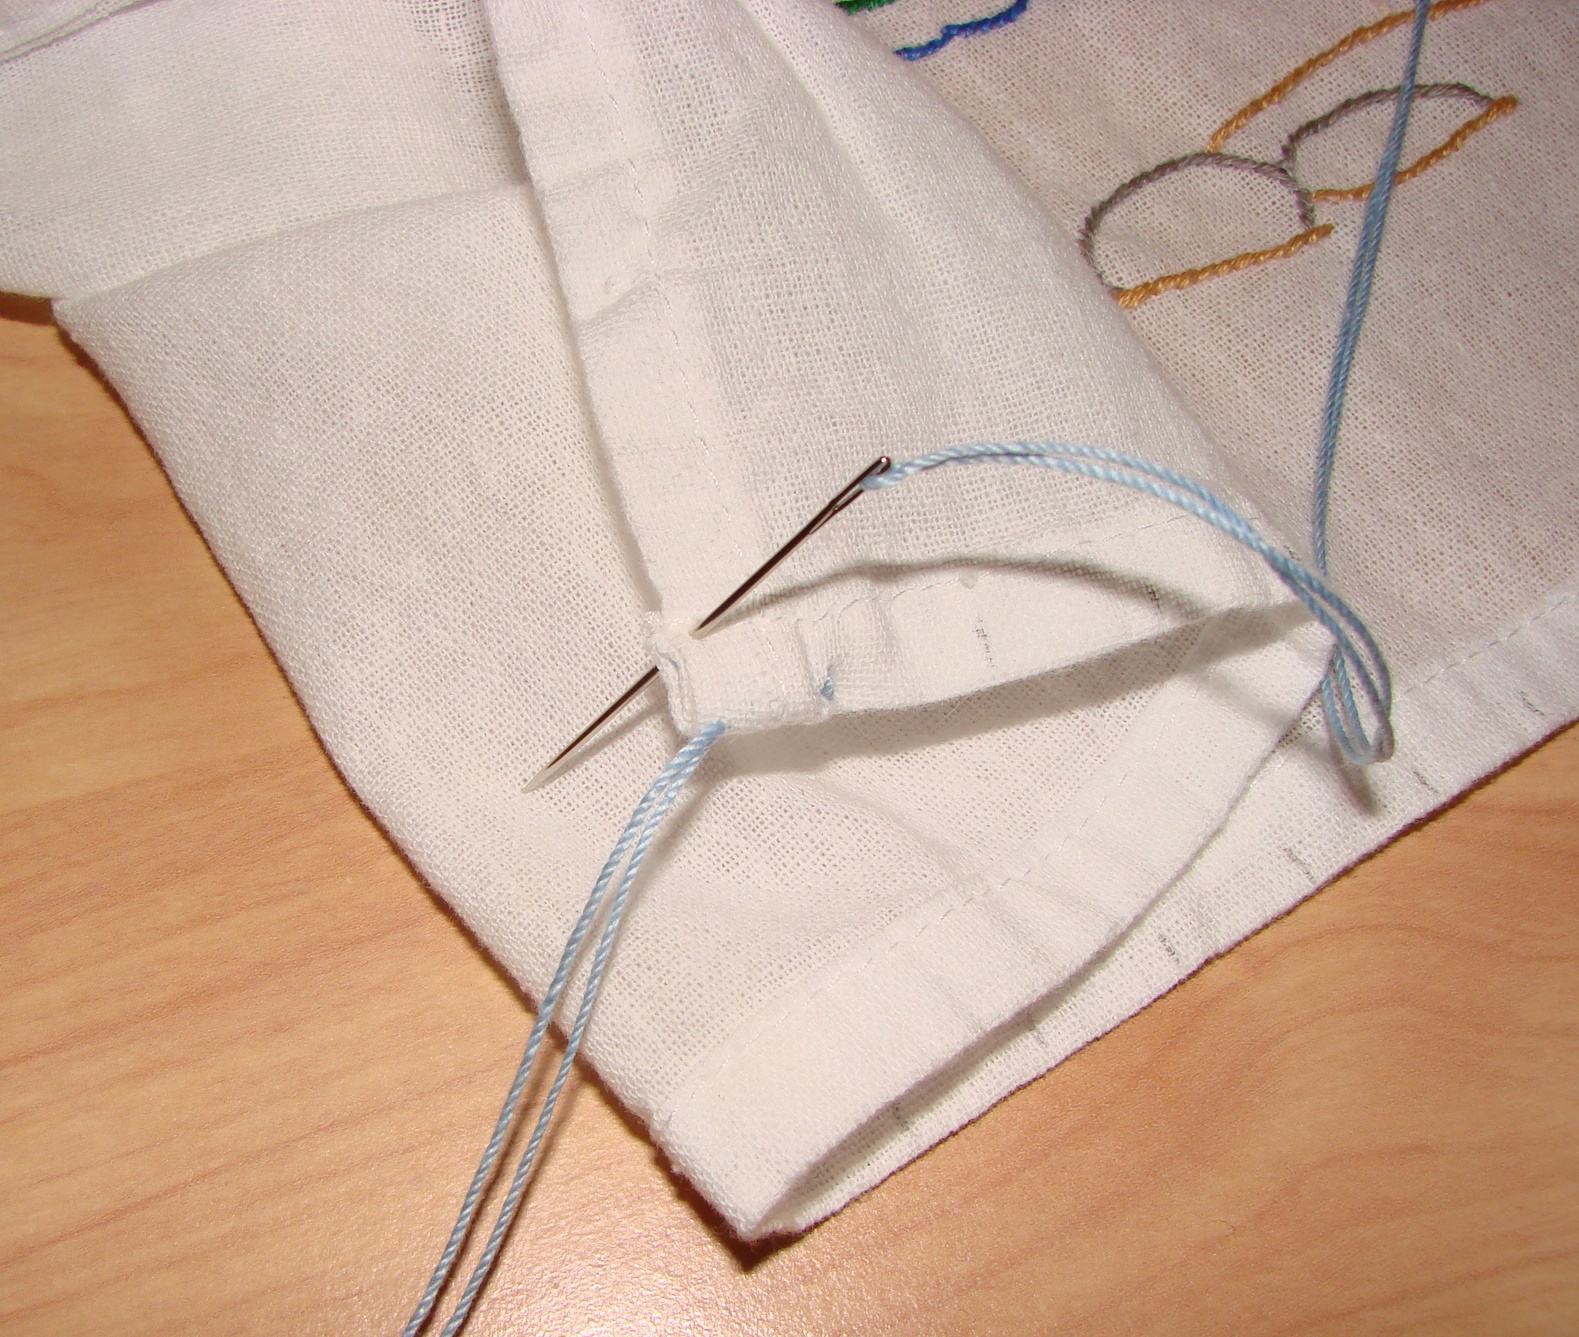
At this point, when you have just put the needle through the fabric but have not yet pulled on it to tighten the stitch, you will see a loop hanging down on the front side of the fabric. Always put your fingers into this loop, pulling the needle toward you through the loop before tightening the stitch.
For this decorative stitch, at every half-inch interval, you will be taking not one but TWO stitches in the same spot. So insert your needle at the top again. If you can, put it into the exact same hole you made before.
Again, reach through the loop and pull the needle toward you, through the loop. Then tighten the stitch, which should now look something like this.
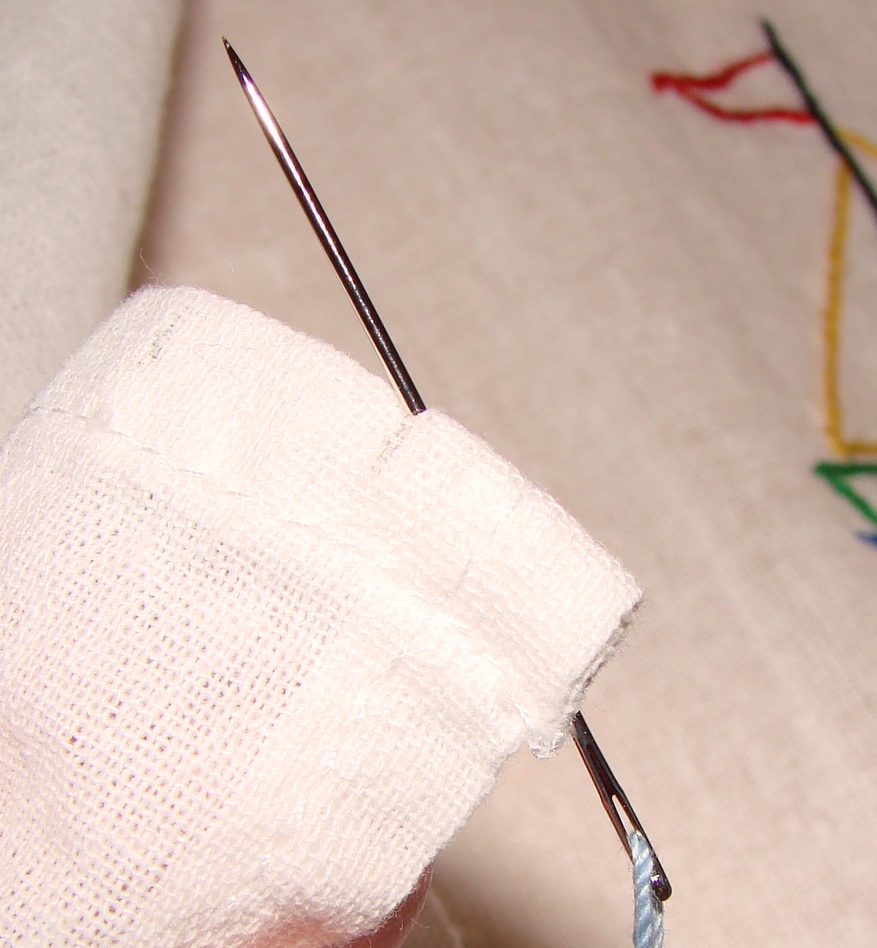
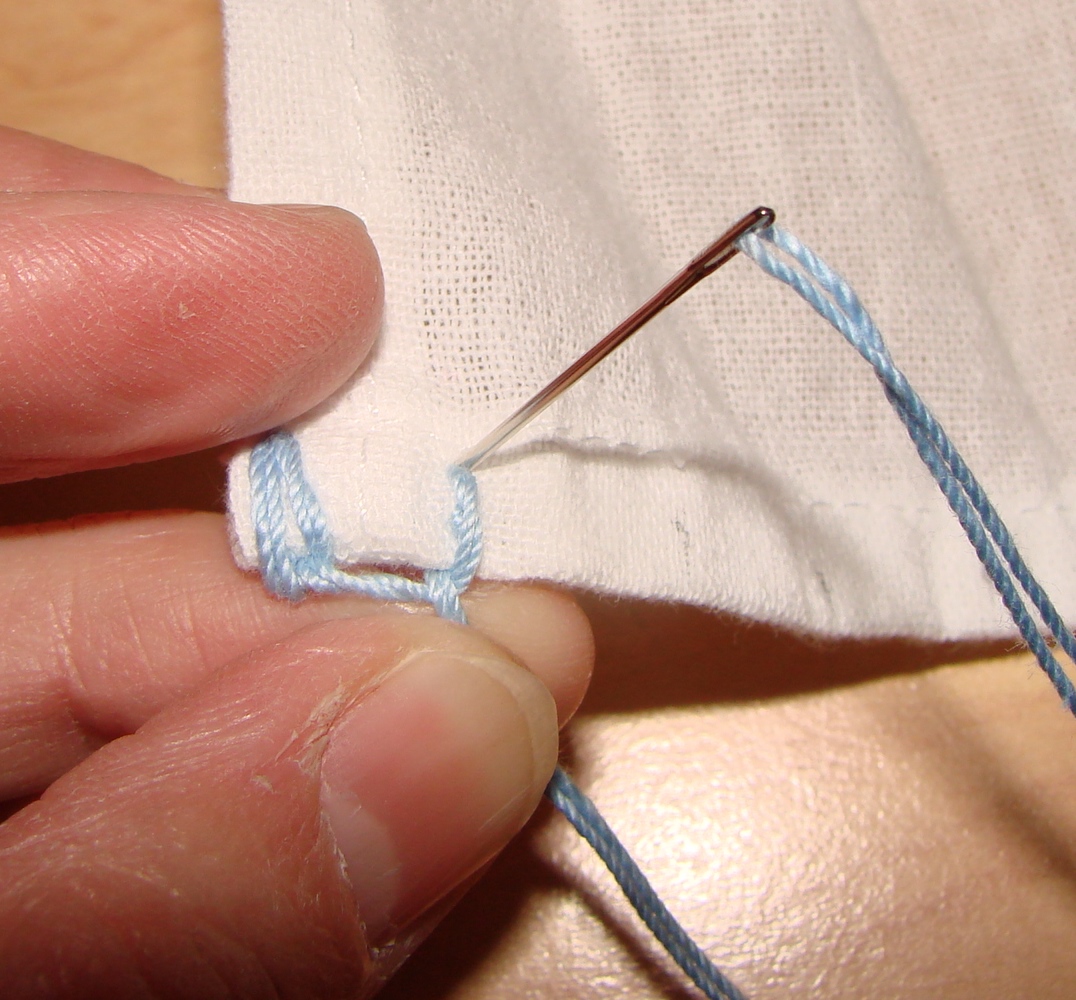
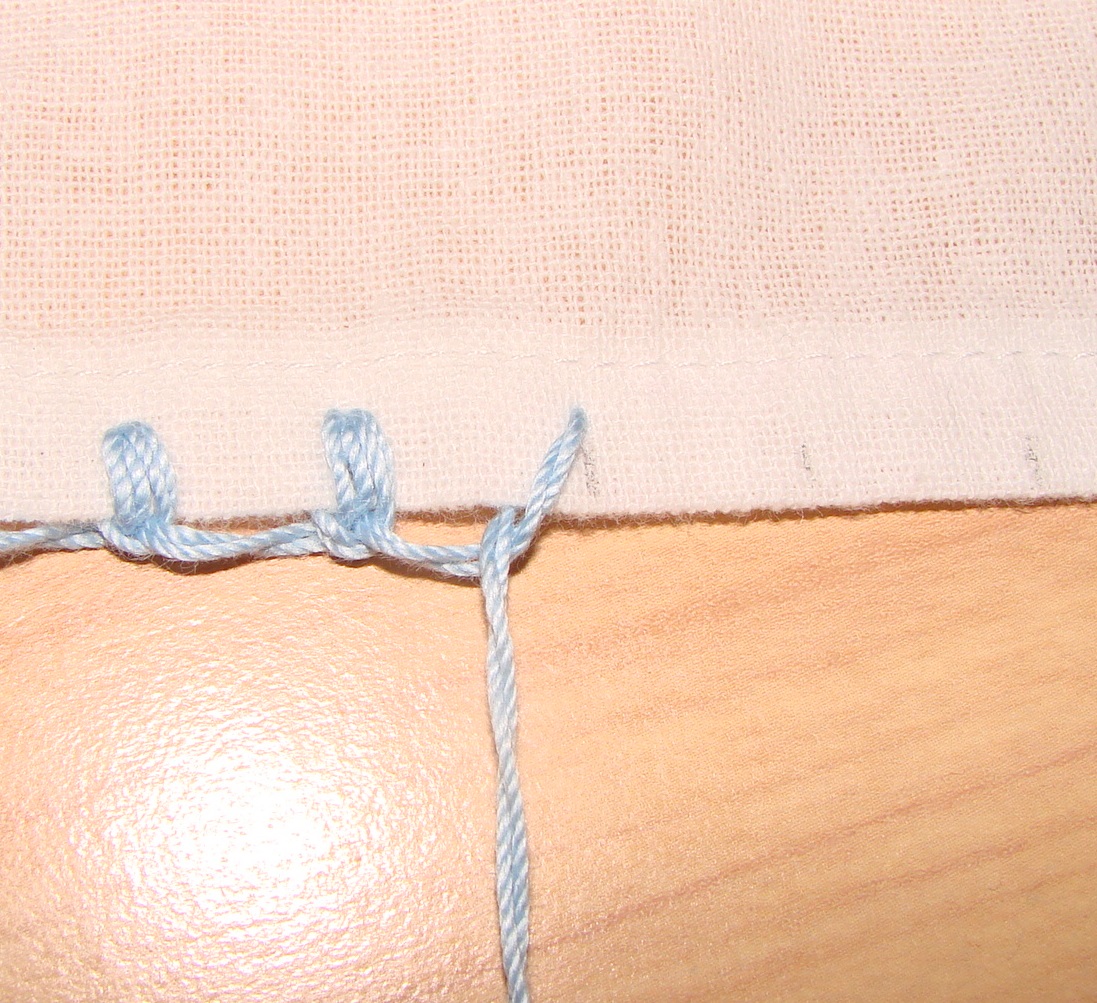
To start the second stitch, insert the needle on the front of the fabric, at the top of the first mark you made. (You will always insert the needle on the FRONT side of the cloth — I found it helpful to keep reminding myself of that!)
As before, reach into the resulting loop and pull the needle through it.
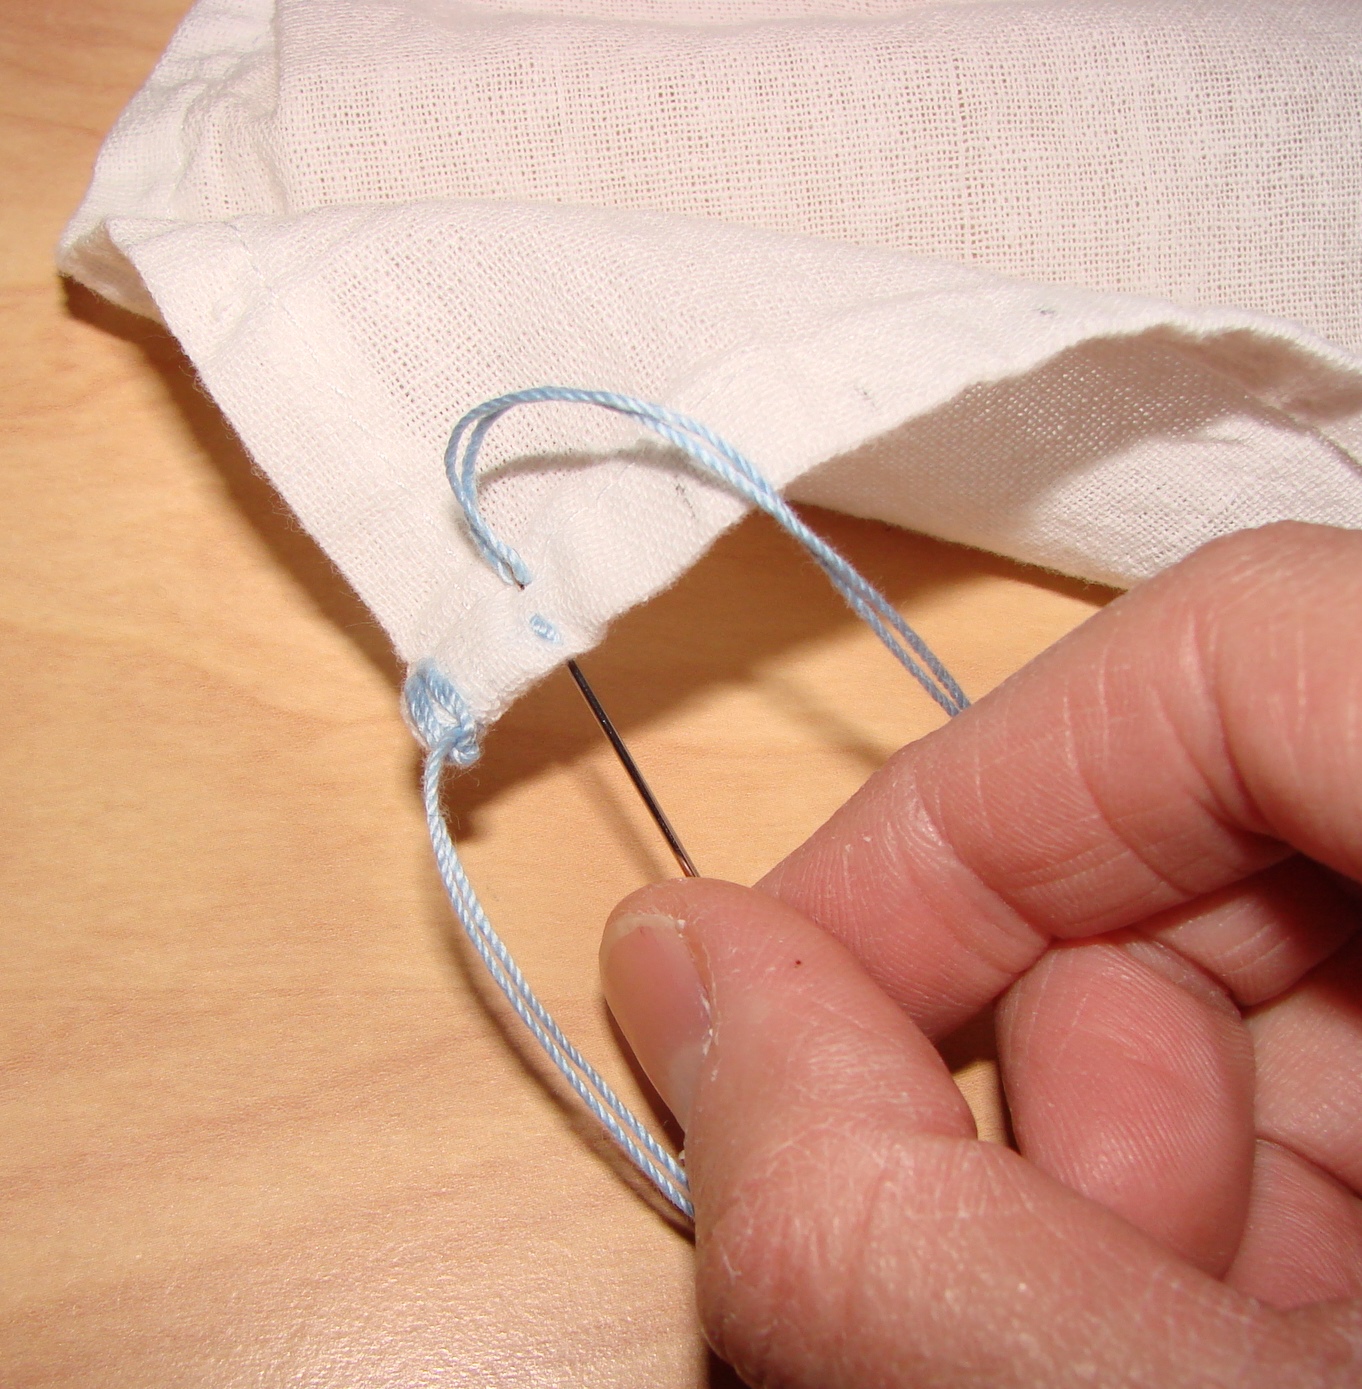
Pull the stitch tight.
Now this is important — pull the thread straight down, at a right angle to the edge of the cloth. Not too tight and not too loose.
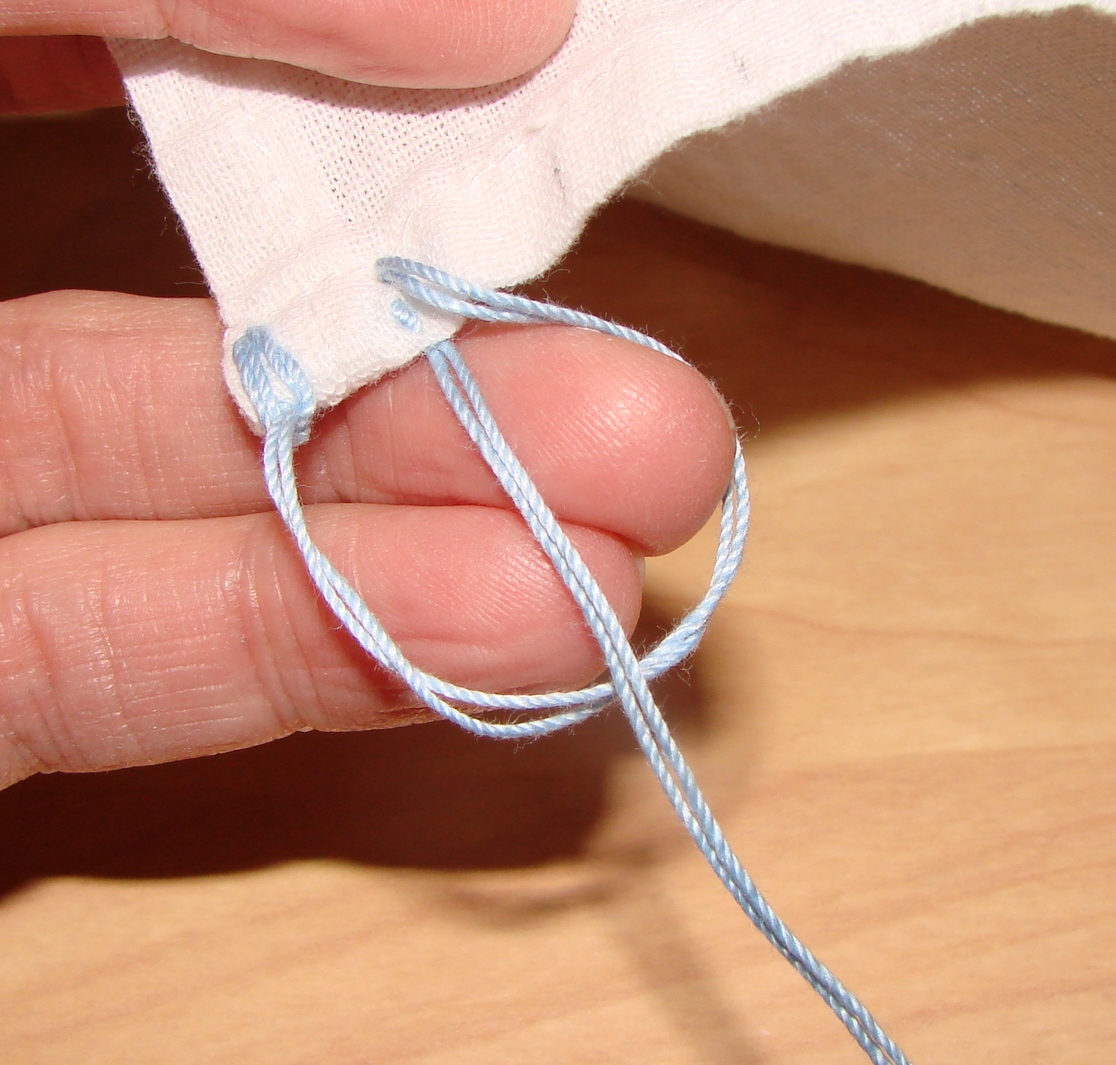
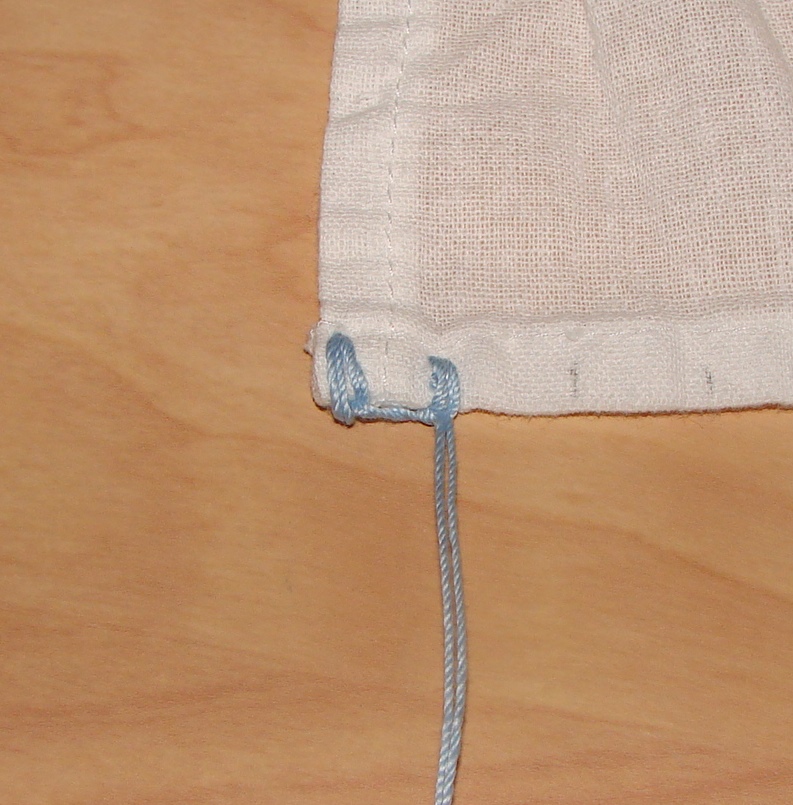
Holding that stitch straight, do the second stitch as before, inserting the needle into the front of the fabric, in the same hole as the first stitch.
Again, pull the stitch, just taut. This stitch looks good:
My stitches tended to pull slightly to the back — I think I pulled them slightly over-tight. Notice how the towel even folds a little bit because the stitching is too tight to allow the fabric to lay flat.
This is what happens if you do not keep the thread at a right angle when you pull the thread taut.
Here is a stitch that has not been pulled quite tight enough — it hangs down instead of being more parallel to the edge of the tea towel.
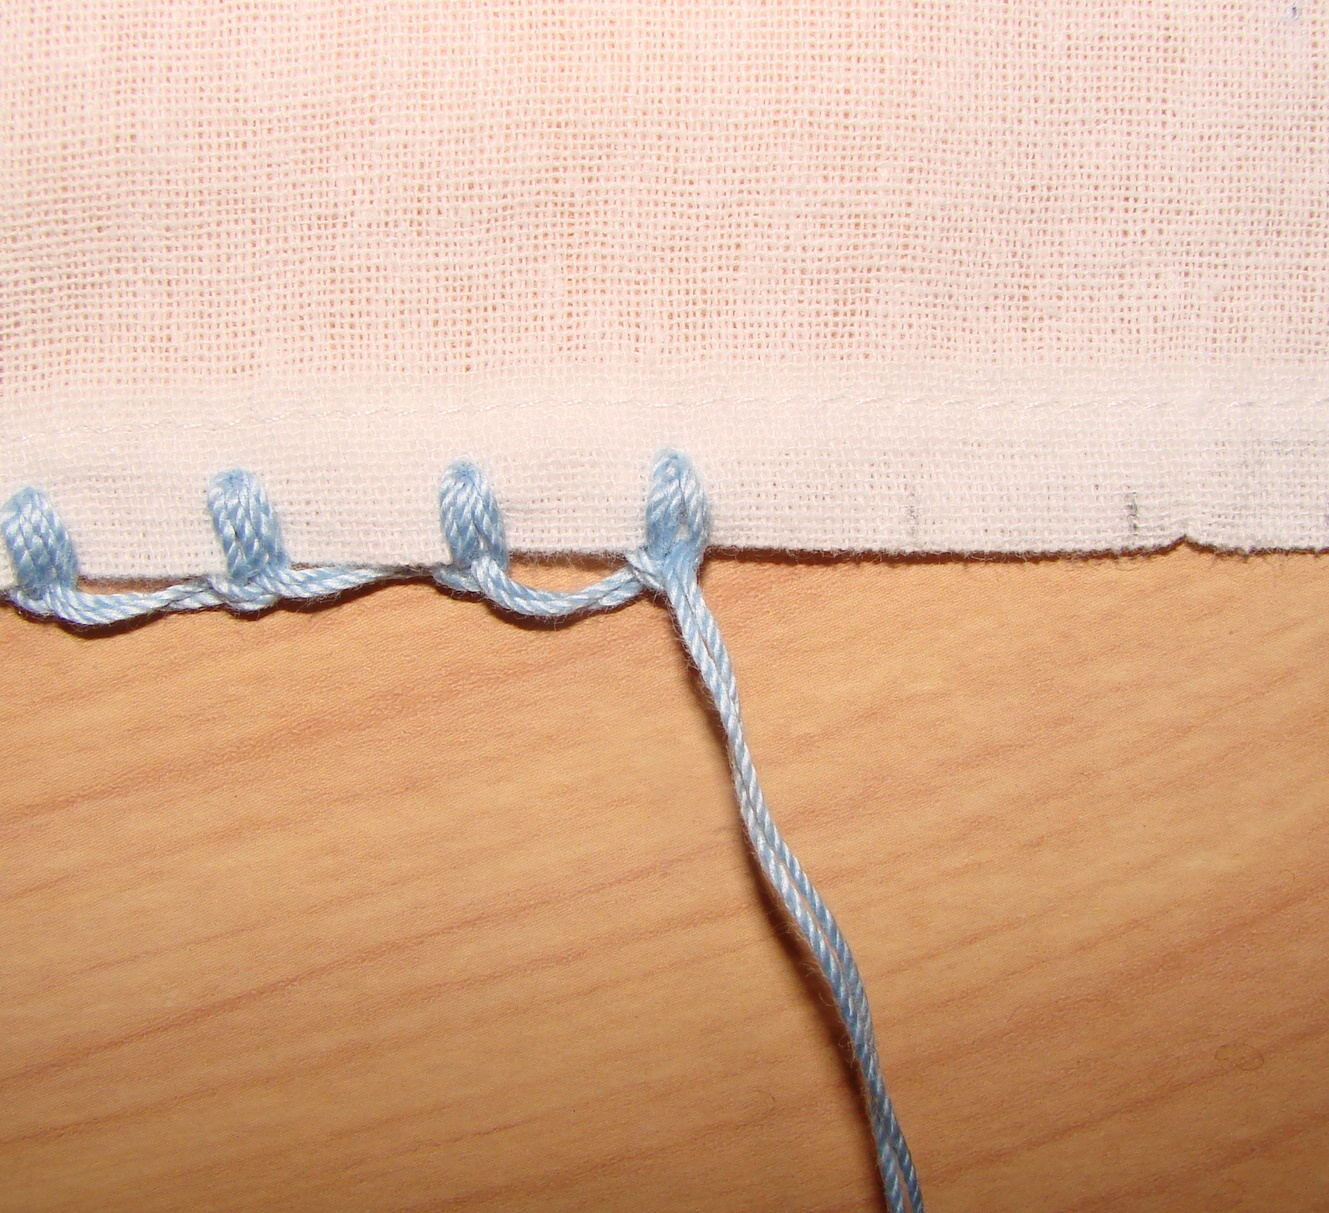
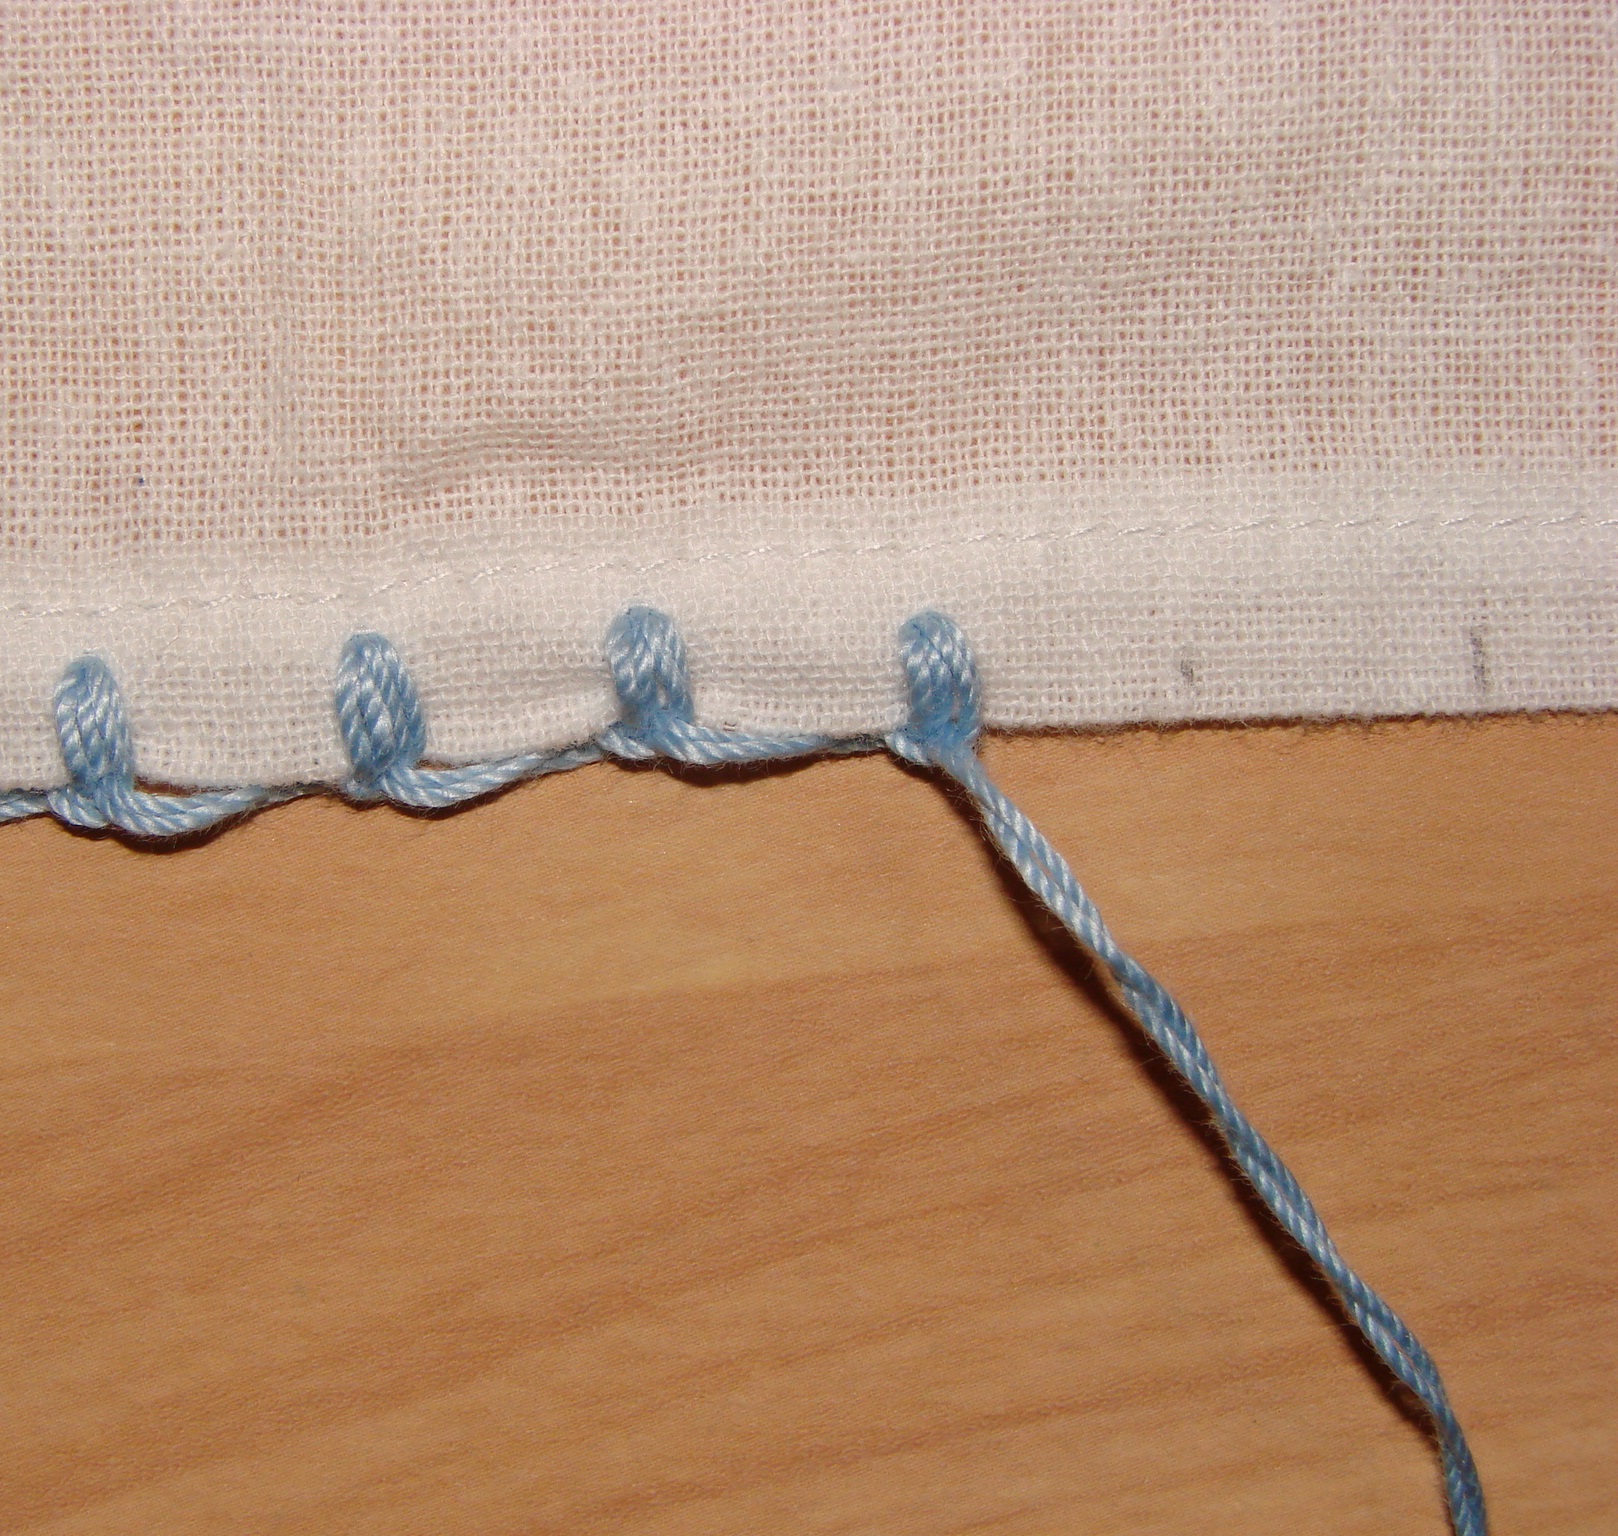
Continue all the way across the edge , putting two stitches at each mark. Try to keep your stitch length fairly consistent. Some web sites say to stitch just on the far side of the edge of the hem, enclosing the entire hem with each stitch. I purposefully don’t do that — I stitch into the hem, with the idea that the stitching will be less likely to weaken the fabric and cause it to tear, if the stitches are in a doubled or tripled thickness of fabric.
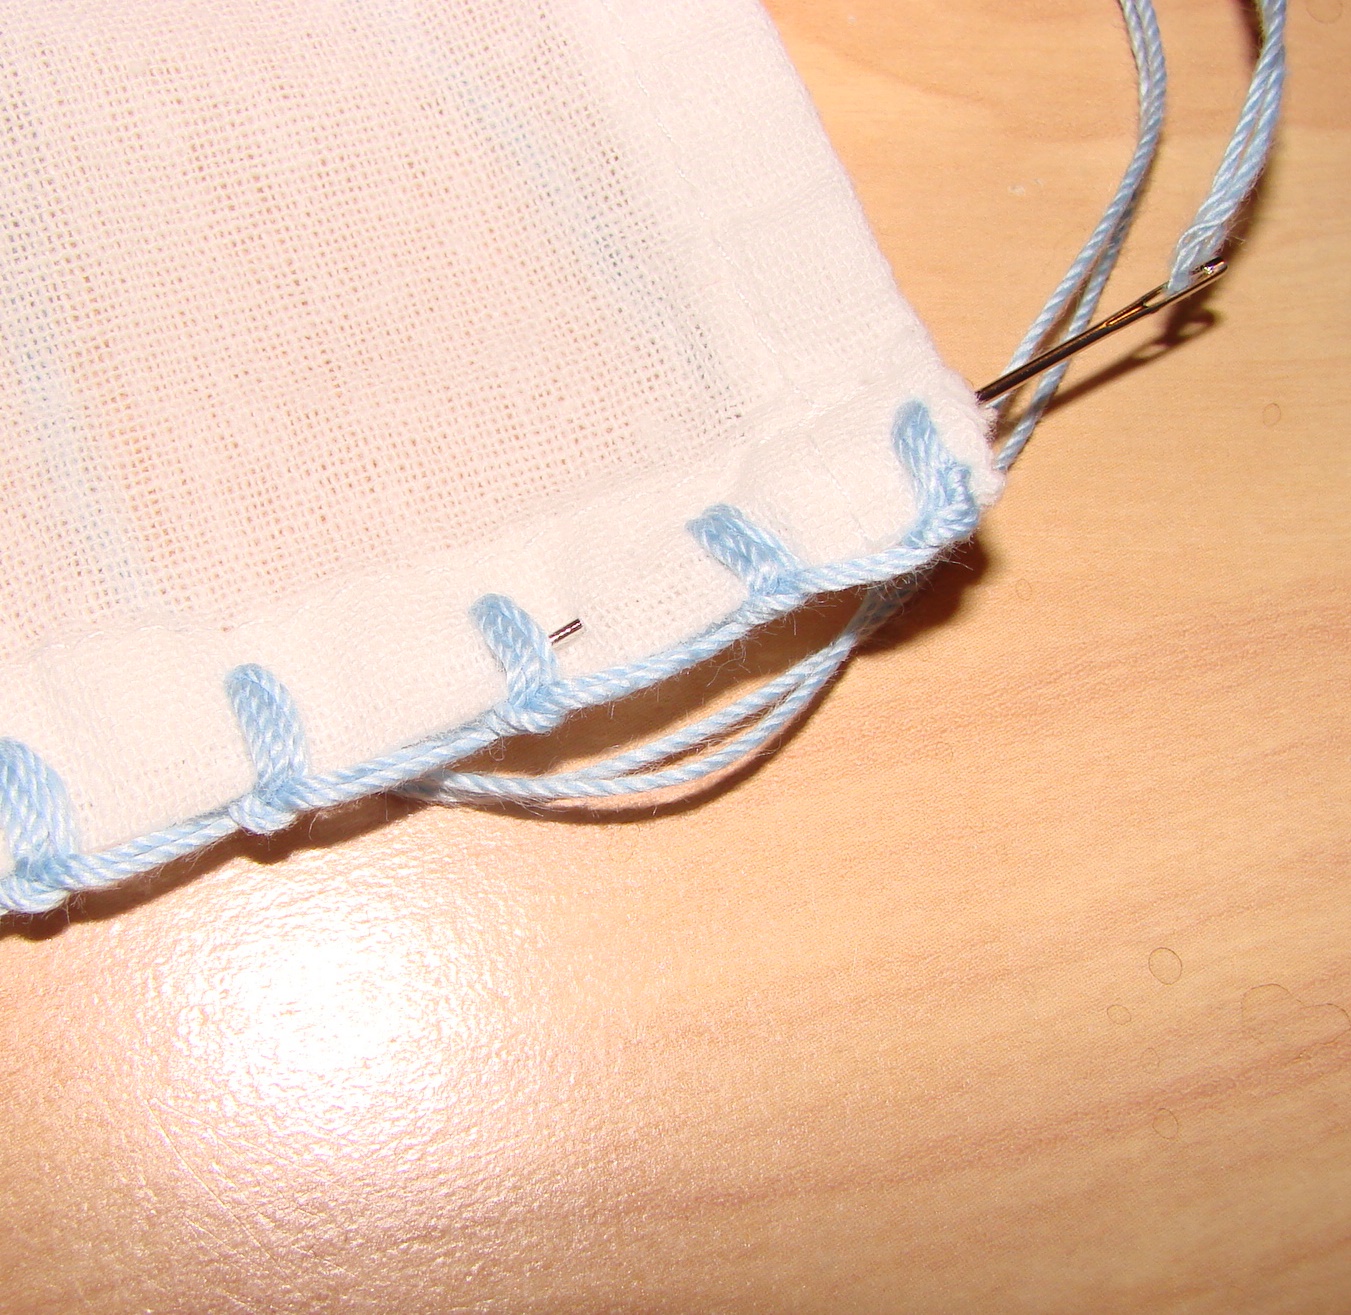
So when you get to the end of the edge, make your last stitch just a little way in from the edge, like you did on the other end.
For the last stitch, you need to take one extra little “insurance” stitch, to keep the stitches nice and vertical, preventing it from creeping over to the side. This is what you want to avoid:
So do your two stitches almost-but-not-quite-at-the-edge, making sure the stitches stay vertical when you first pull them tight…
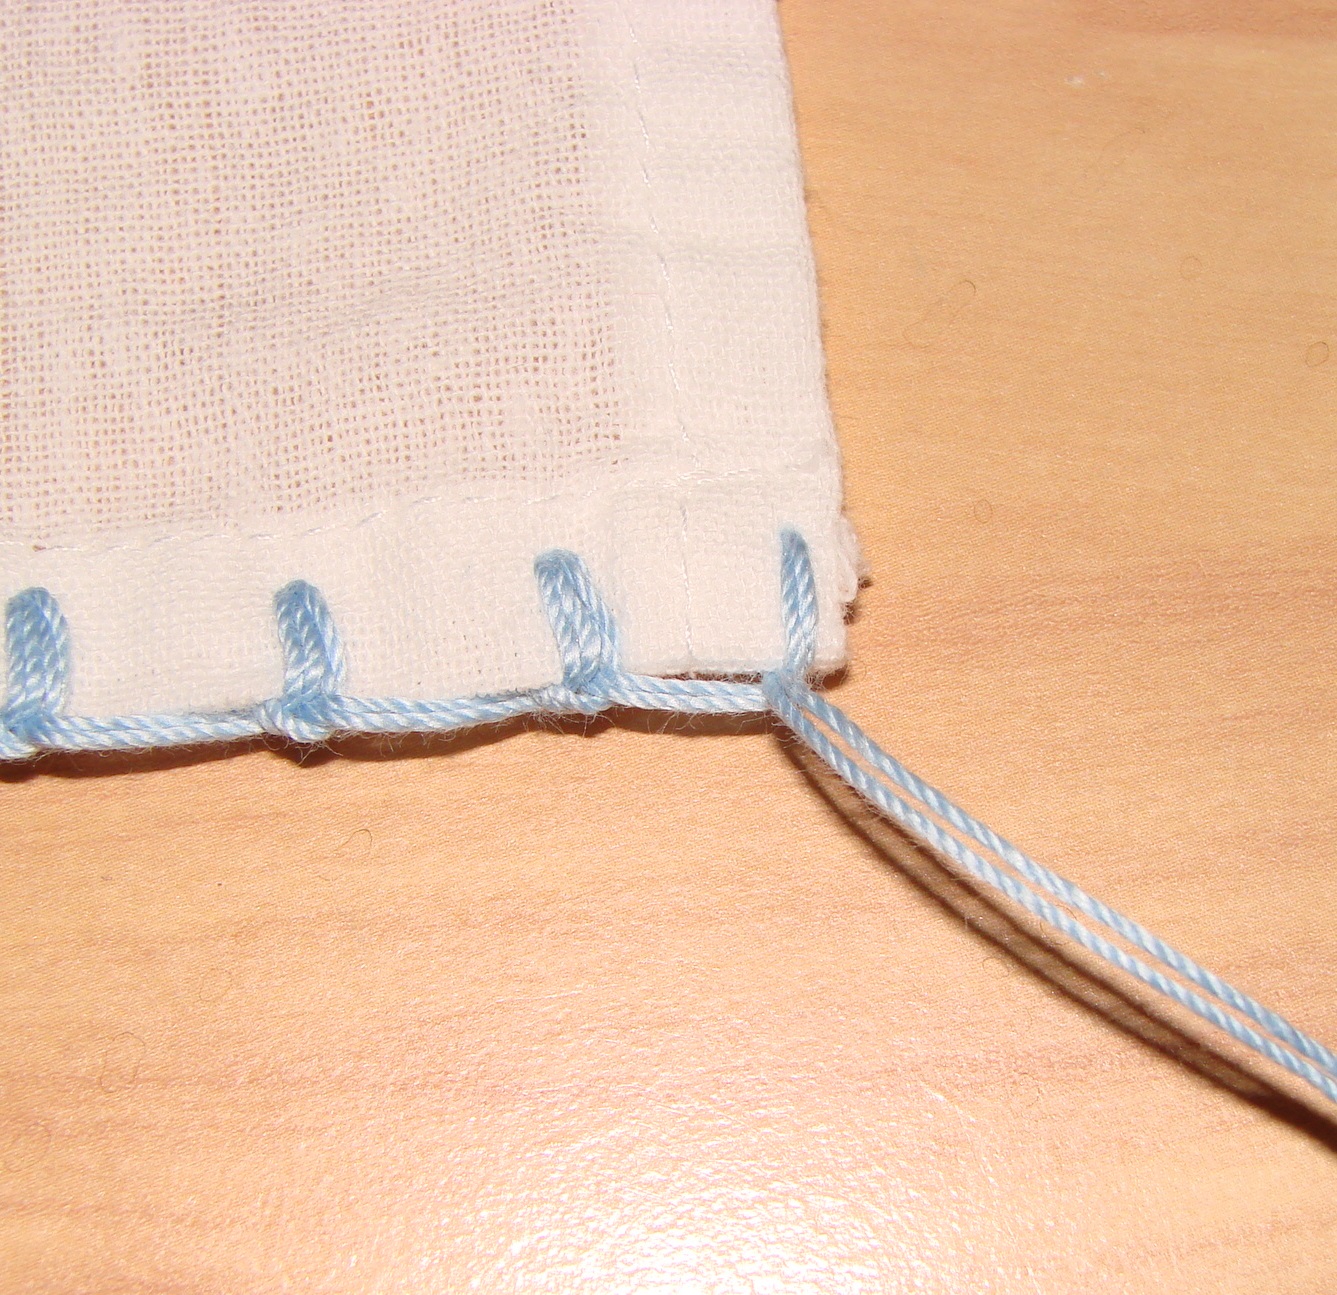
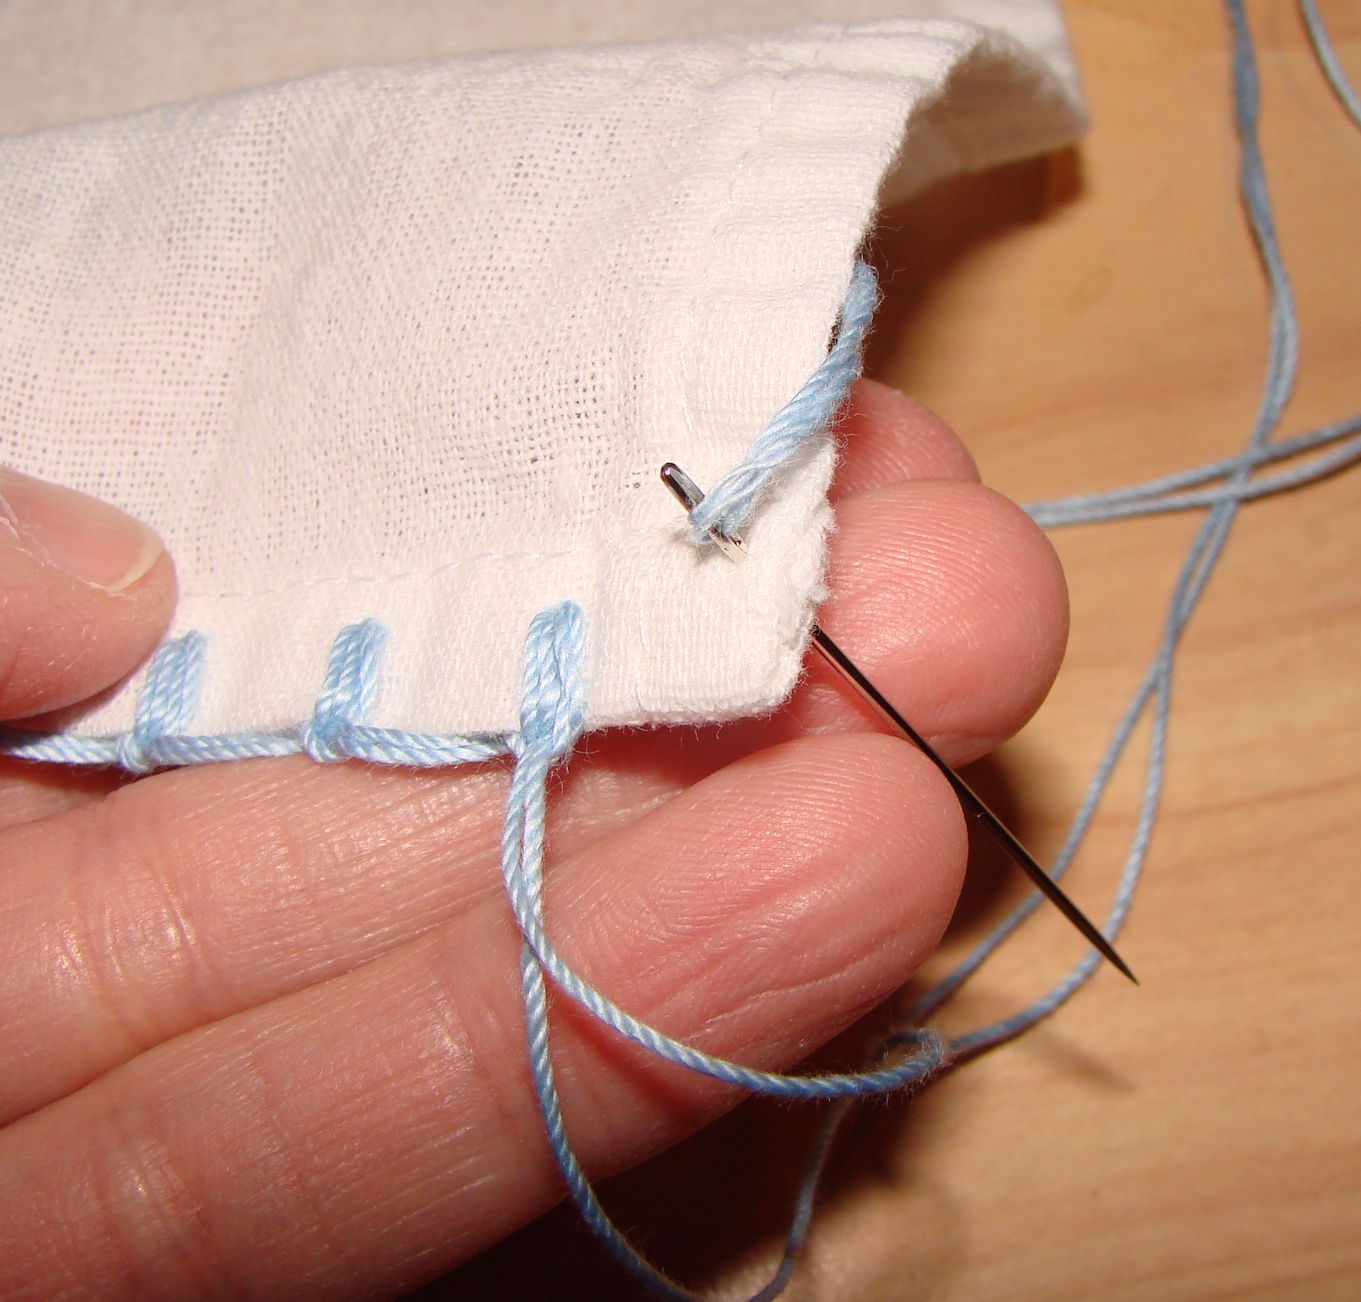
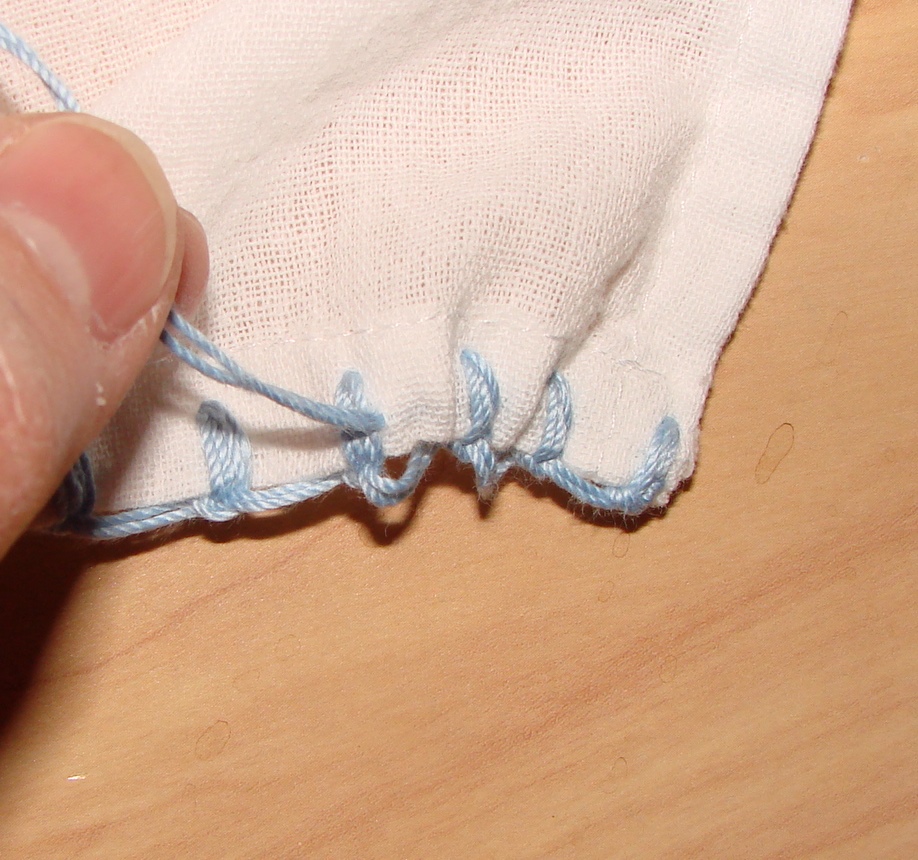
… and then take that “insurance stitch” across the bottom of the stitching and upward into the hem area. The needle should emerge on the back of the fabric, close to the top of the last decorative stitch. (If you are a perfectionist, try to get it to come out the exact same hole at the top.)
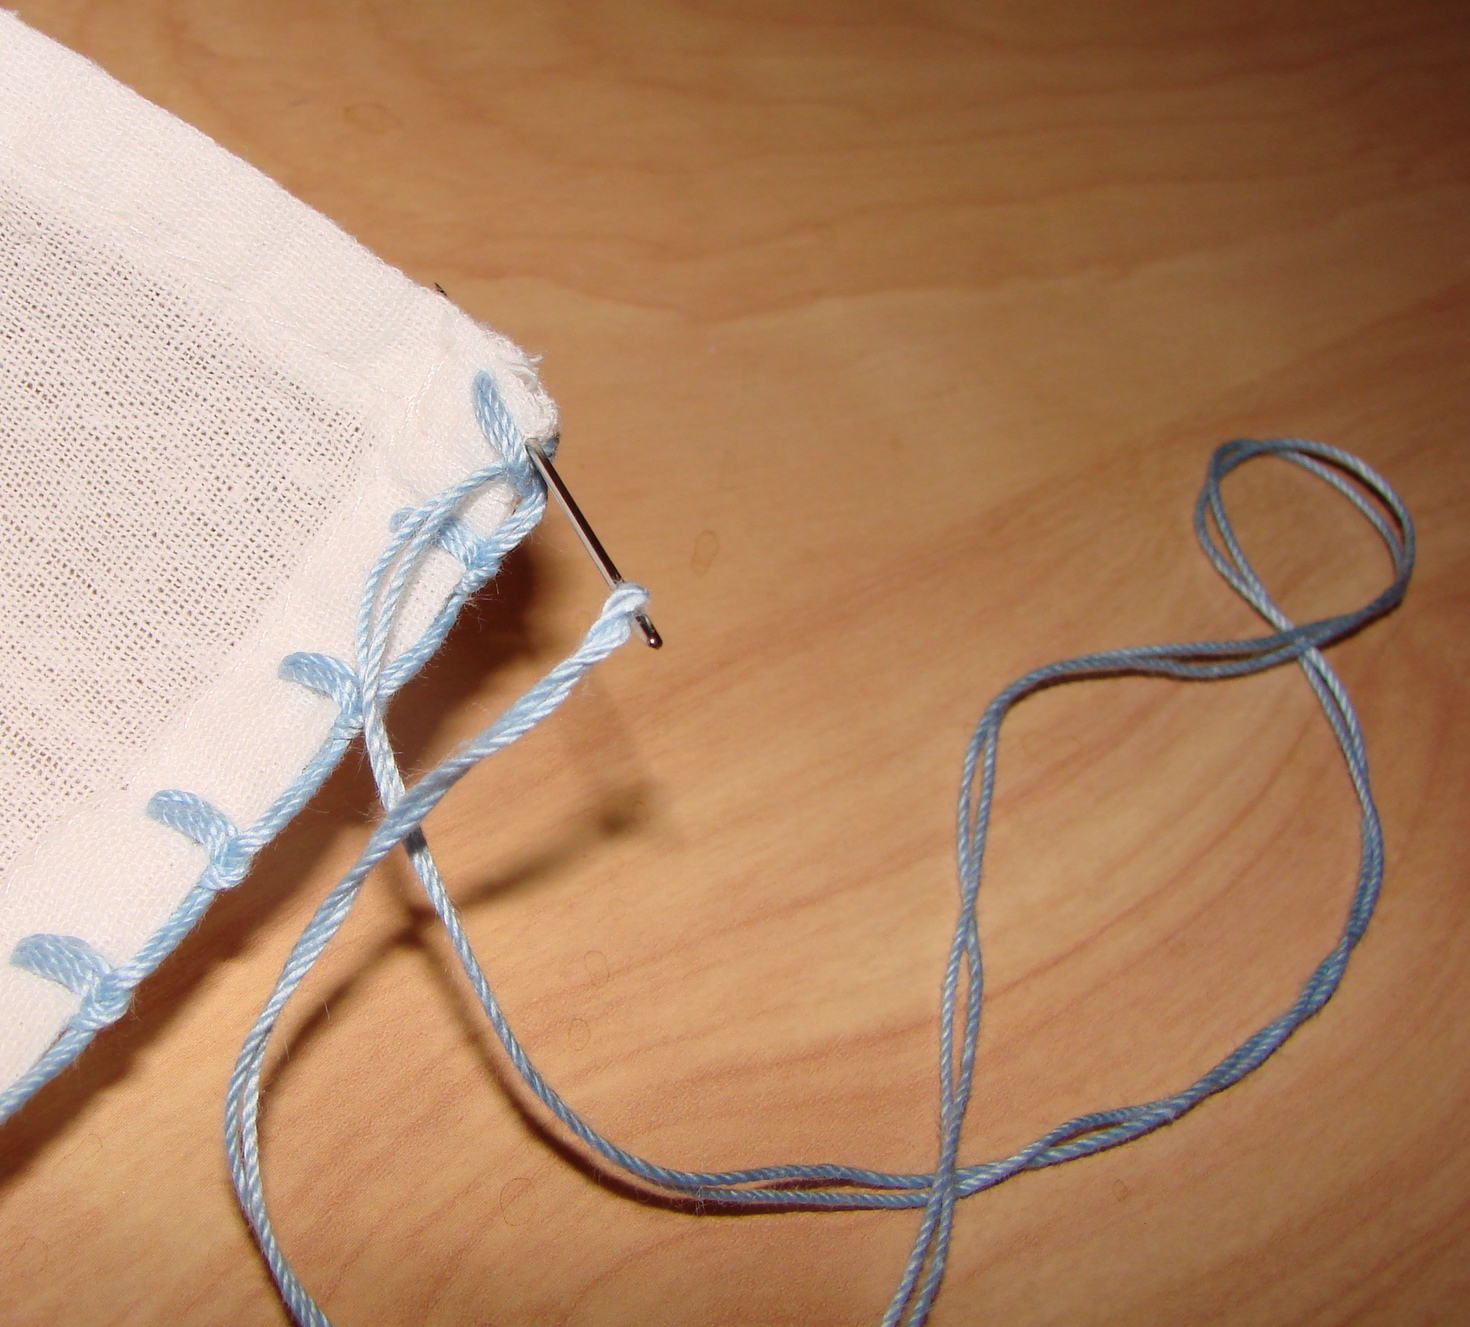
Then tie a little knot on the back there, by inserting the needle underneath the decorative stitches, and then putting the needle through the resulting loop.
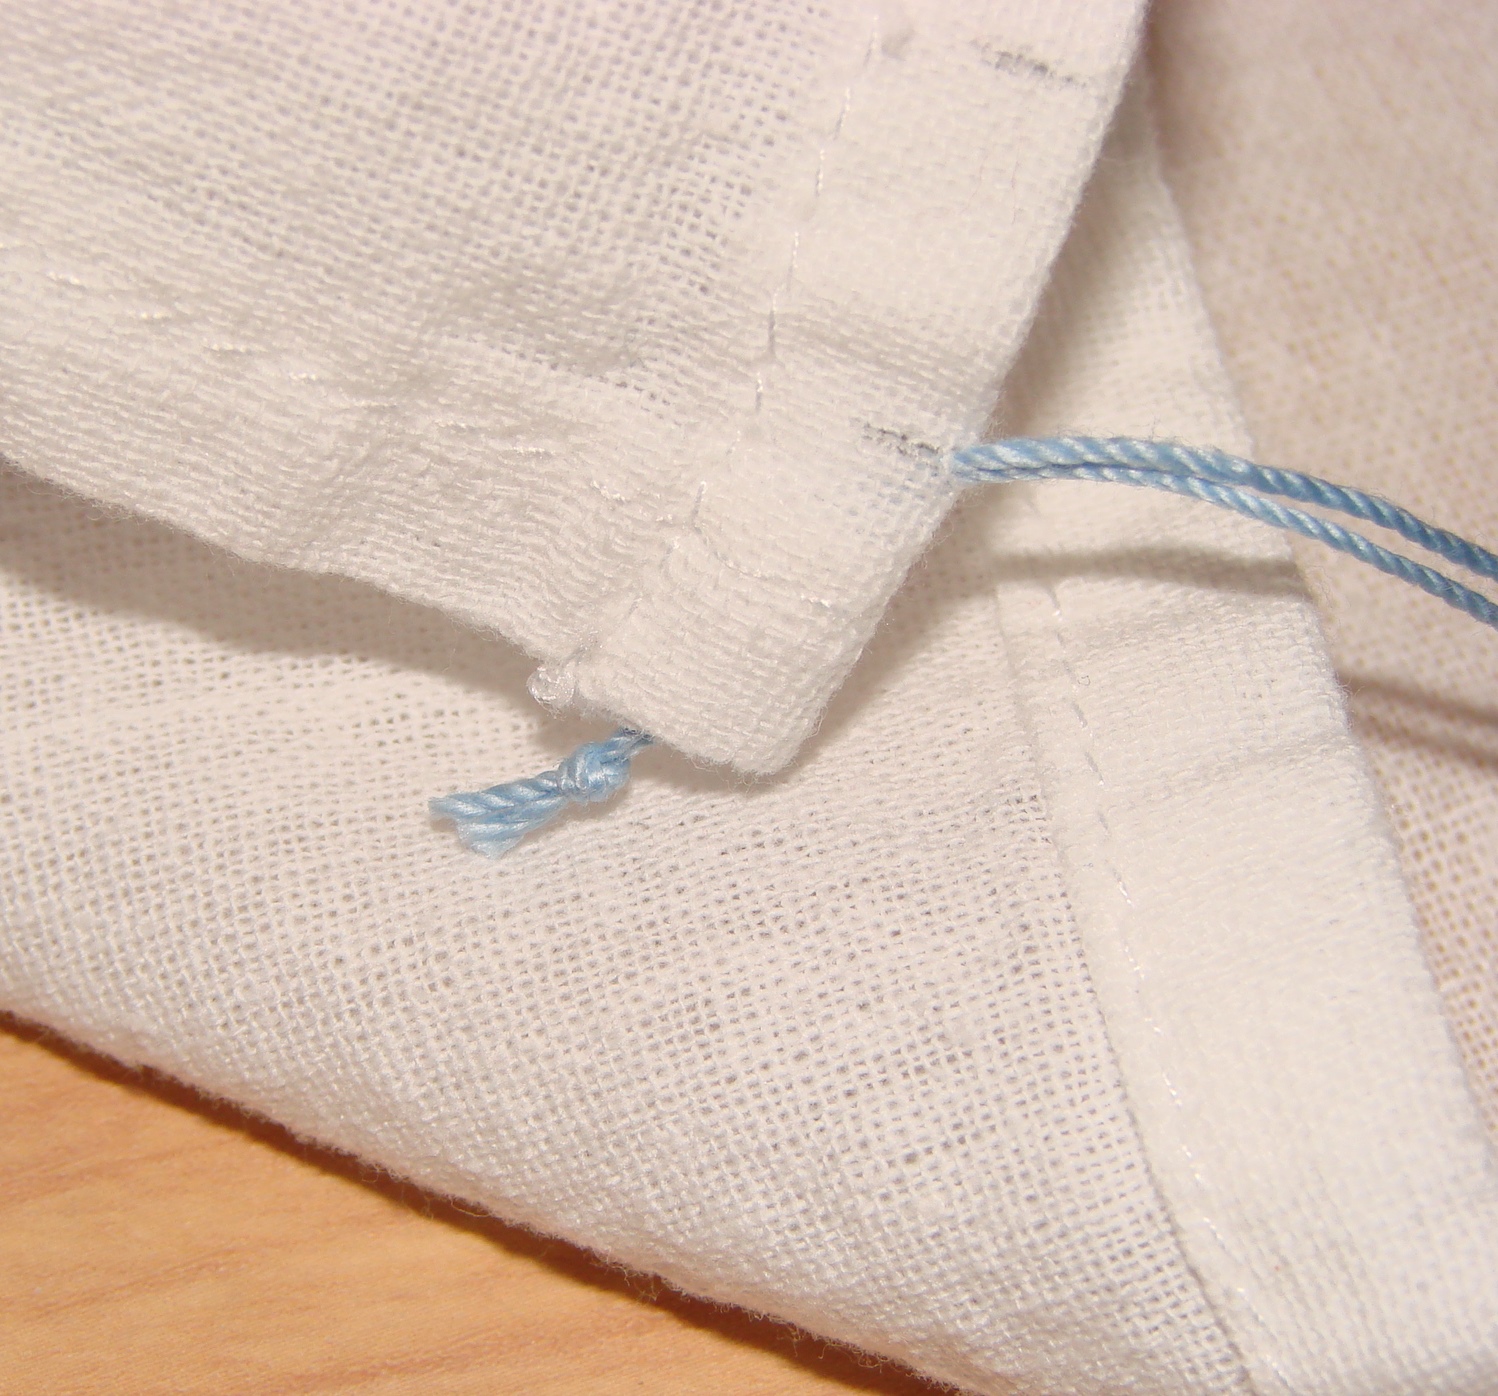
Then to hide the loose end of the thread, put the needle into the hem fabric, headed back toward the center.
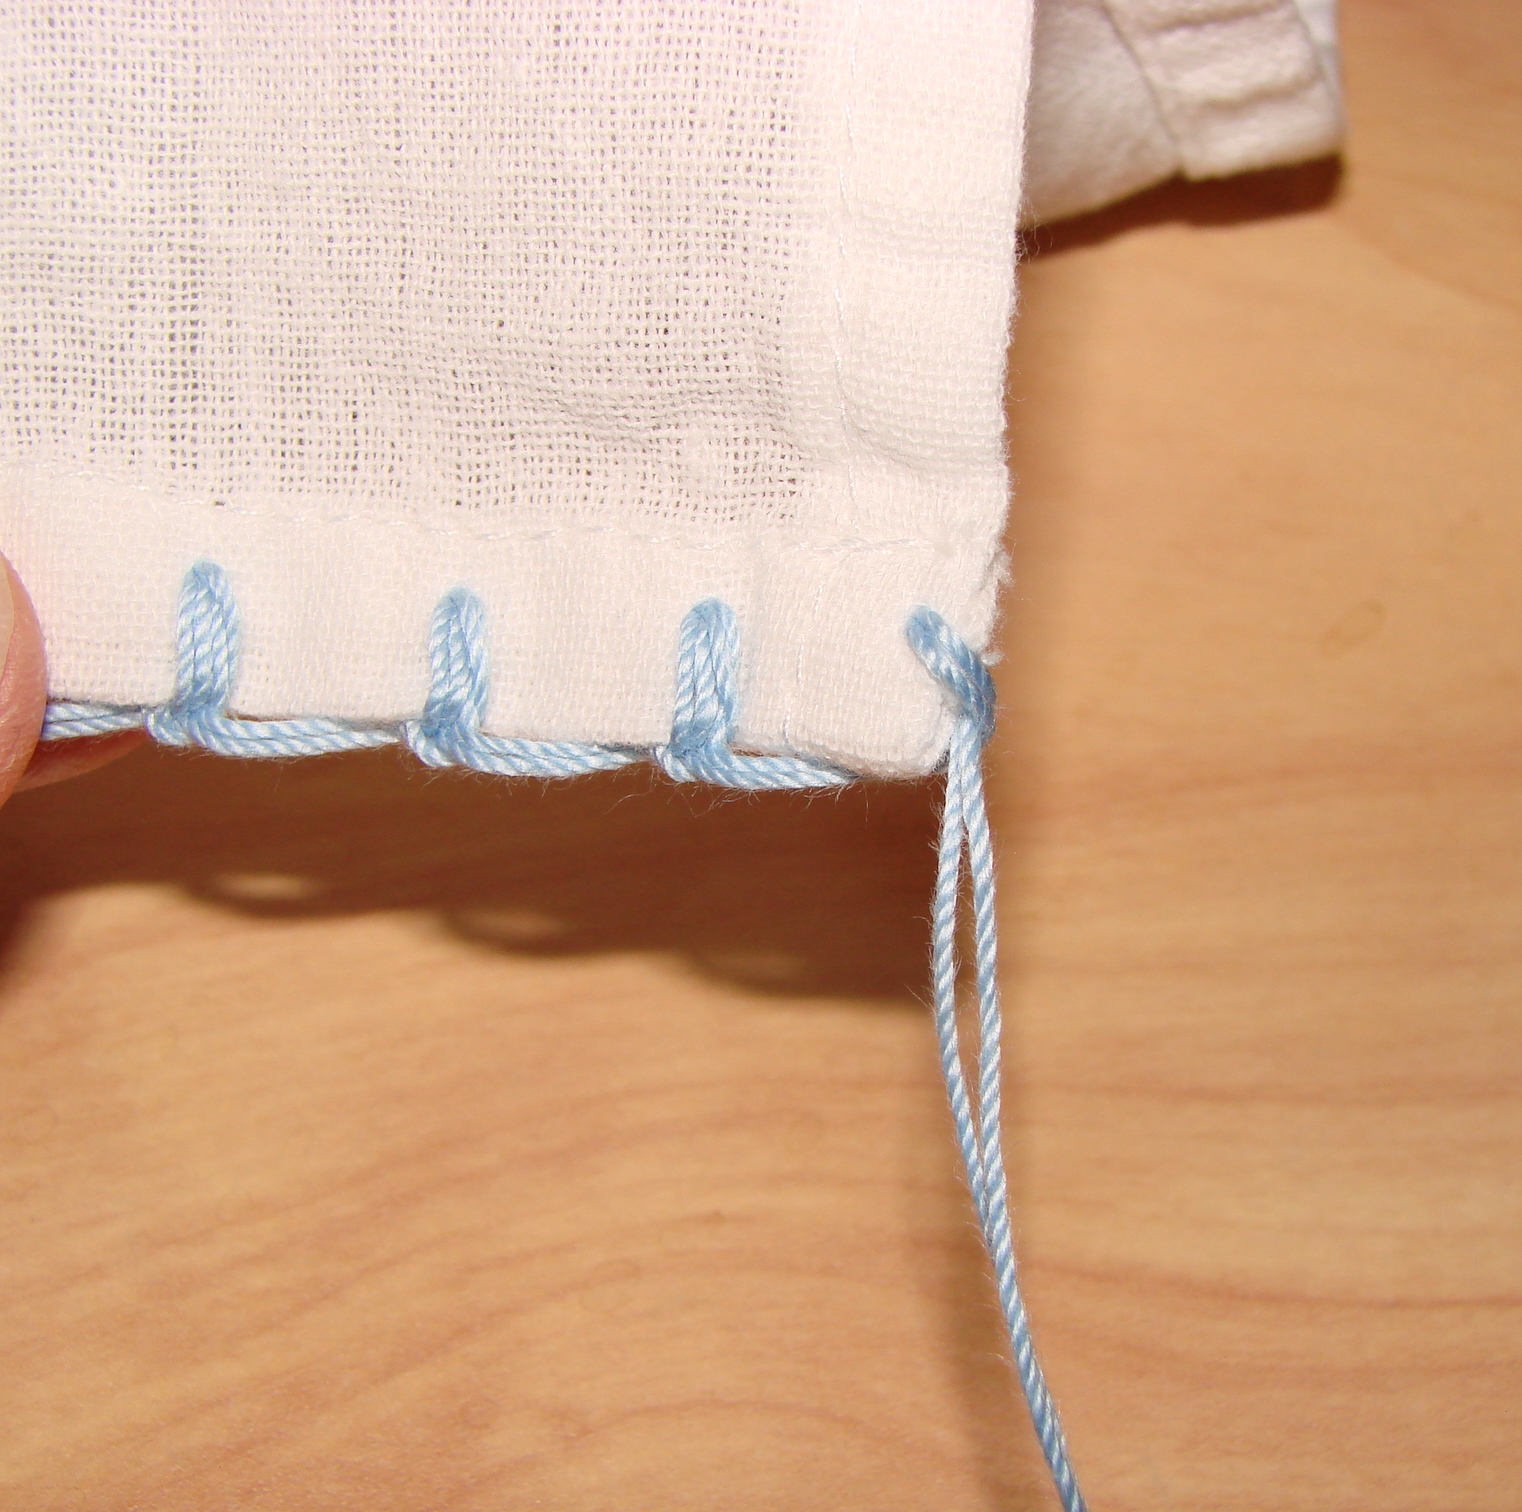
Be sure that the needle stays totally hidden inside the hem (look at both sides of the fabric to make sure), and then let it emerge an inch or two from the side edge.
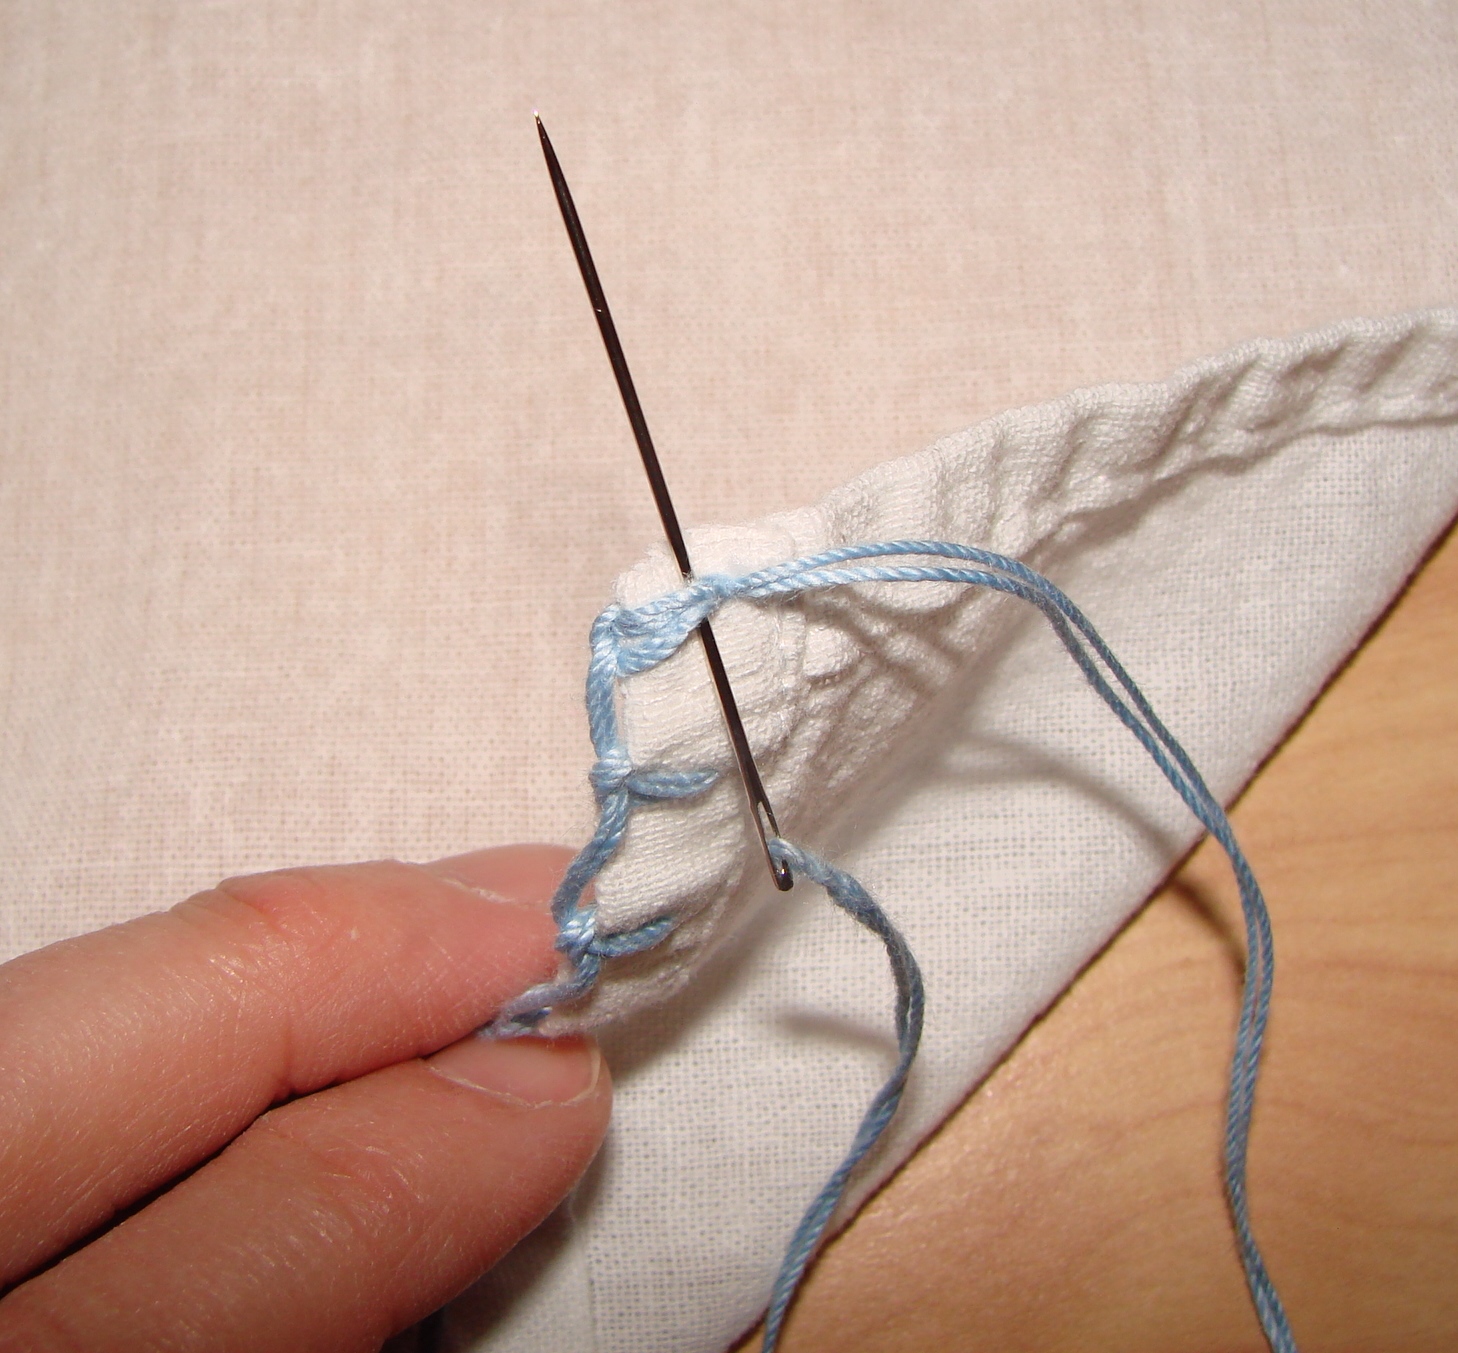
Pull the thread tight enough so the fabric starts to bunch up.
Snip the threads, and then smooth the fabric out flat again, so that the loose threads disappear into the hem.
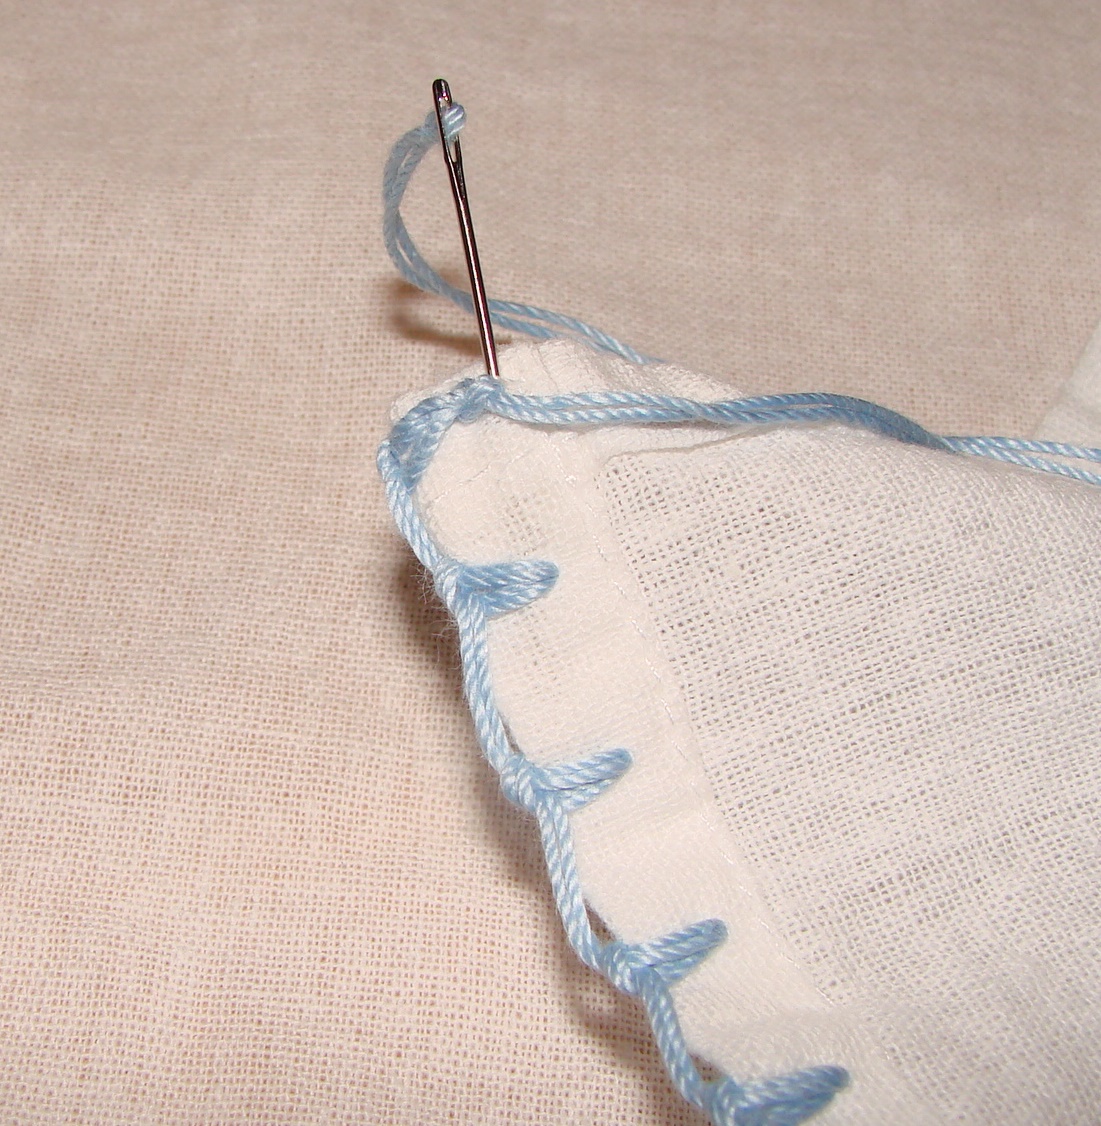
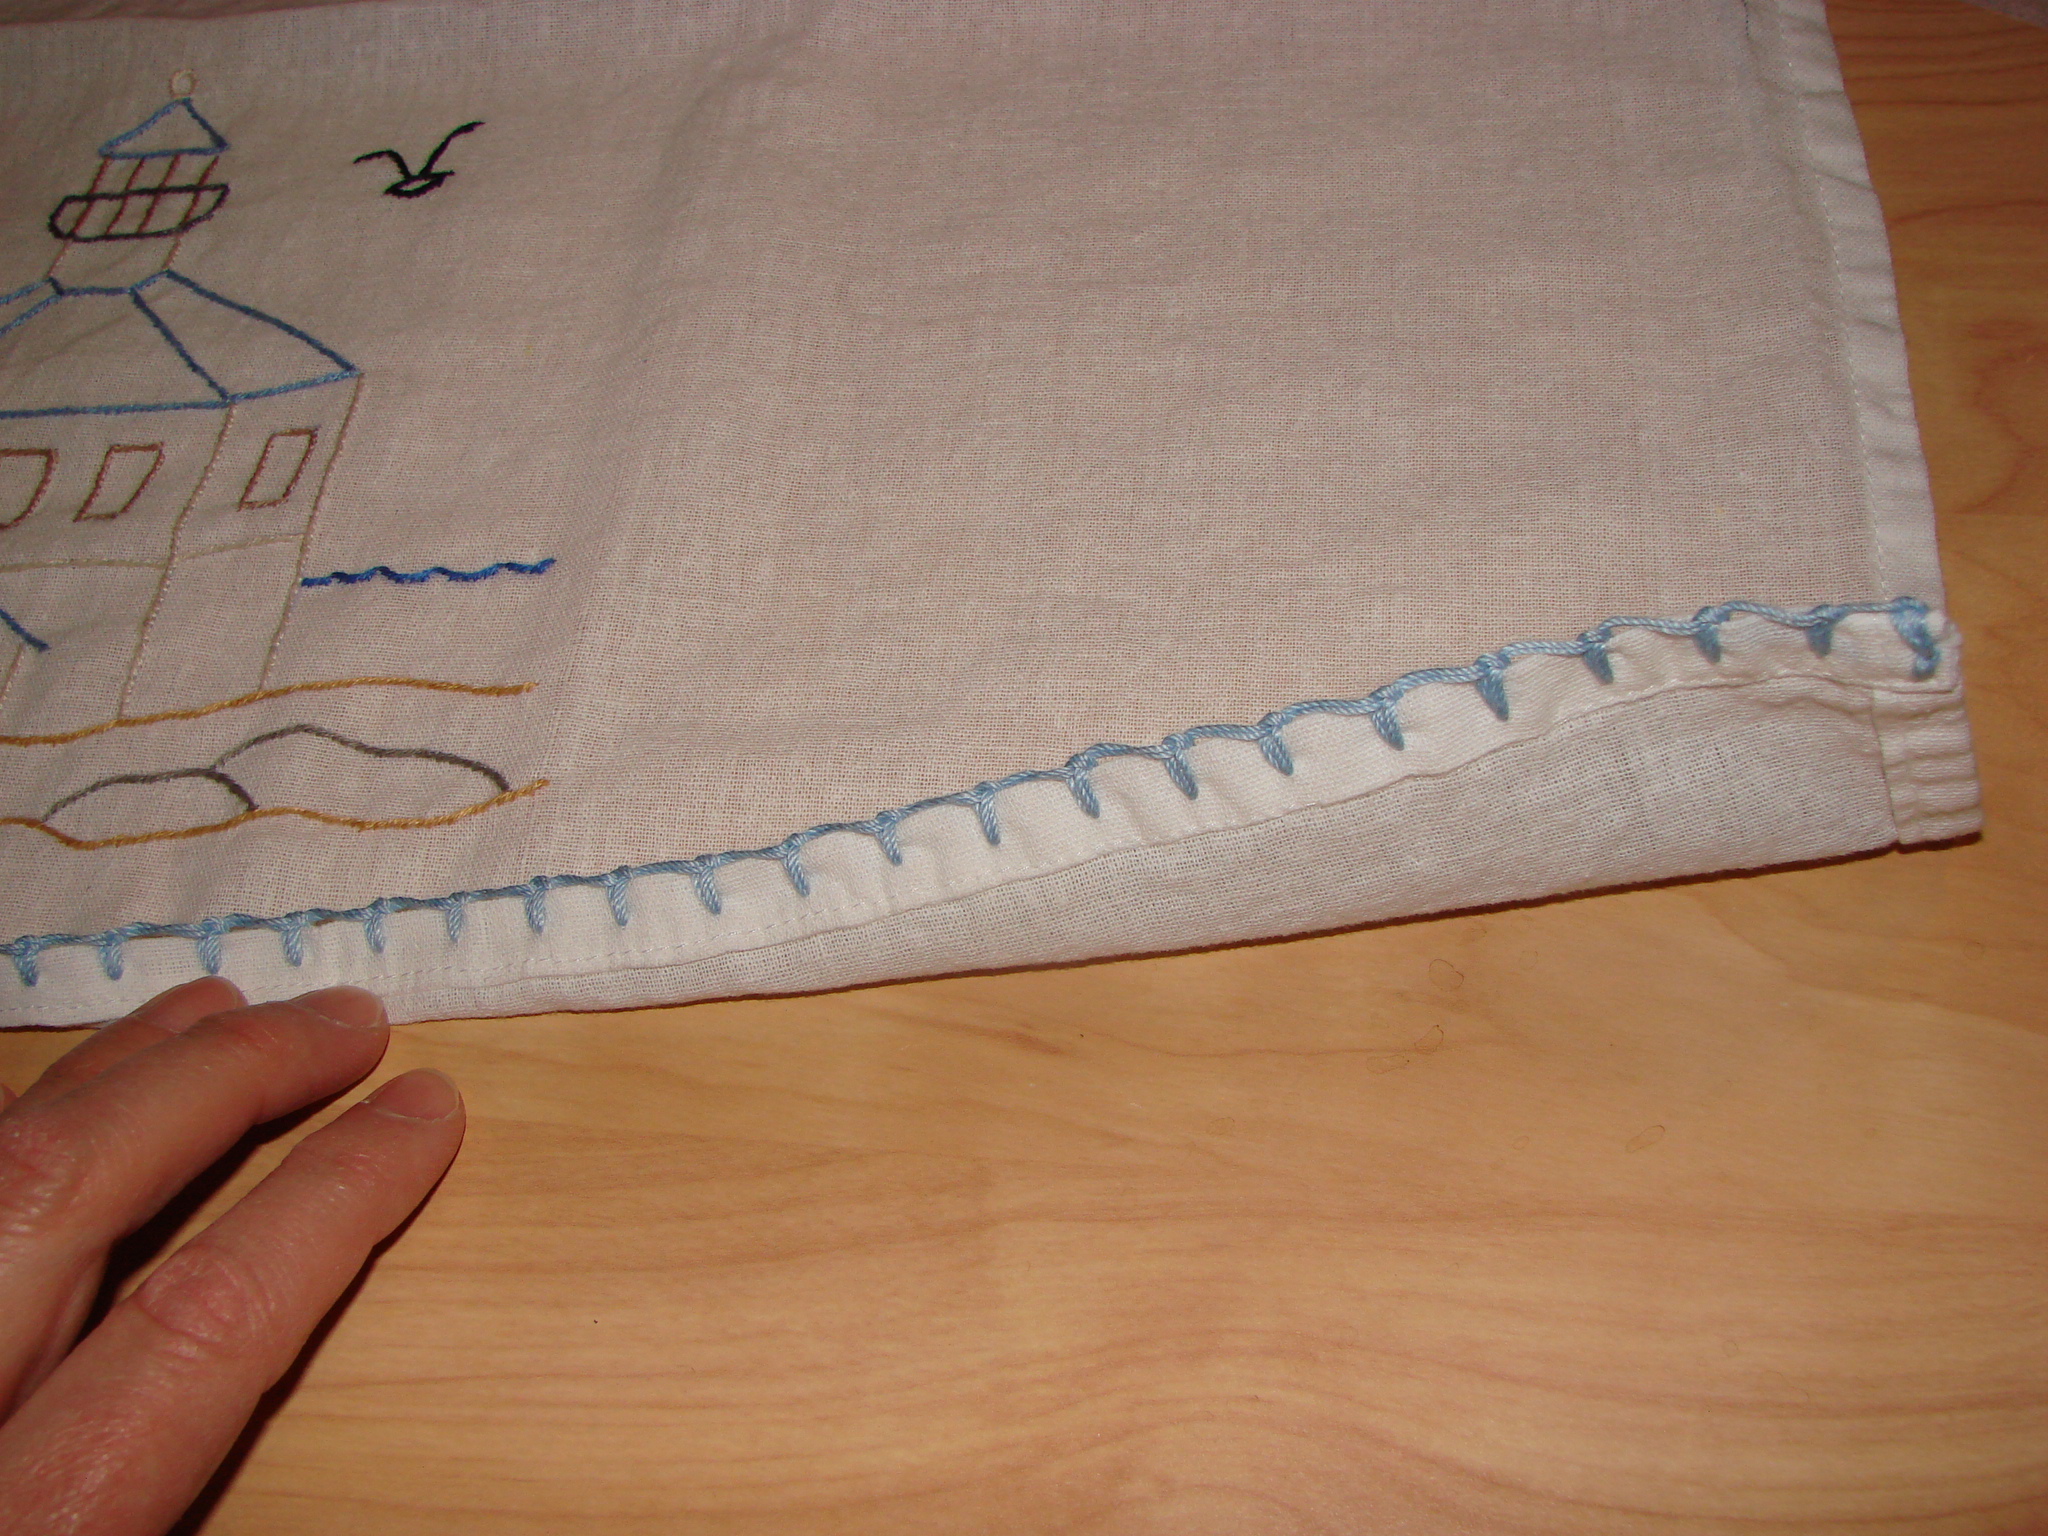
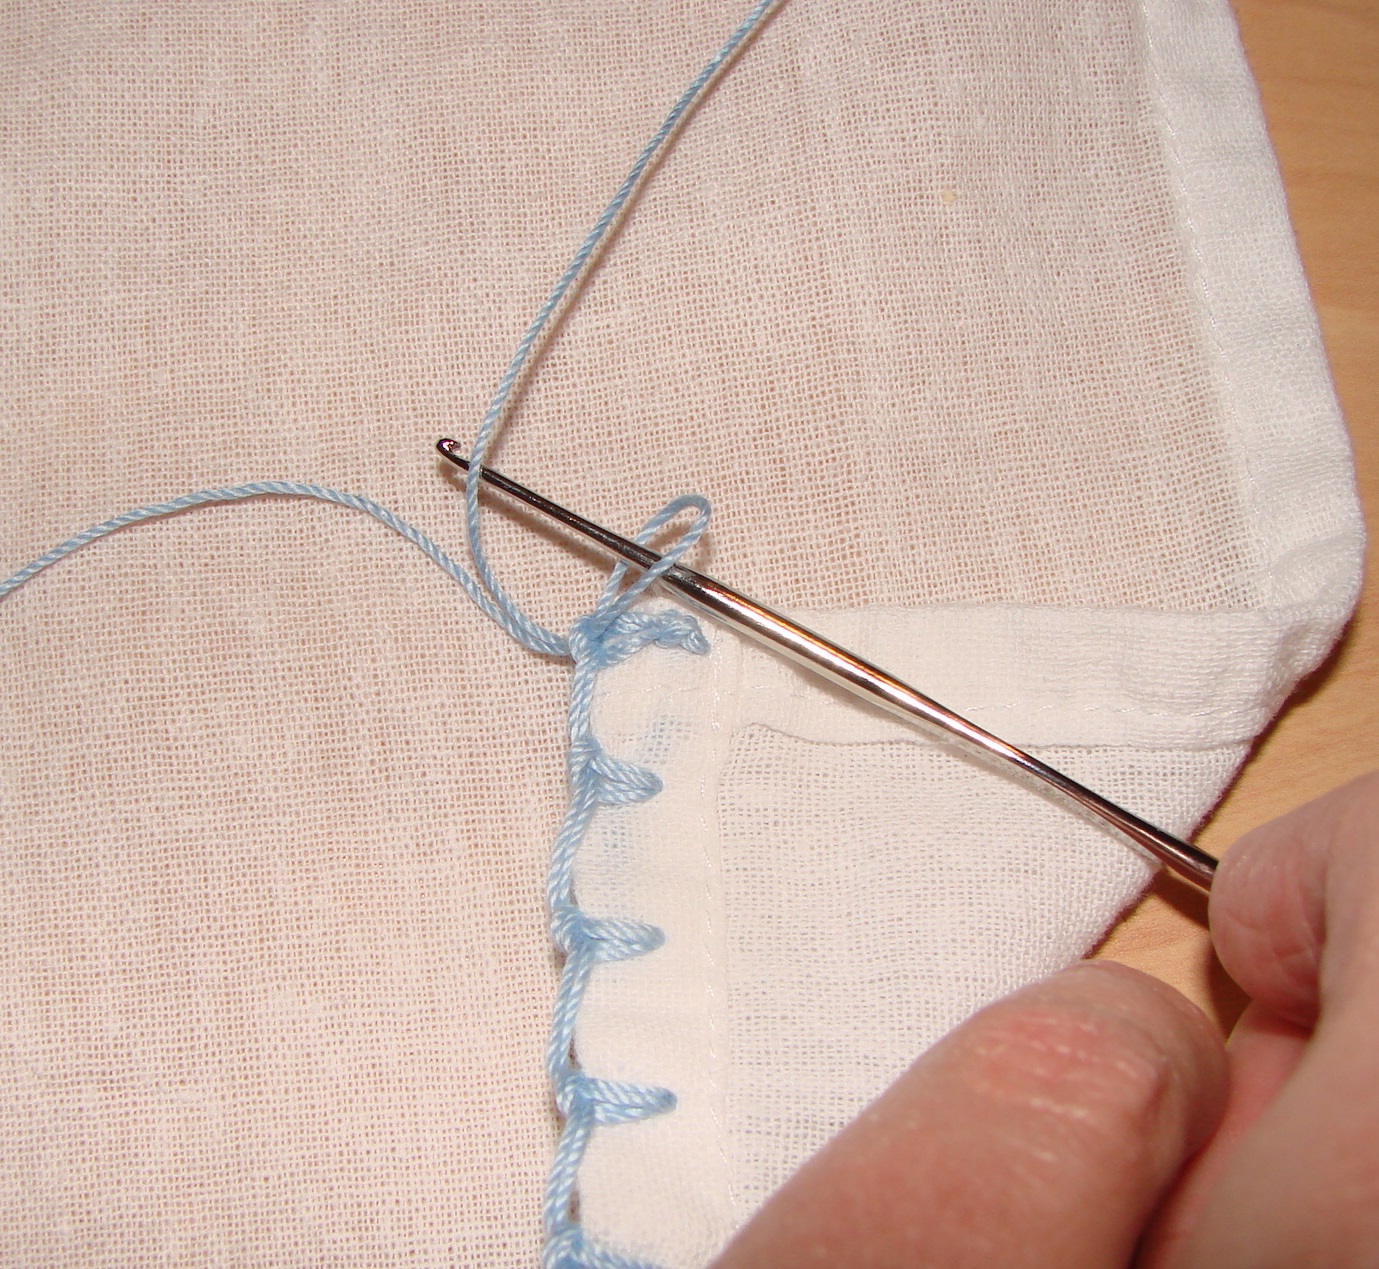
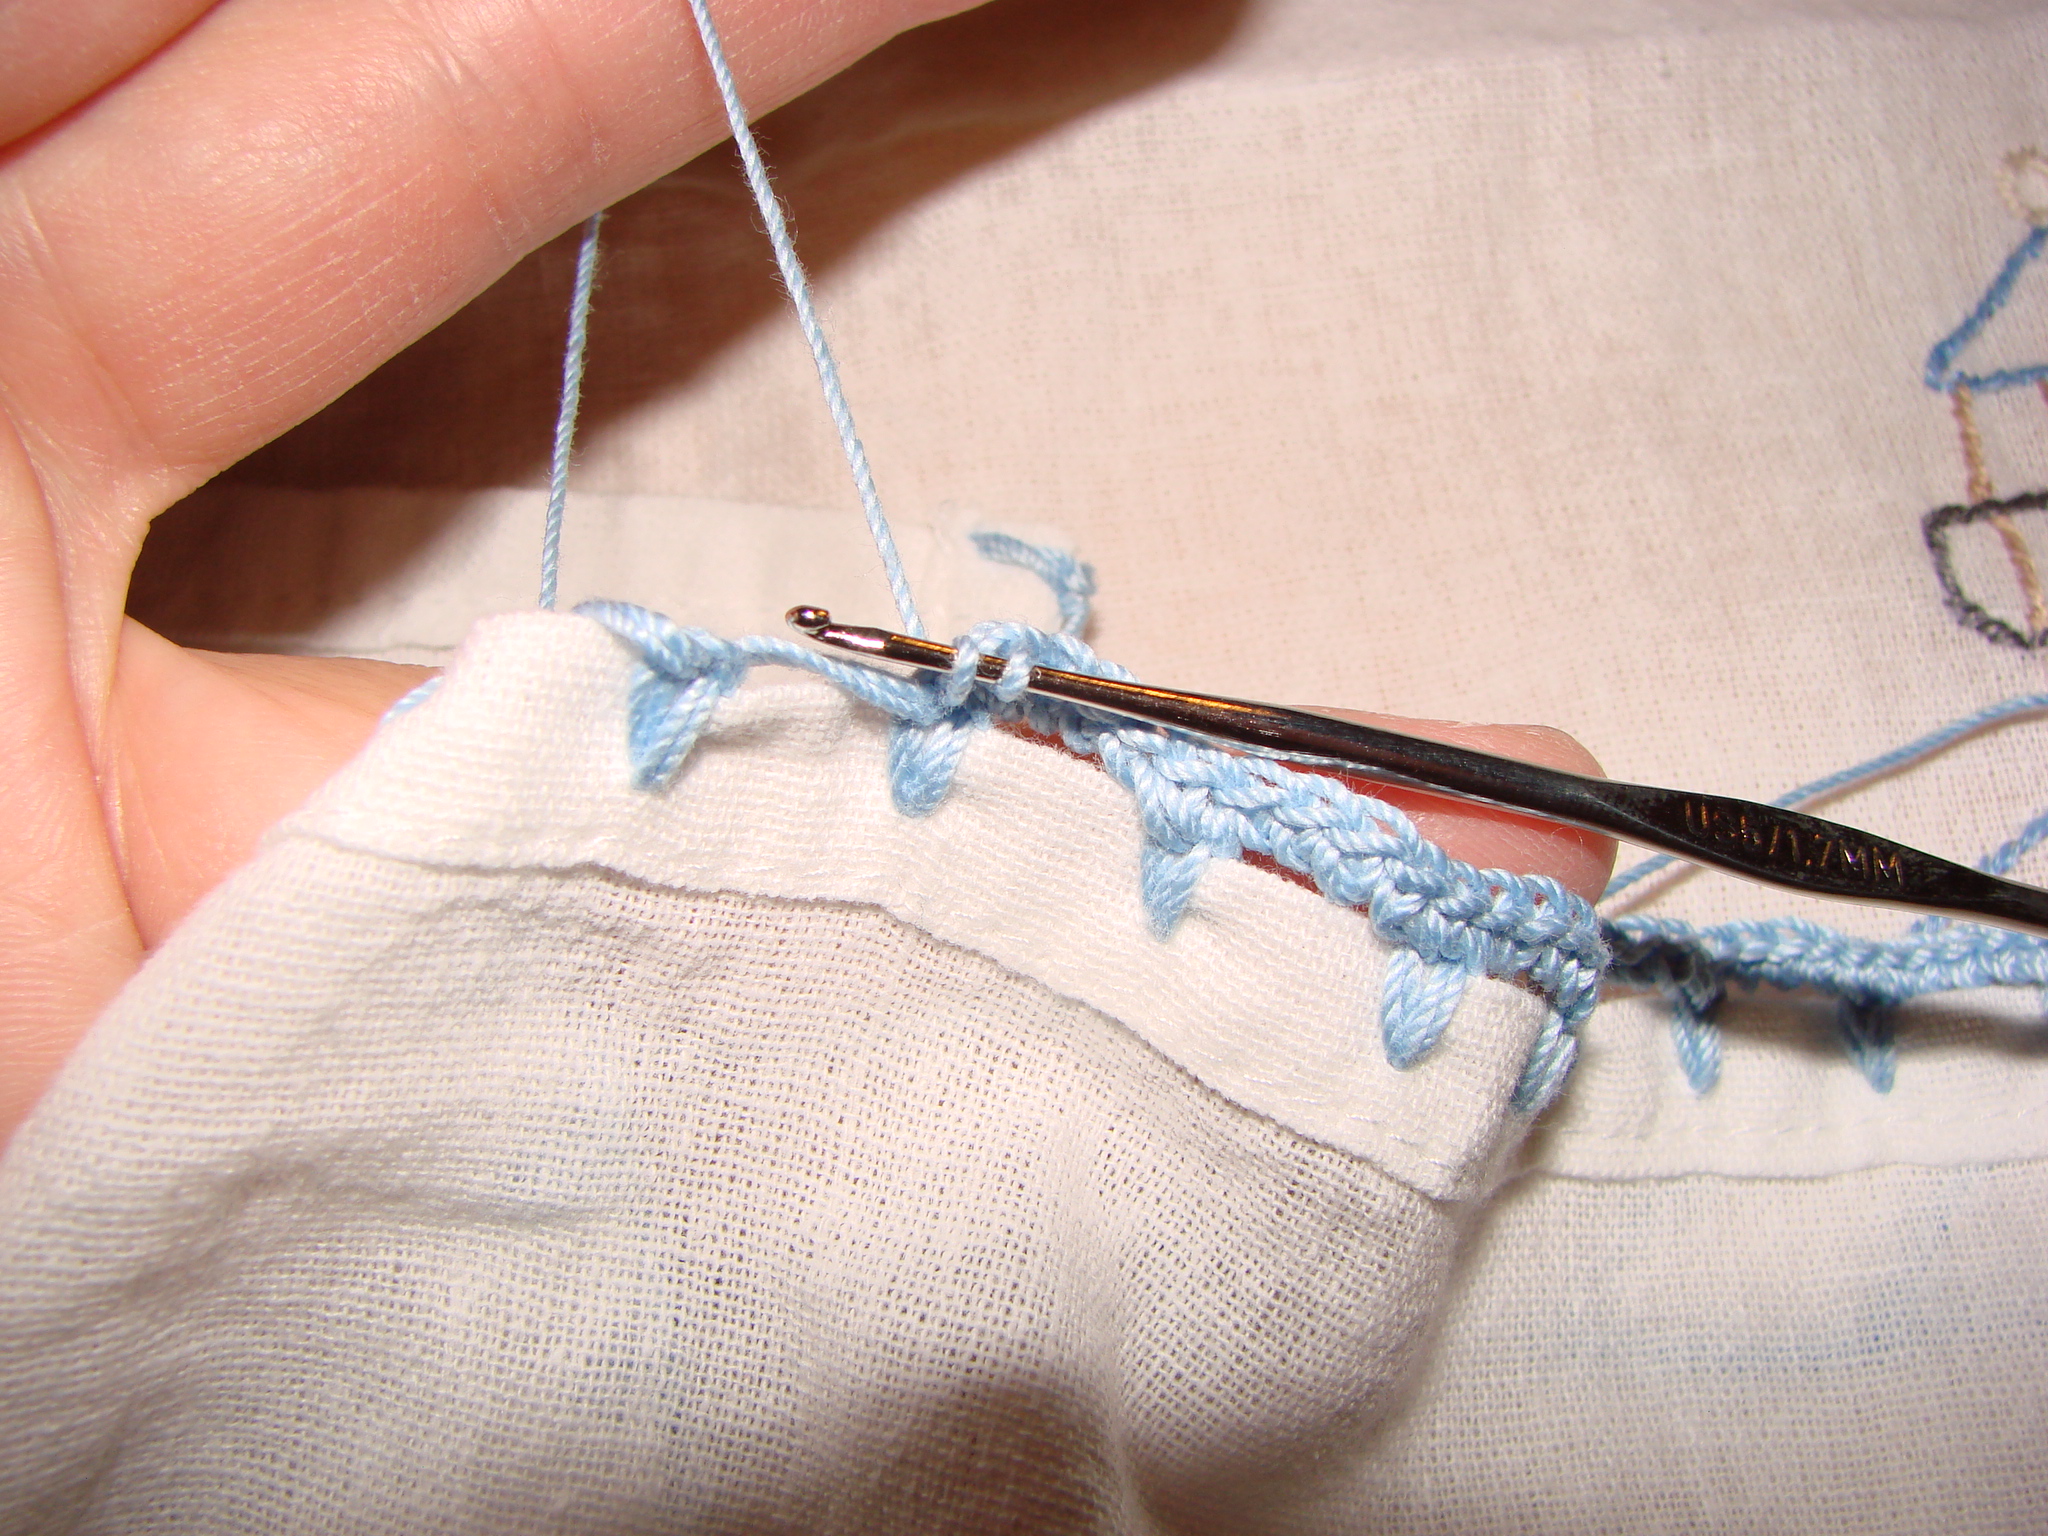
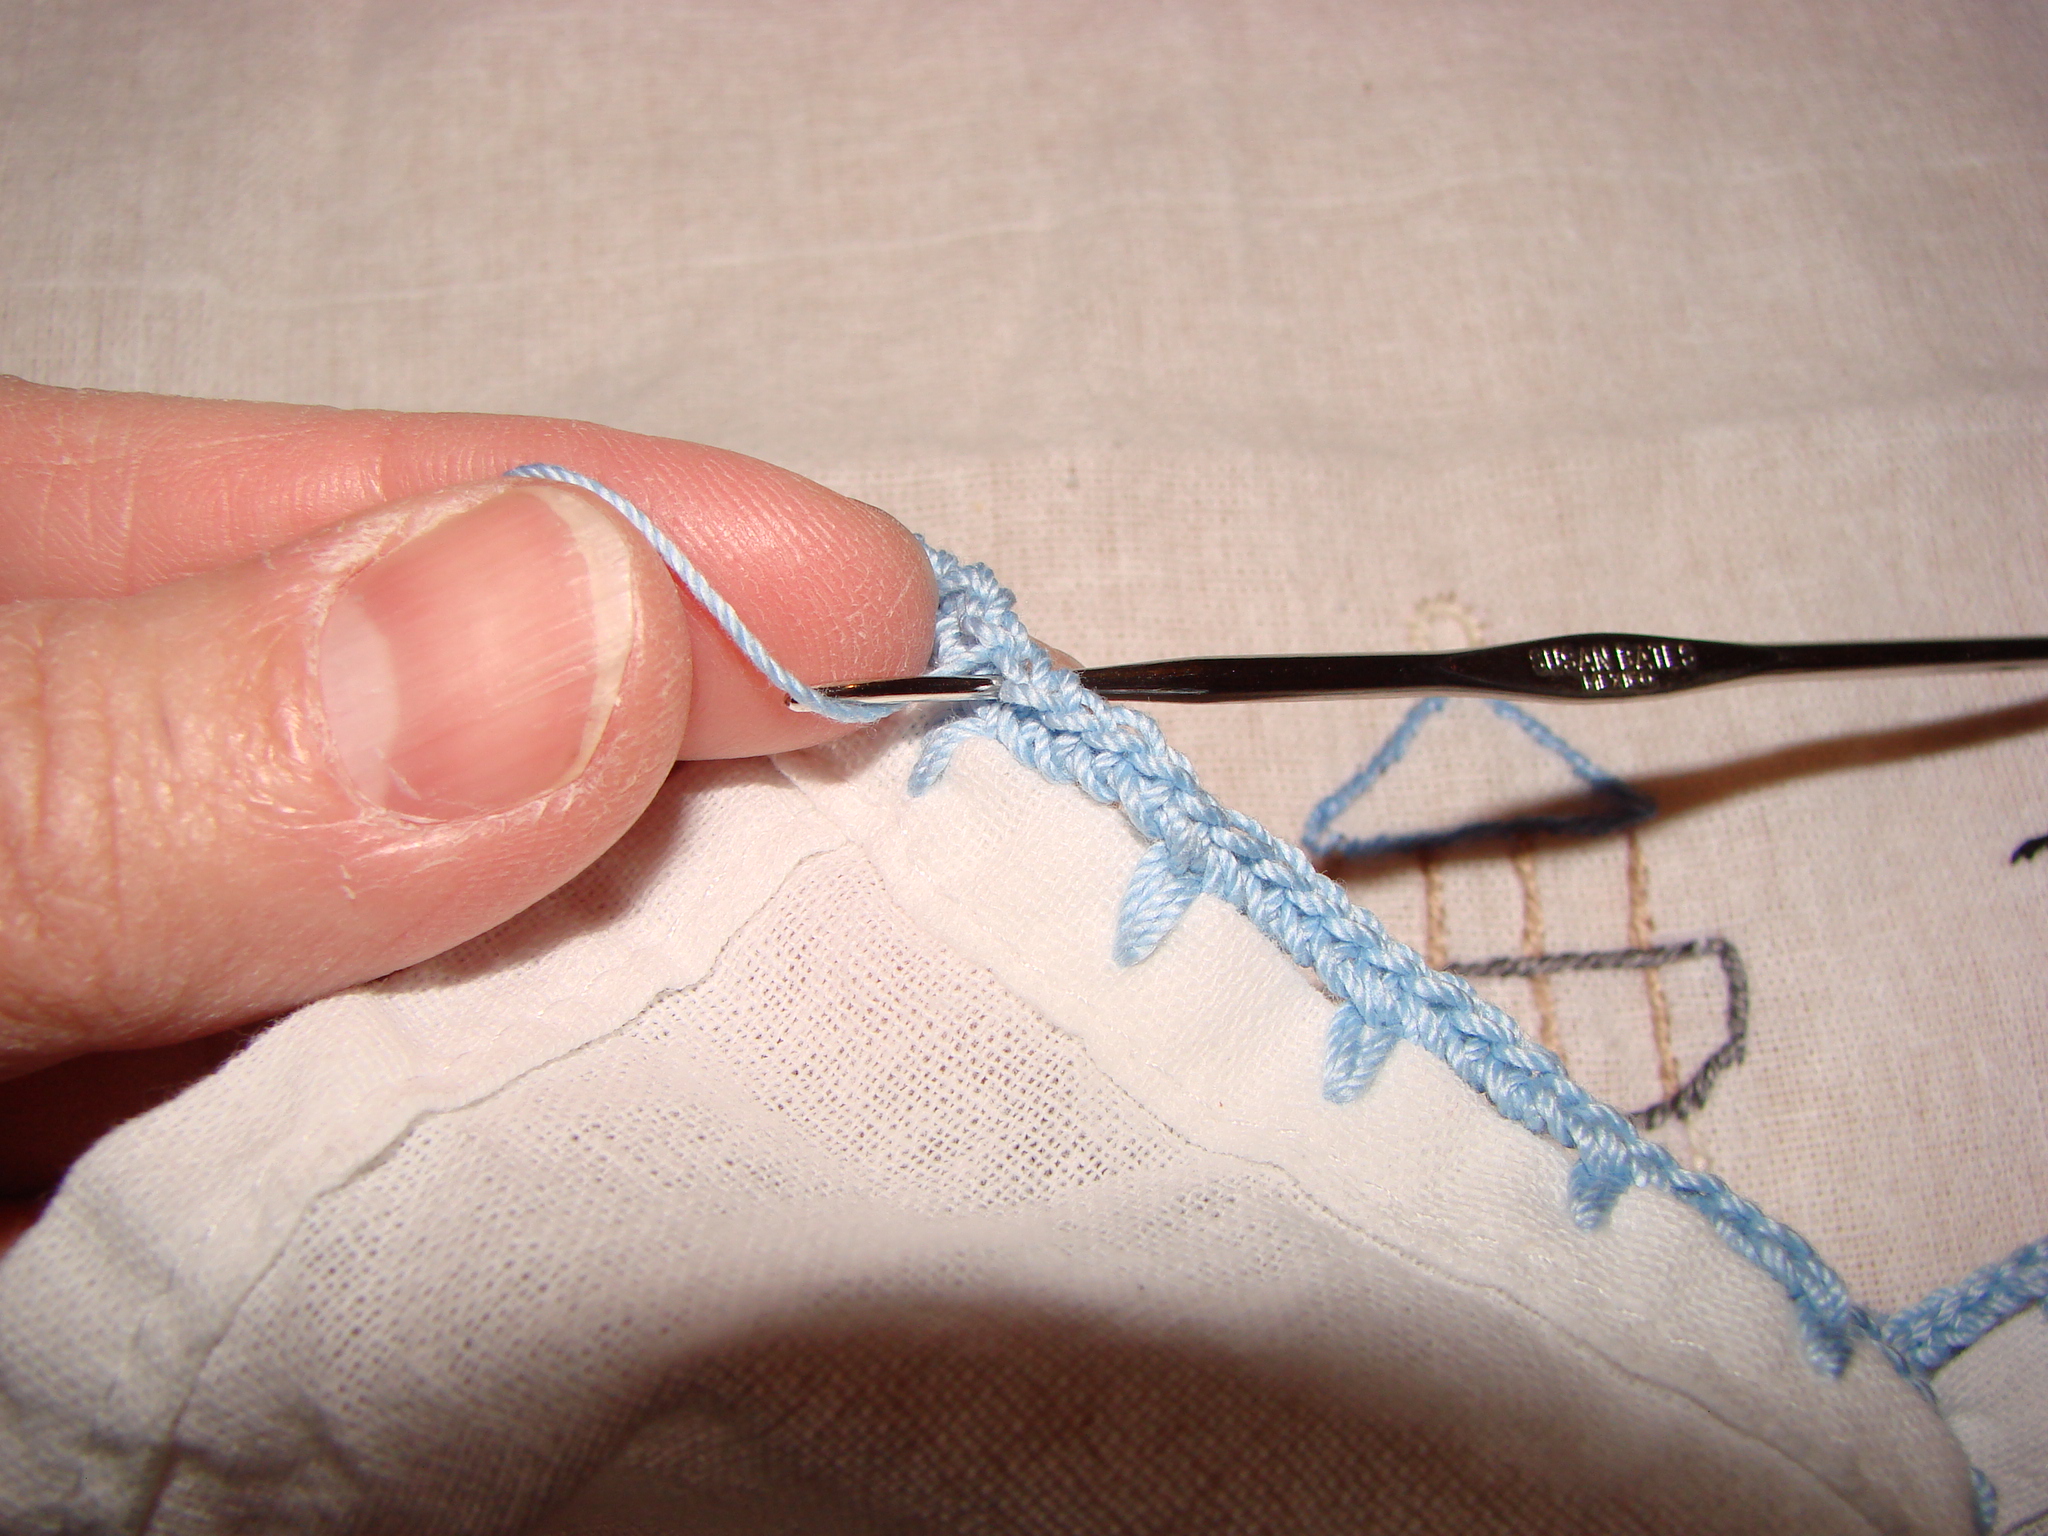
The next step is to crochet a line of stitches onto the needlework you just did. This time, you will work from right to left. I usually work on the back side of the fabric rather than the front because I like the way the edging looks (a little lacier and less chain-like) when I do it that way. It has the added advantage of allowing me to leave the tea towel undisturbed after I finish the first step — face-up, facing me. I just flip up the edge and start to work back the other way.
Start by inserting the crochet hook (I think I used size 7) into the last stitch and catching a loop and pulling it back through that stitch.
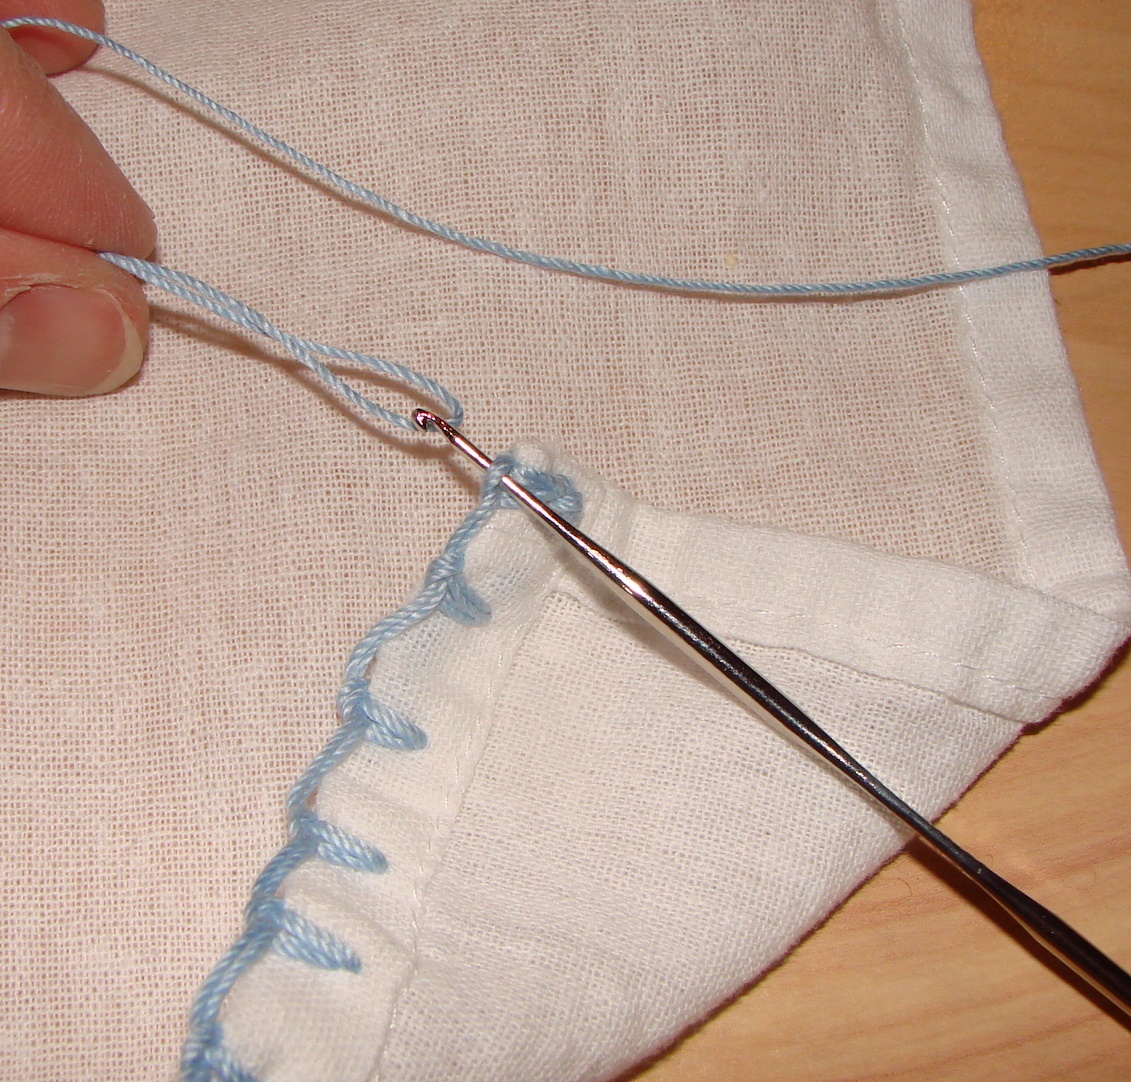
Then stick the hook through the resulting loop, catch the thread and pull it toward you.
Now, start the stitching pattern that will carry all the way across. You’ll do 4 or 5 single crochet on the long loops, and one attached to the bottom of each (doubled) decorative stitch.
To start, do 4 or 5 single crochet on your first loop. Stay consistent — if you do five on the first loop, do five on all of them.
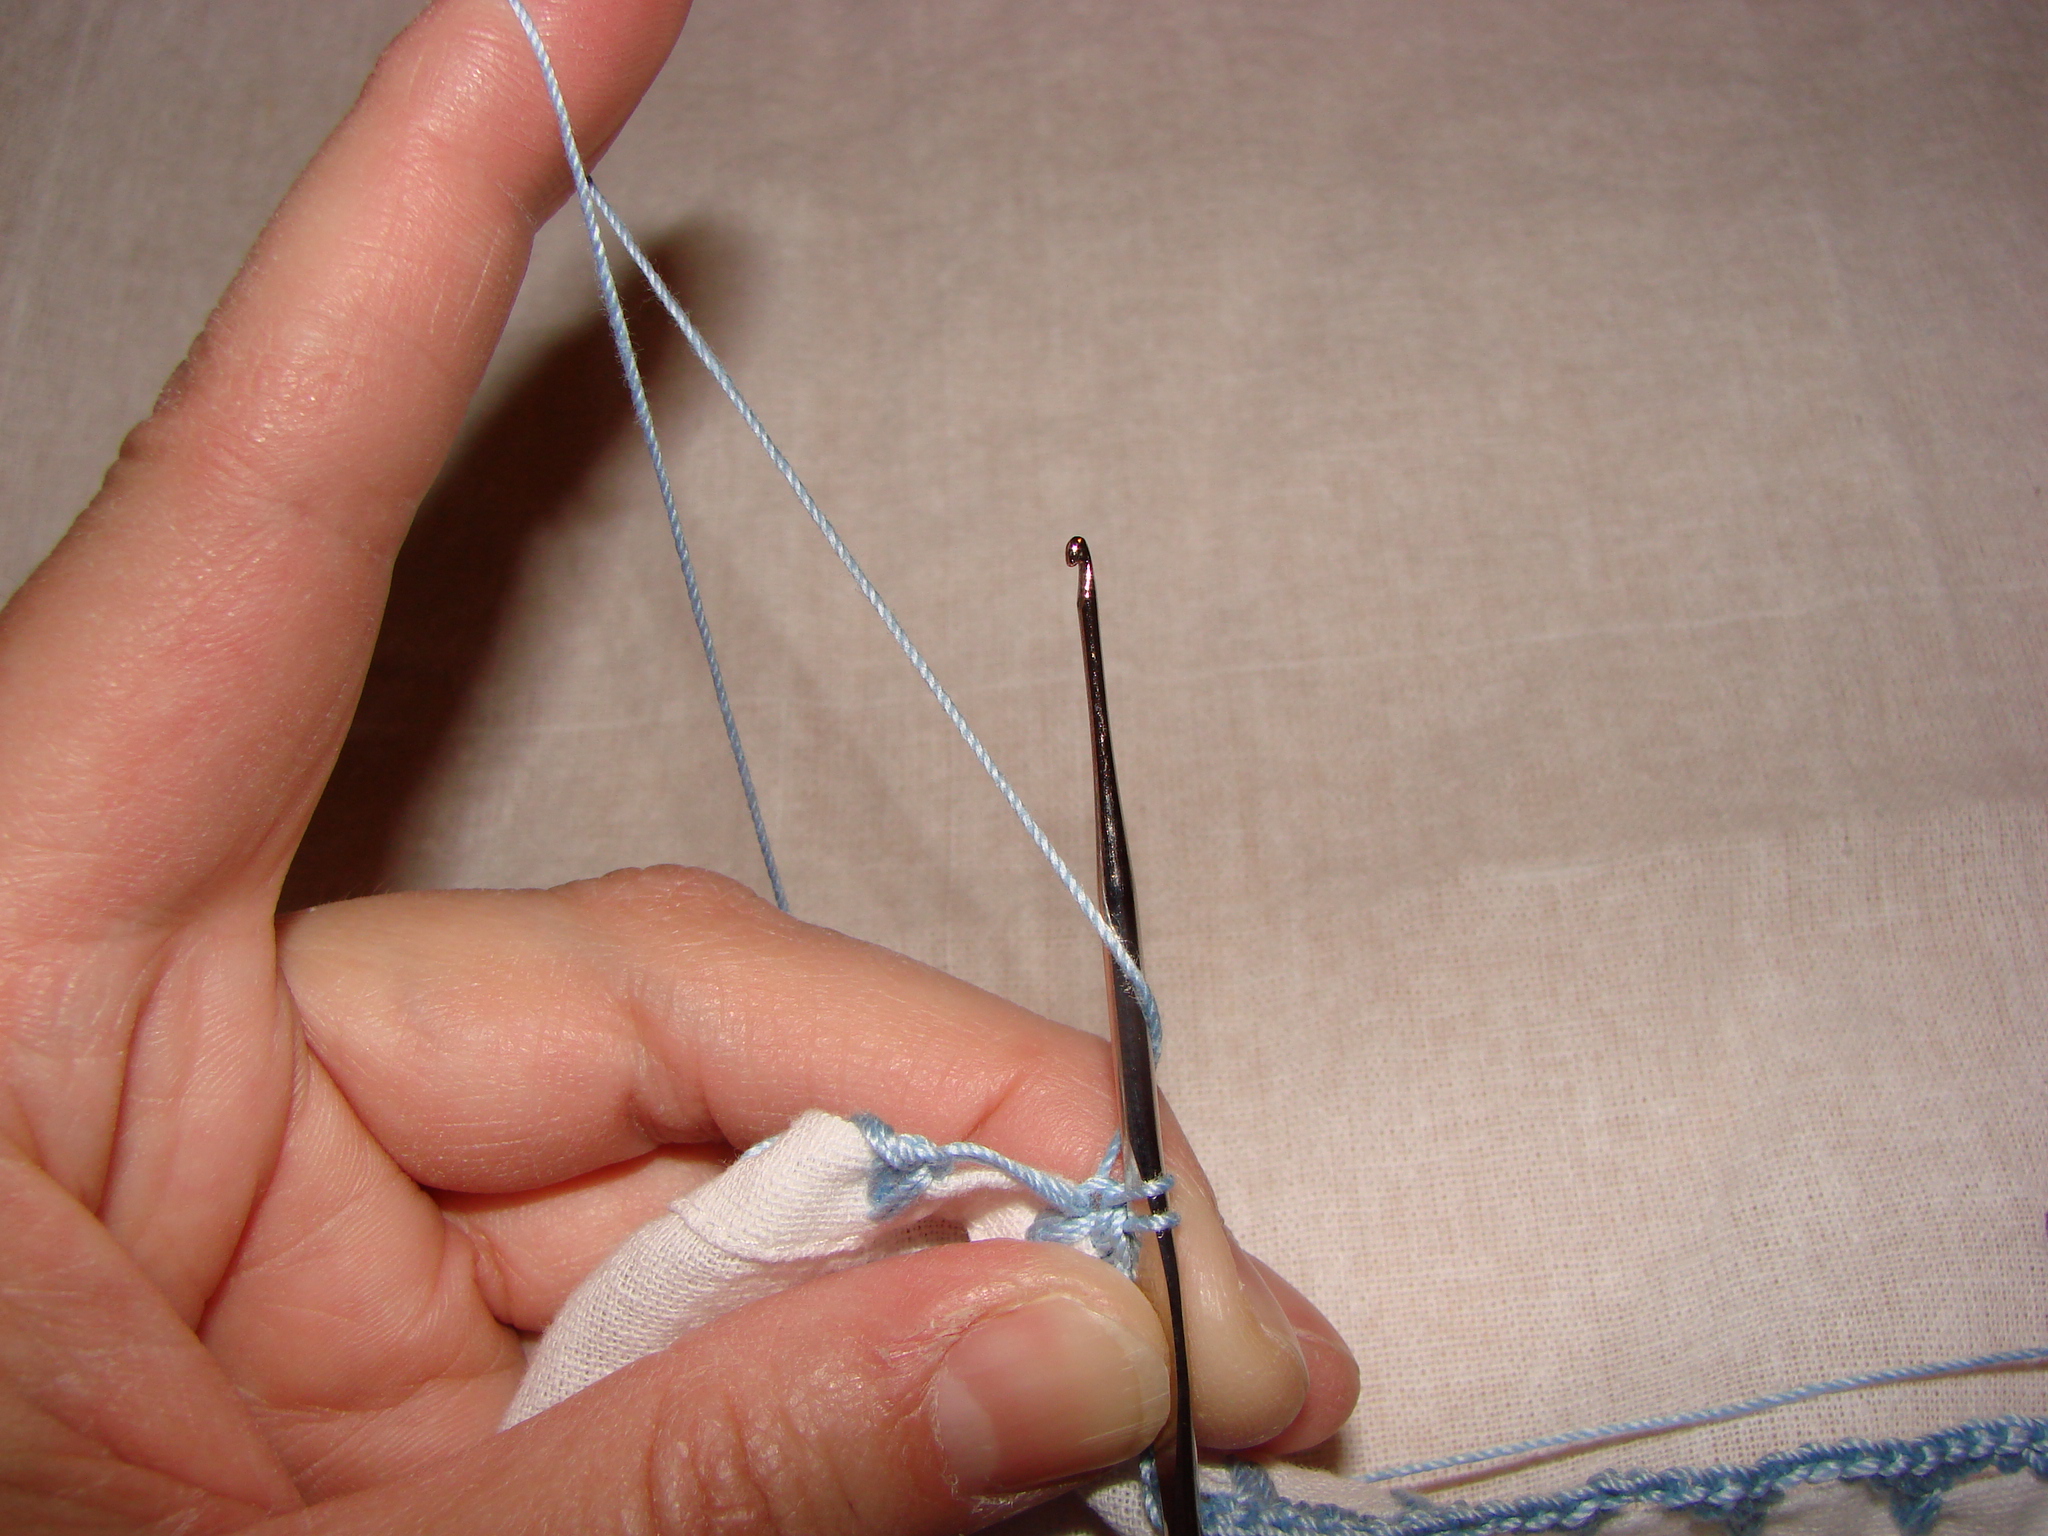
Doing a single crochet is actually a two-step process. First, you push the crochet hook (with the hook part facing down)underneath both threads of the loop…
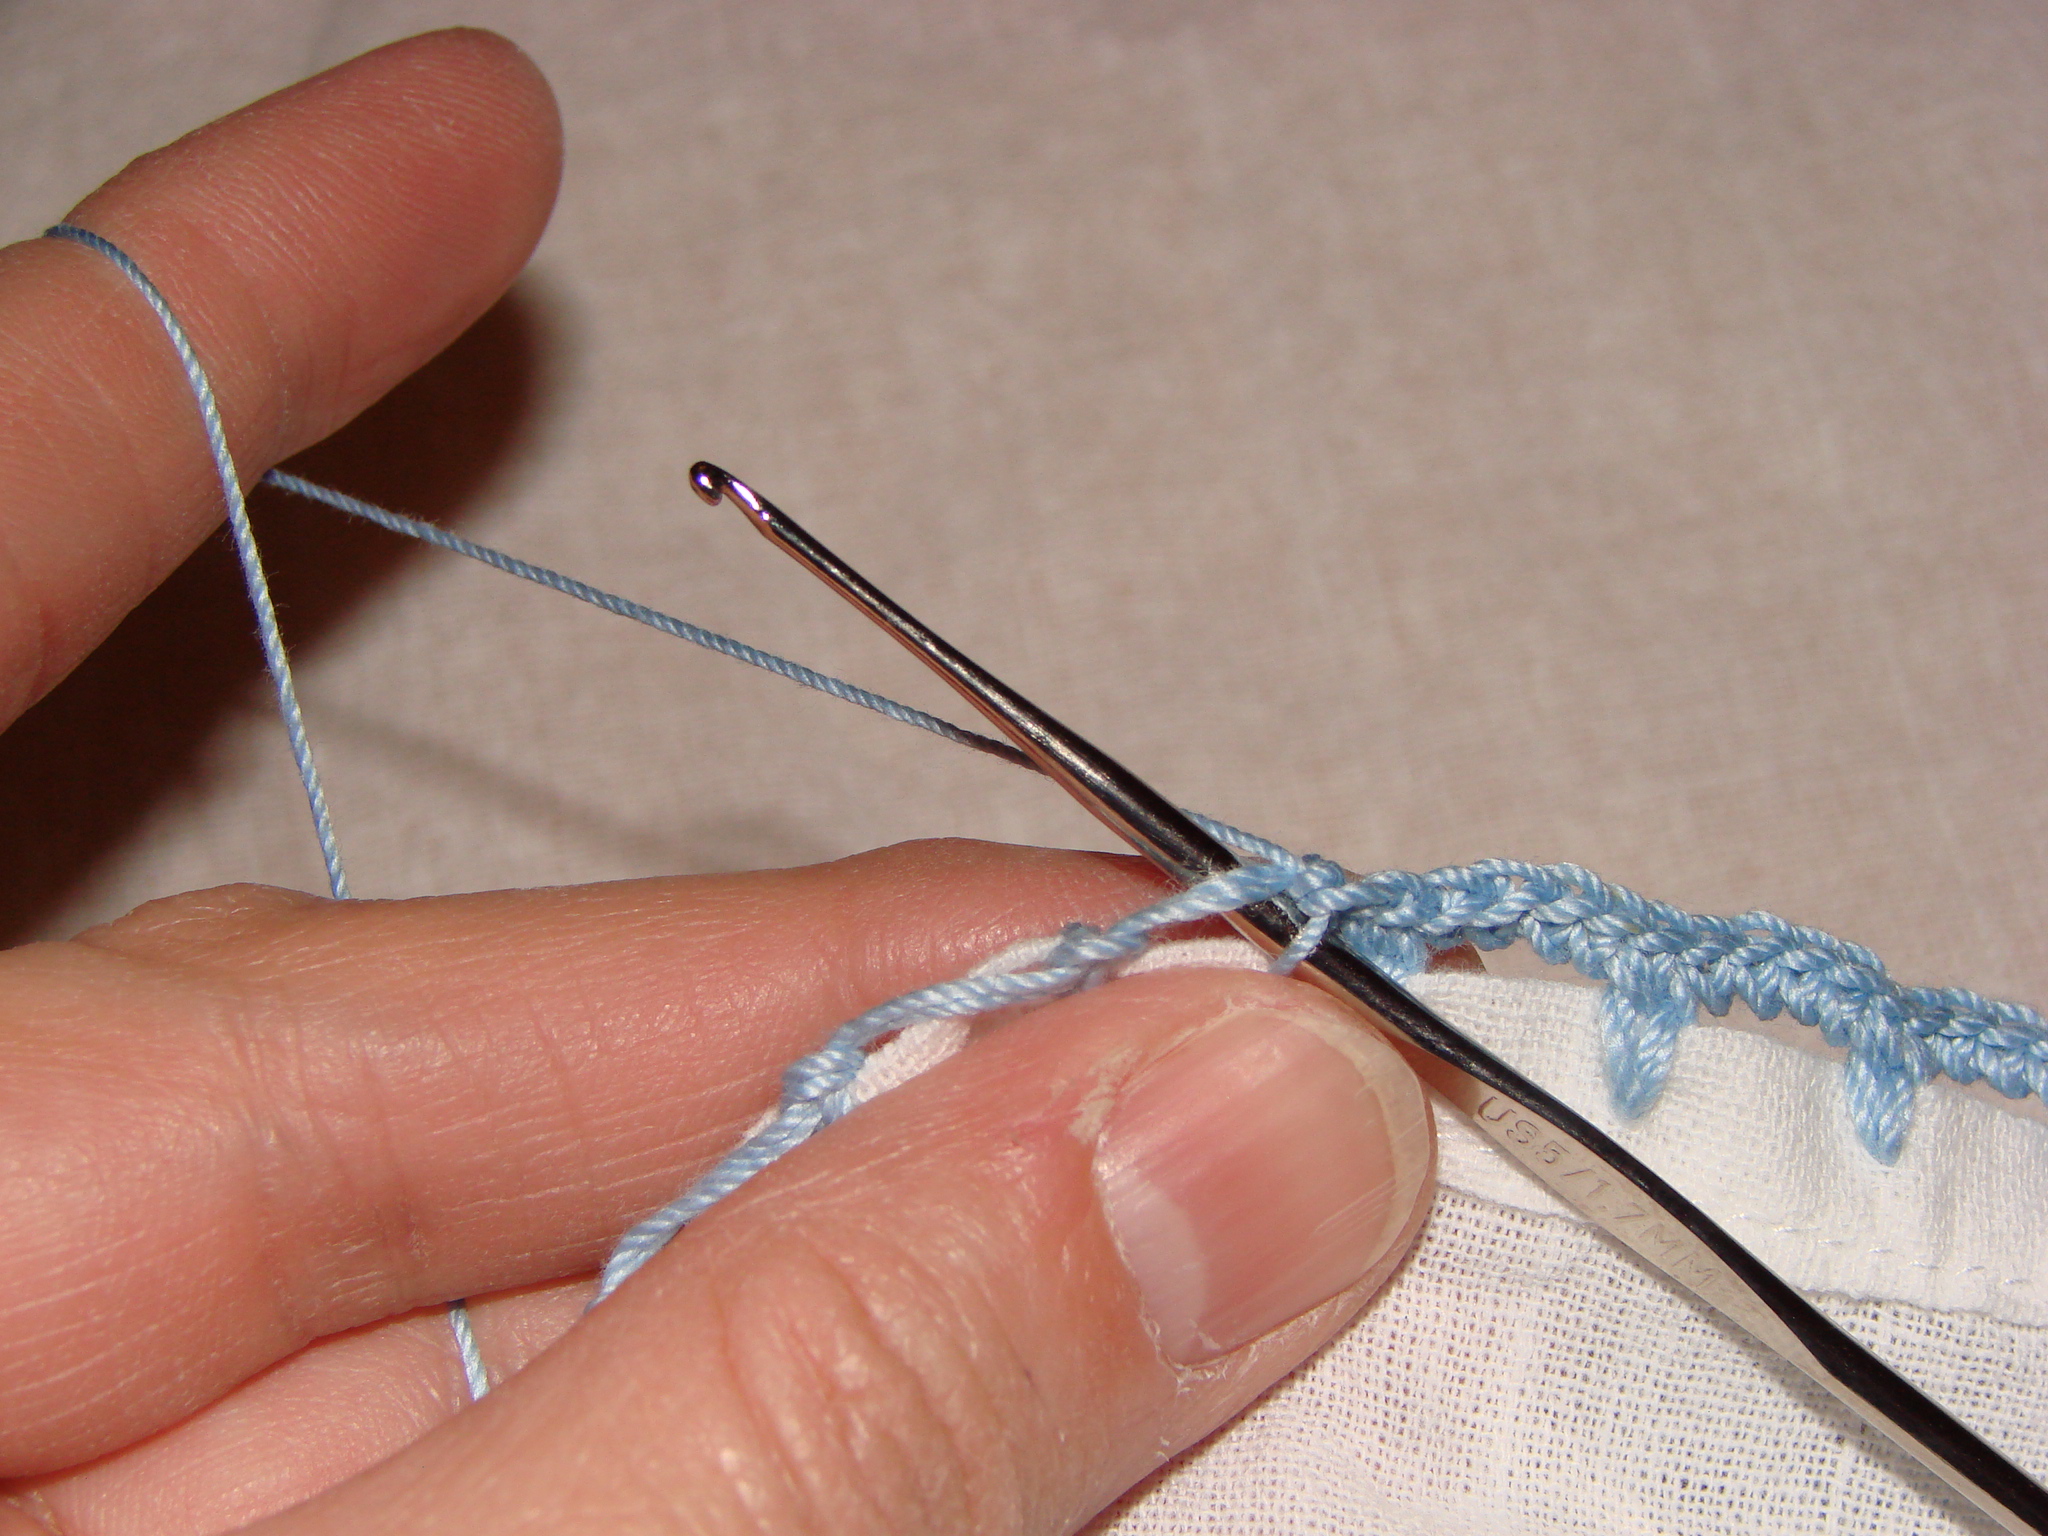
catch the thread, and then pull it through everything EXCEPT the last loop (the one that was already on your hook before you started.) Then catch the thread a second time, and pull it through all the loops on your hook.
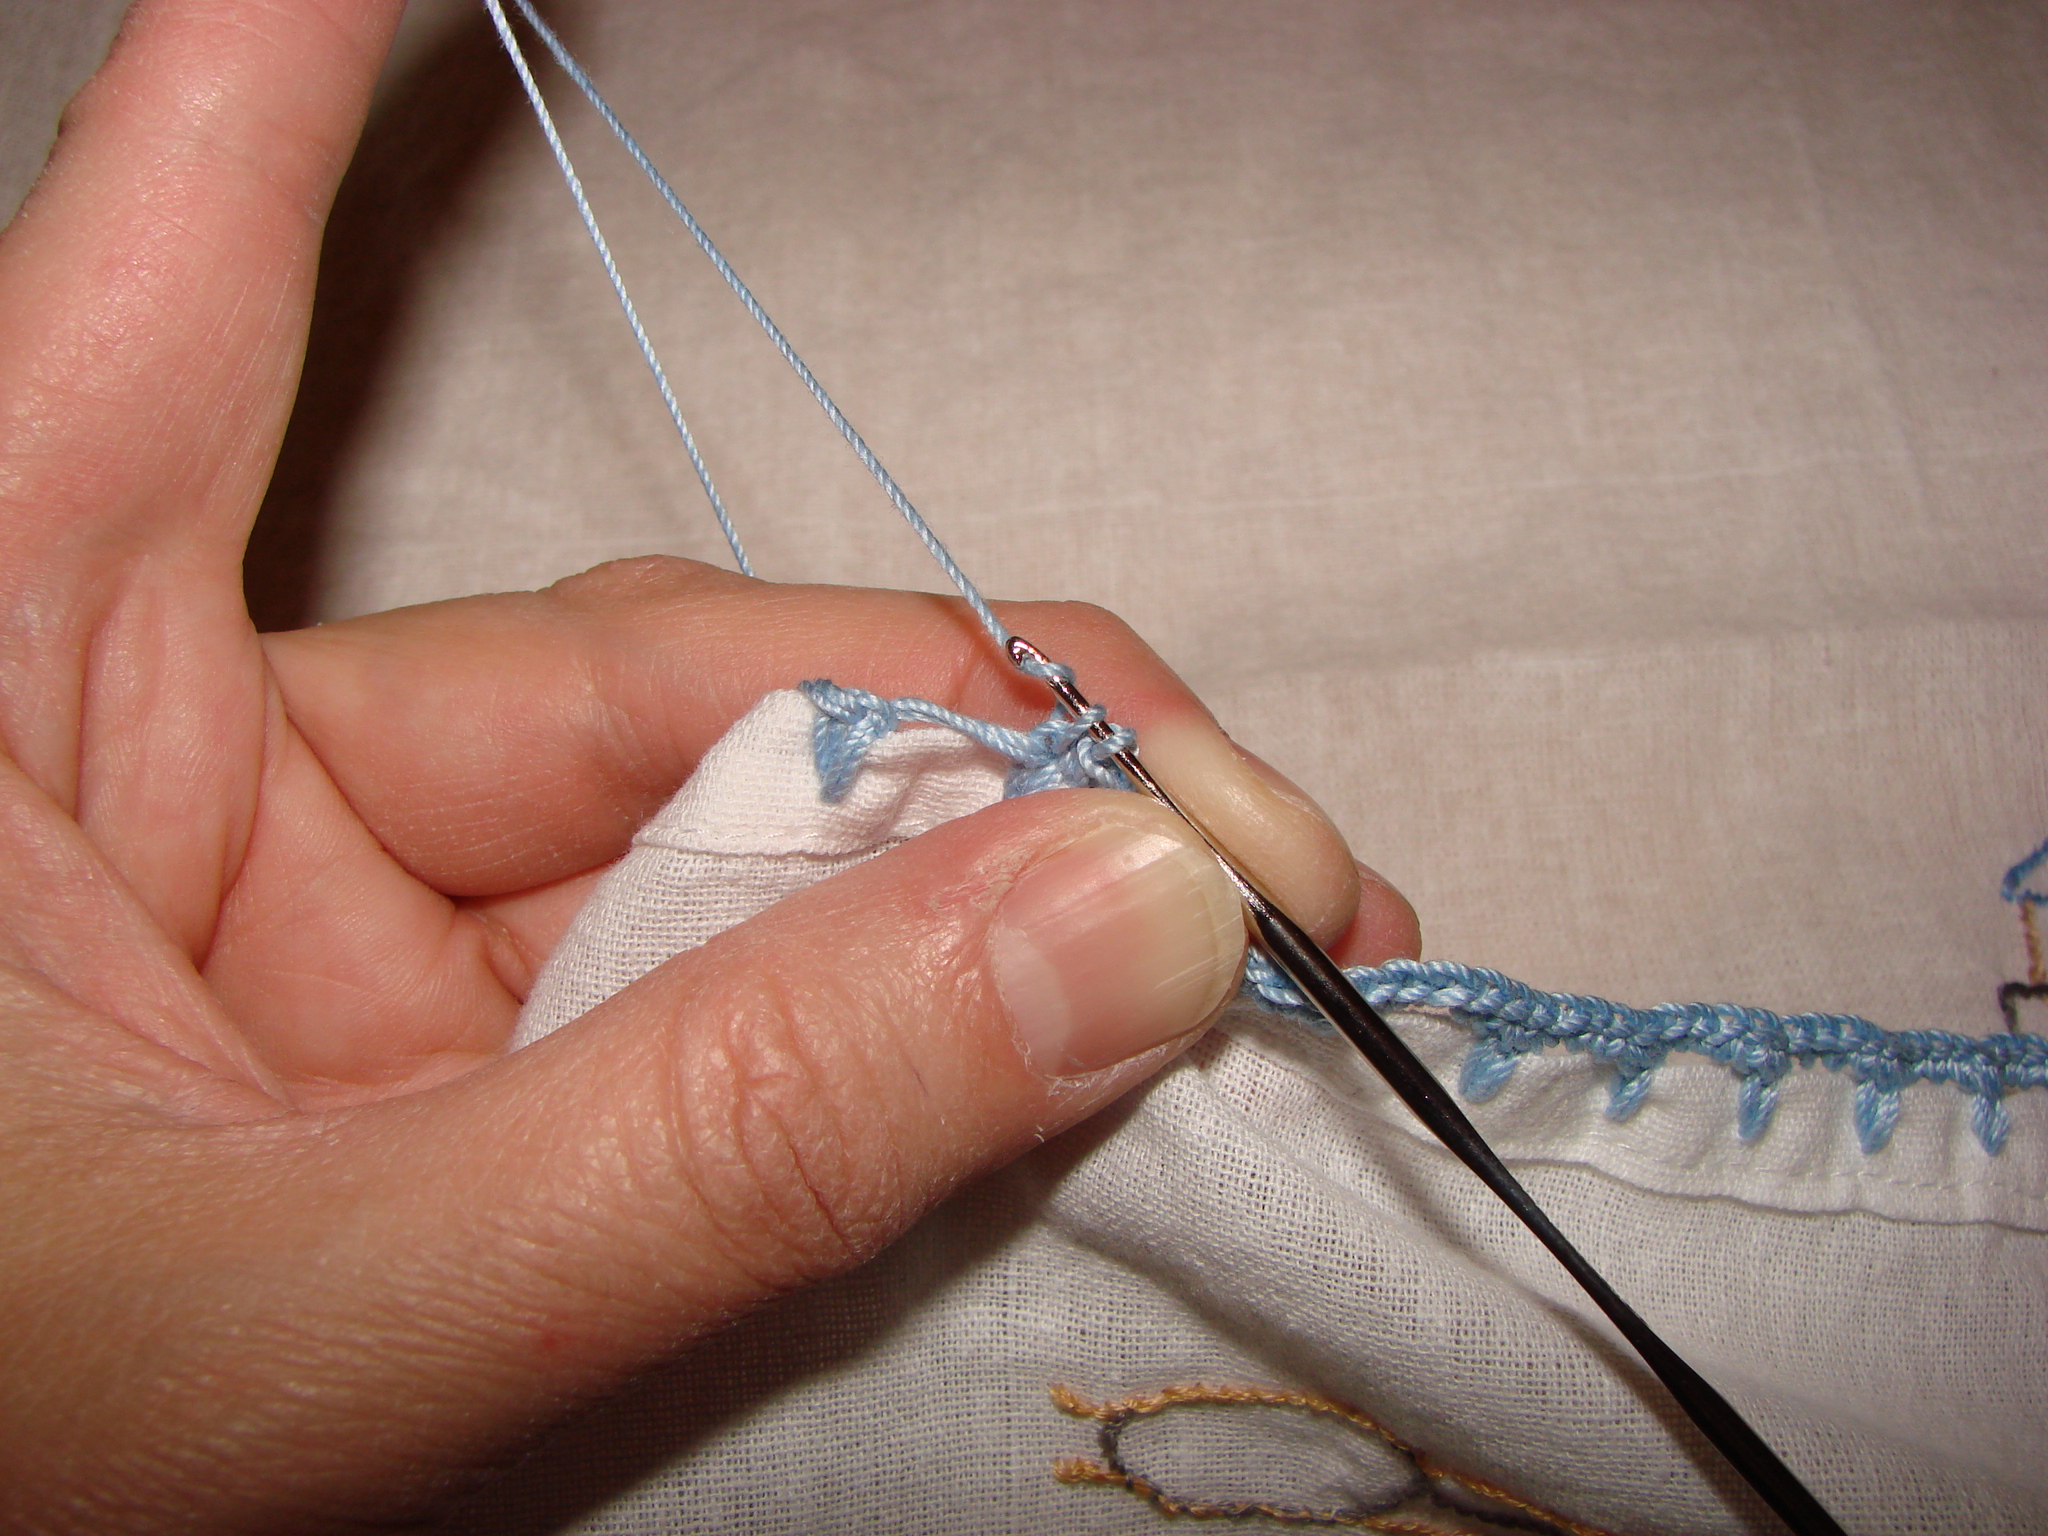
Do this four or five times, and then carefully insert the hook under the bottom of the decorative stitch.
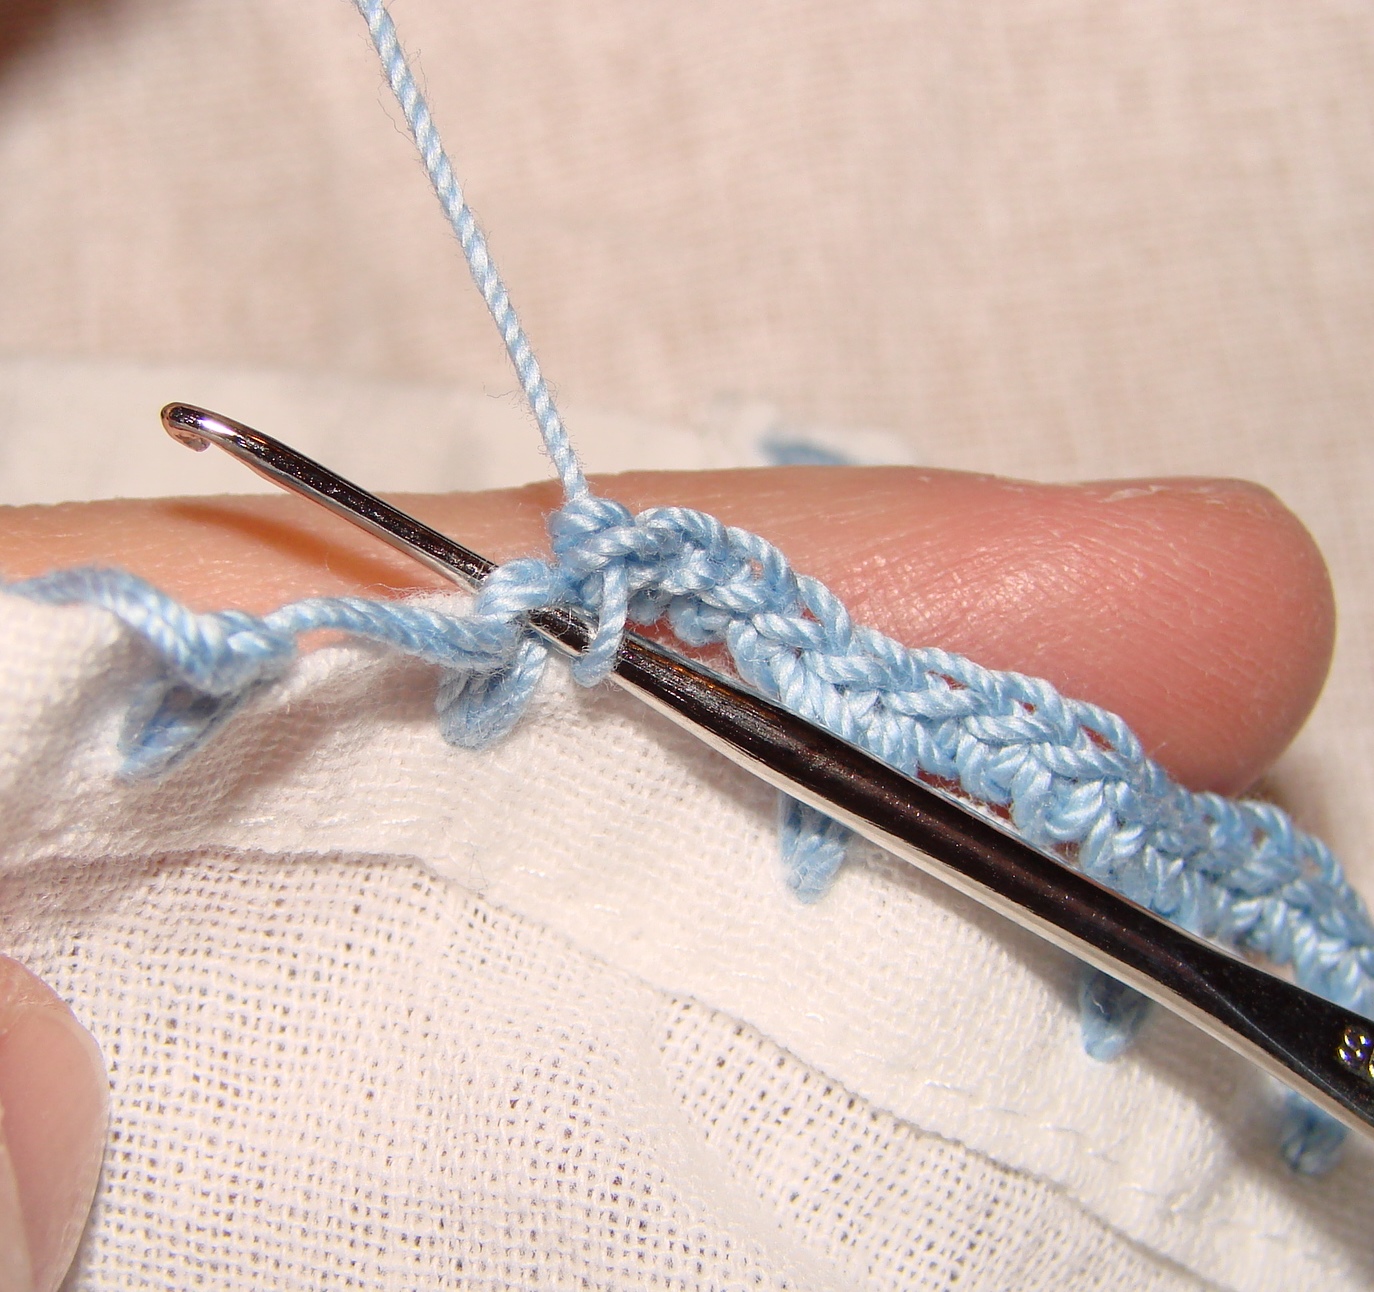
Catch the thread (by pushing the thread to the left) and pull it through the stitch… but not through the one original loop you had on your hook.
This will leave two loops on your hook.
Then catch the thread again, this time from underneath (pushing the thread to the right as you catch it).
And pull it through both of the loops on your hook.
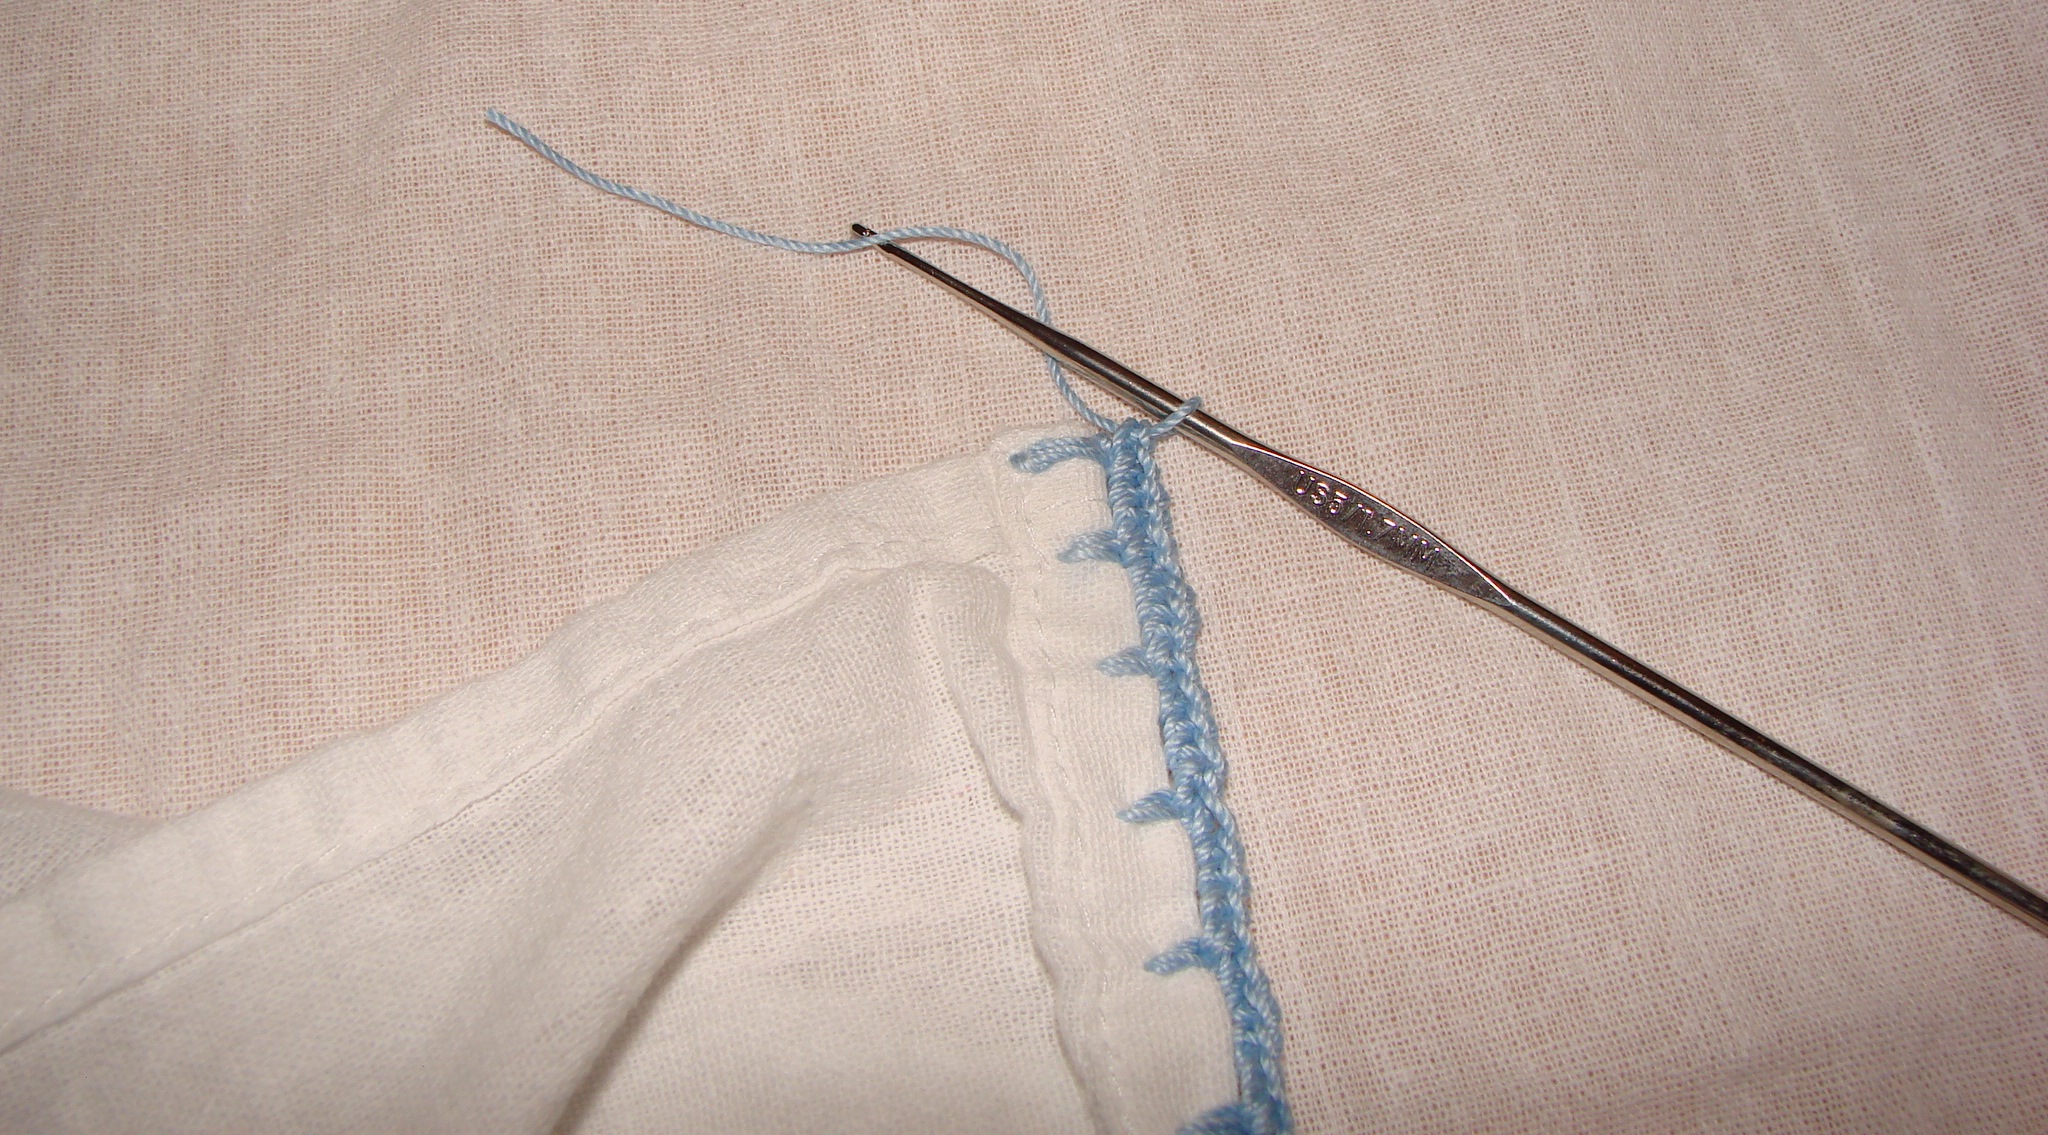
Then you are ready to do 4 or 5 more loop stitches. Keep going in this manner — 4 or 5 stitches through the long loops, followed by single stitches every half inch on the decorative stitches — all the way across the cloth. This will create pretty scallops.
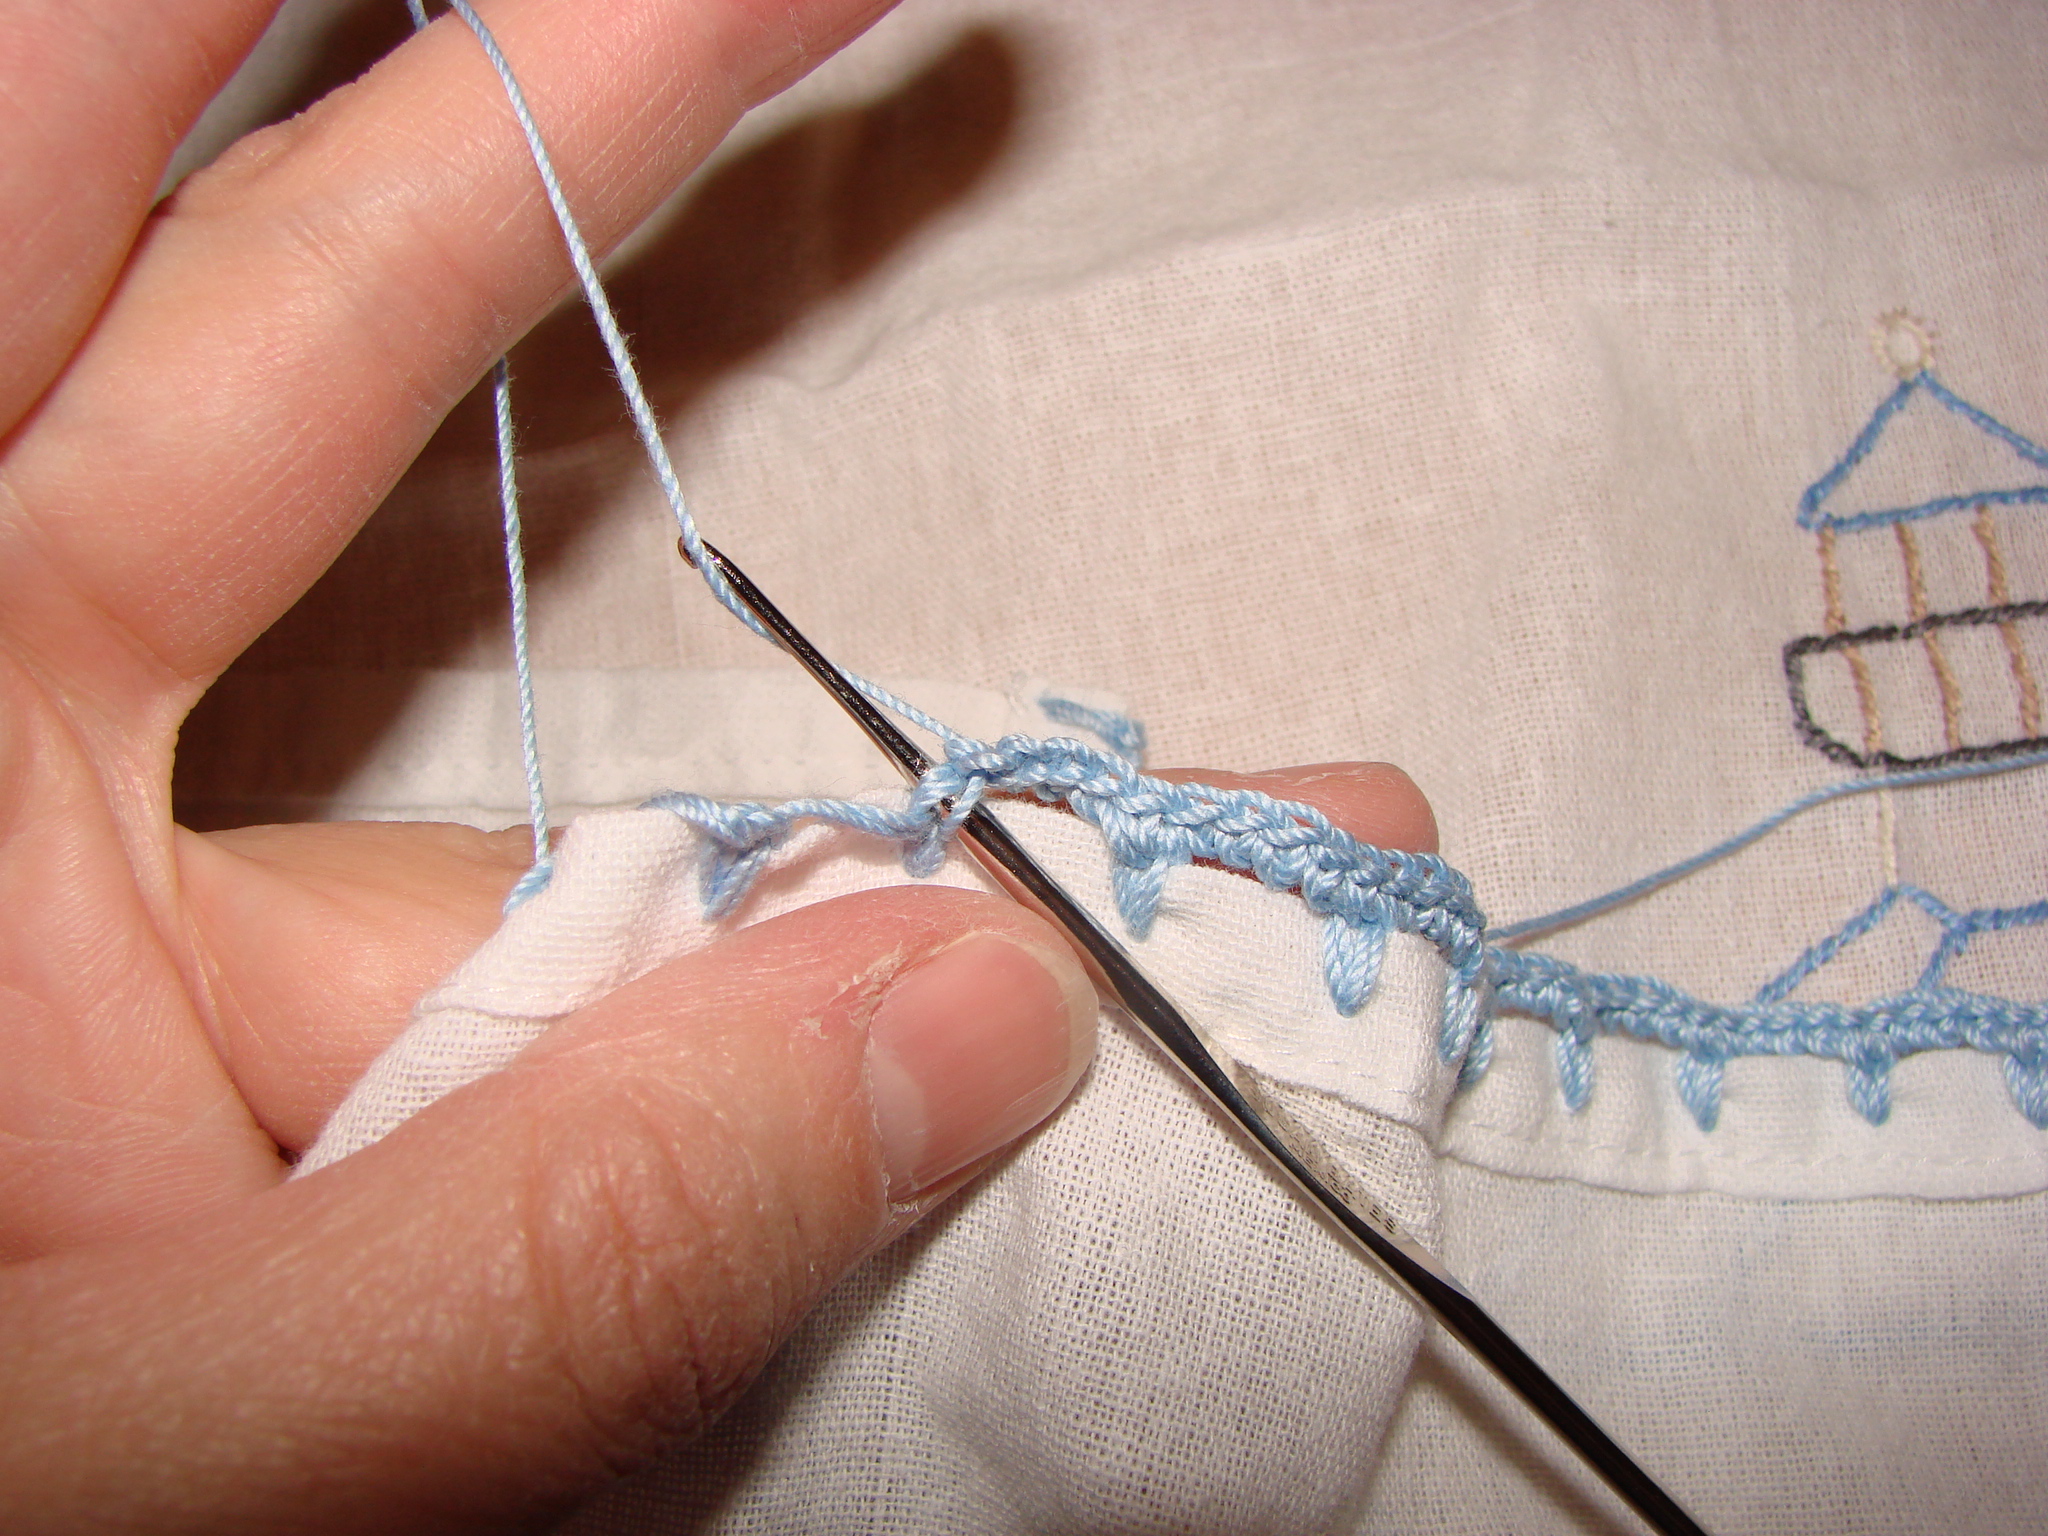
When you get to the end, your last stitch will be in a decorative stitch. Then snip the end of the thread, about 3 inches or so away from your last stitch. Catch the free “tail” and pull it all the way through your last loop, and pull it tight to form a knot.
Then weave the tail in and out of the work you have already done, maybe about five or six times. Then trim it close, being careful not to snip any of your stitches.
Now turn it around and do the same thing on the other (un-embroidered) end of the cloth… You want both edges to look pretty, don’t you?
So, here are a few of the finished lighthouse tea towels so you can see their pretty edges.
Be sure to wash the tea towels and iron them before giving them as a gift!


I don’t have pictures of the others–I’m sorry! But thank you for the kind words.
Those look beautiful. I also have the lighthouse set and love how you did these four towels, so wondering if it’s possible if you have pictures with the other three towels I would love to use colors simular to what you used. You do wonderful work.