Crochet-topped towel to loop over a handle
My grandmother sent me a set of two towels like these many years ago, and they have been used constantly ever since! Because of the button loop at the top, the towels can be attached to an oven handle, a cabinet drawer, a hook, or a towel rack. And the towel air-dries quicker than most towels of its weight. It isn’t doubled over itself, so air circulates freely around it.
One of the great things about this project is that it is quick and easy if you have some crochet knowledge/experience. And it’s suitable as a beginner project also.
Another great thing about the project is that it is inexpensive. All you need to make a set of two of these towels is:
")
- One kitchen towel (terry type)
- Matching embroidery floss
- Coordinating yarn
- Coordinating buttons
- Crochet hook
- Scissors
- Needle
Start by cutting the towel in two.
")
The cut should be across the middle, so that you wind up with two towels that are half the size of the original, with each one having a “pretty edge” from the original towel, and one raw edge.
To hide a raw edge, roll it up a bit. Then use the embroidery floss to anchor the raw edge so it will stay enclosed. I used a whip stitch. If you need instructions on the whipstitch, Alice Merlino’s web site, Future Girl, has better instructions than I could ever possibly provide.)
")
Now take your crochet hook. It is best if it is one that has a bit of a point on the end.
")
Now do a row of single crochet, attaching the row of stitches to the towel as you go. If you need instructions on some of the basic crochet stitches, I found some with good diagrams at Annie’s Attic.
")
")
")
")
")
")
")
")
")
")
")
")
")
")
If you don’t have a crochet hook that will easily go through the towelling, you can punch holes along the edge.
As you go along, be careful not to catch the towelling.
")
When you have finished the first row, make three chain stitches and then use a longer/taller stitch for the second row. For example, a treble crochet or triple crochet.
")
")
")
")
")
")
")
")
You will notice as you go along, that the stitches will naturally draw inward.
")
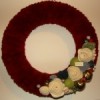
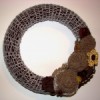
Now… finish it!
Okay, I do this every time. I get so caught up in the last stages of completing my project, that I forget to take pictures. Just continue in this manner, sometimes doing rows where you skip every third stitch or every other stitch so that it continues to get narrower. At the very end, maintain the same number of stitches for the last six to eight rows or so. These last rows should be about three times the width of your button.
The button size should be the right size to slip through the space between two triple crochet stitches. (You may notice that I did not use the buttons I photographed in my “materials” picture; I decided to use a slightly different size button.)
I gave a set of two of these towels along with the Days of the Week Tea Towels I made for a wedding present recently.
If you make some of these, post a comment and let me know!